Hey Finly, here's 2 options from ebay.
http://cgi.ebay.com.au/VDO-GENUINE-T...item53e63643ad
http://cgi.ebay.com.au/Exhaust-pyro-...item3cb5bb31a5
But this guy looks the best
http://cgi.ebay.com.au/EGT-PYRO-GAUG...item1e6200b900
Cheers, Lachie


Hey Finly, here's 2 options from ebay.
http://cgi.ebay.com.au/VDO-GENUINE-T...item53e63643ad
http://cgi.ebay.com.au/Exhaust-pyro-...item3cb5bb31a5
But this guy looks the best
http://cgi.ebay.com.au/EGT-PYRO-GAUG...item1e6200b900
Cheers, Lachie
Last edited by lachiek; 10th March 2011 at 07:20 AM. Reason: Better info
GQ Safari 2.8TD. BFG AT's / Safari Snorkel / Straight thru exhaust / Lots of electrical mods
Finly Owner (15th March 2011)
mate, you can buy do it yourself rebuild kits which include seals and bearings... if you are interested let me know as there is a tech article on a forums I know of with pictures etc. It really is easy and the kit costs about 20-30 bucks
HOW-TO: Rebuild Your T3 Turbo.
--------------------------------------------------------------------------------
First off; credit goes where credit is due, this how-to was taking off the DSM Tuners forums by jusmx141 but I thought i might bring it here for us T3 owners to maybe take a stab at trying.
This guide is for those who have never attempted to rebuild a Garrett T3 / T4 style turbo. Hopefully this step-by-step guide will get you back to boosting for less!
- Lets begin by describing the tools needed for this procedure. You'll need:
- 1/2" box end wrench (for the compressor housing bolts).
- 12mm or 13mm box end wrench (for turbine housing bolts).
- A 3/8" or 7/16" wrench (for the backplate bolts).
- Ratchet with a 12mm socket.
- Ratchet with a 3/8" socket.
- Medium flat screwdriver.
- Tiny flat screwdriver or pick.
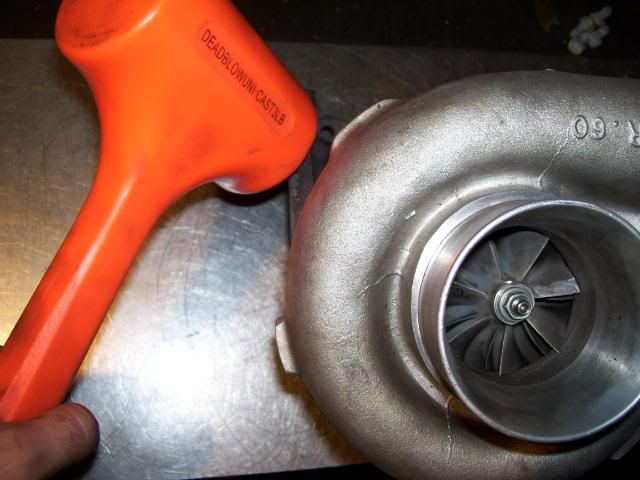
- Dead-blow hammer or regular hammer and a block of wood.
- Here's the candidate for today's lesson- a PTE6031E. These turbos are built around a popular Garrett T3 frame that many popular Hybrid turbos use today. These brands include PTE, Turbonetics, and others.
**Before beginning, it's a good idea to make some type of mark on the compressor cover, backplate, center housing, and turbine housing to ensure proper alignment during assembly. Unlike a Mitsubishi turbo, the Garrett-style turbo's housings can rotate 360* making reassembly a challenge.
- Begin by removing the wastegate actuator using the 1/2" wrench. Most of the time these bolts are 1/2" because the compressor housing is made by Garrett, an American company. Occasionally they're metric.

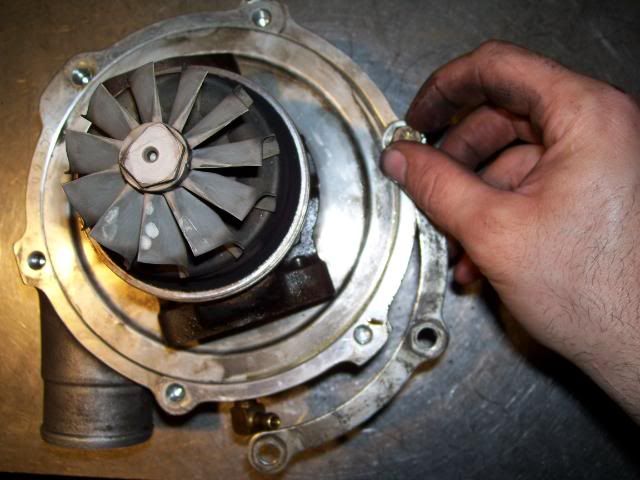
- Once the actuator is removed, use the 12mm or 13mm wrench to remove the bolts holding the center housing to the turbine housing. Some of these will be difficult to reach due to the position of the center housing....you may need to rotate the turbine housing to reach two of the bolts.
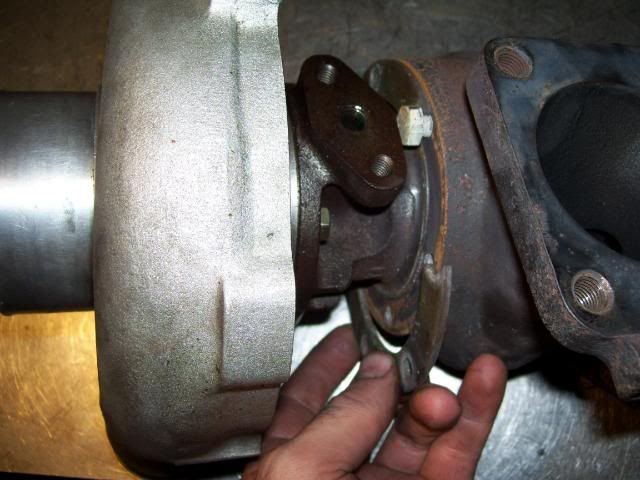
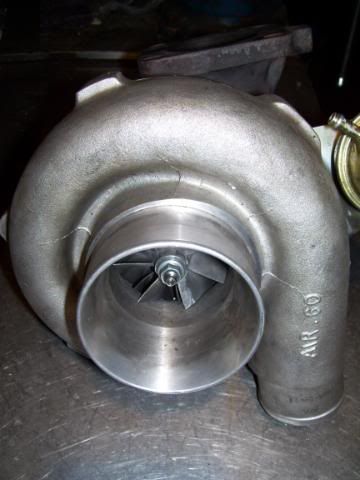
- The exhaust housing will almost NEVER come apart on it's own! You'll need to strike the housing using a dead-blow hammer or a regular hammer and a block of wood.
- This photo illustrates the housing once it's removed.
- Now you may remove the remaining compressor bolts.
- Take note of whether the locknut on the compressor wheel is left-hand or right-hand threaded! Most Garrett turbines are left-hand threaded to prevent the nut from loosening during operation. If you look closely at the threads in this photo, you'll see the turbo I'm working on is left-hand threaded.
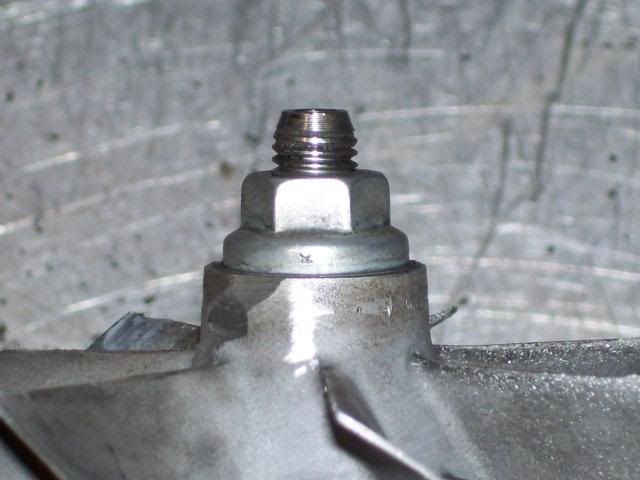
- Using the 3/8" socket, remove the compressor locknut while holding the hex portion of the turbine wheel with a 17mm wrench. The locknut can be 10mm, 11mm, 10mm 12-point, or 3/8" 6-point. The compressor wheel should slide off the shaft easily.
***There is a controversy regarding whether or not to scribe the shaft and compressor wheel to mark alignment. Most of the time these turbos are component-balanced so their orientation during assembly isn't crucial. If the shaft and wheel are already scribed, you'll know the turbine shaft and wheel have been balanced as an assembly. If it makes you feel better to scribe your shaft and wheel, by all means do so.***
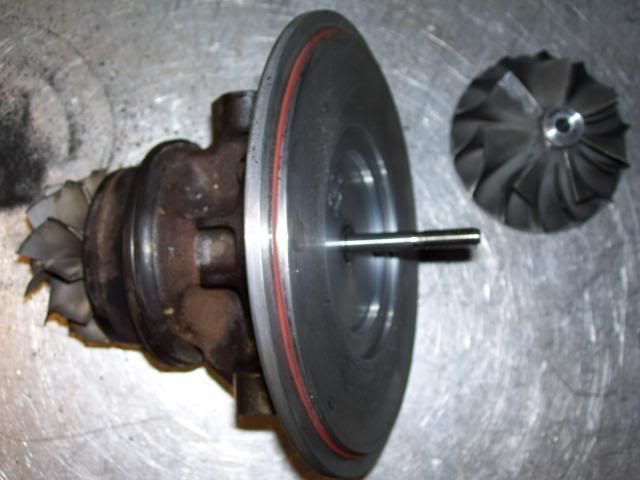
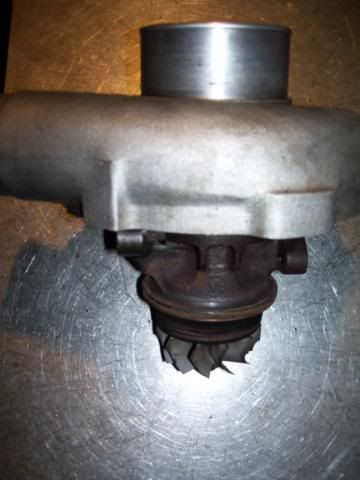
- Once the compressor wheel is removed, the turbine shaft can easily push out the opposite direction
- Remove the backplate bolts from the center housing using a 7/16" or 3/8" box end wrench.

- Separate the compressor backplate from the center housing....be aware of any loose parts that may fall out during this step.

- This particular turbo uses a bolt-down thrust plate that is held in place by three 2.5mm allen bolts. There can also be a spring retainer holding the thrust plate down, or torx bolts as well.
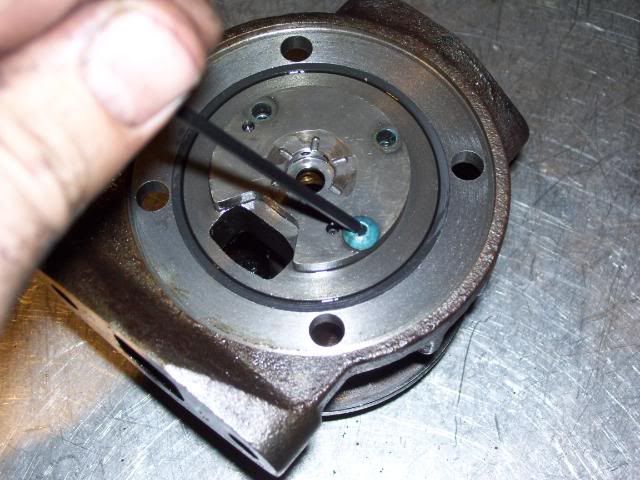
- Using a small screwdriver, walk the journal bearing snap ring out of it's groove.

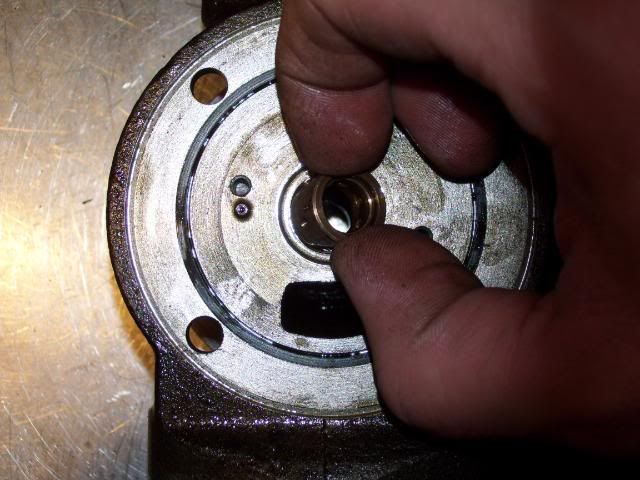
- Remove the compressor journal bearing from the housing. Repeat removal procedure for the hotside journal bearing.
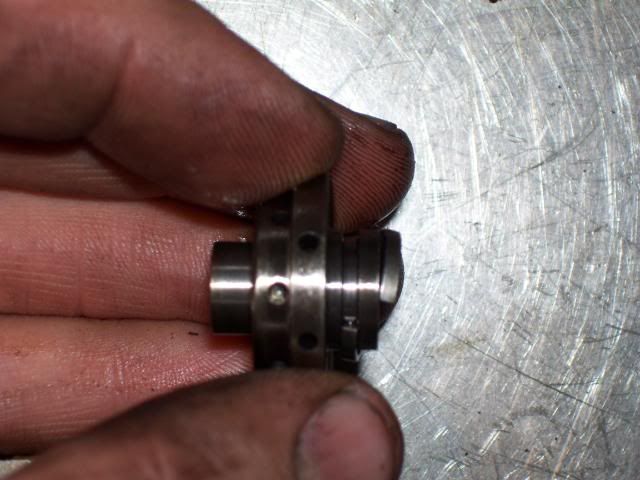
- Remove the worn compressor seal from the collar by "walking" it out of the groove with your fingers. Be careful, the worn seal is often very sharp! Use a tiny flat screwdriver if you cannot get your fingernail underneath the seal to initially lift it out of the groove.
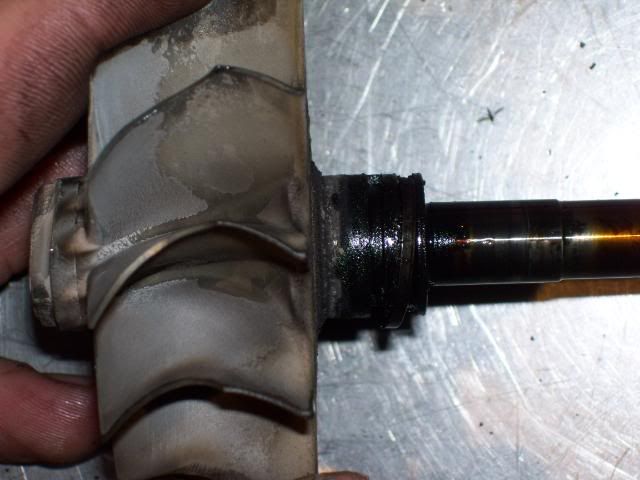
- Use the same "walking" method to remove the turbine seal from the turbine shaft.
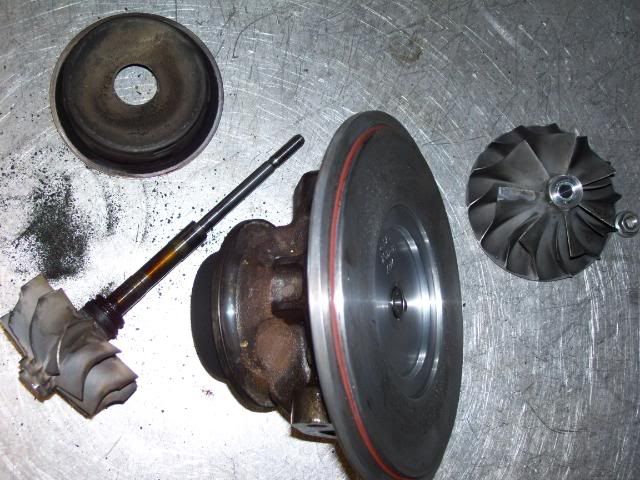
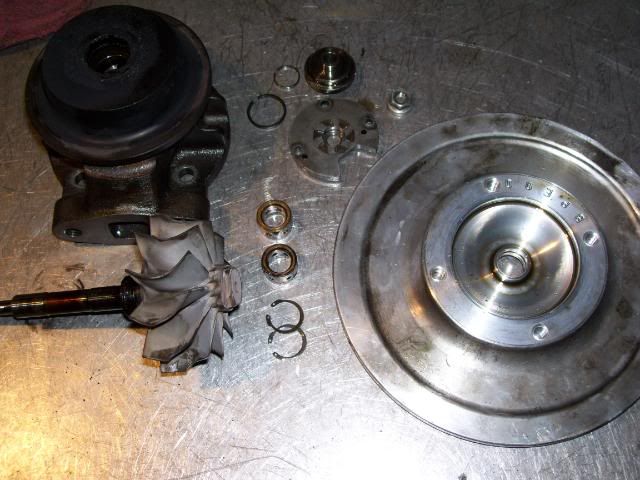
- Here is the turbo completely disassembled.
Cheers Justin
AB (15th March 2011), brynk (15th August 2011), Finly Owner (15th March 2011), rkinsey (17th March 2011), thin on top (15th March 2011)
great info I have a 97 gq patrol and have simliar issues with the turbo. Around the turbo i get alot of oil and I blow white smoke and alot at start up and when i give it to it.

Just added the pictures mate, thanks for the detailed post and pics.
Thinking of buying a new turbo when I have the cash... Also was wondering does anyone have a 97 patrol gq 2.8 turbo deisel where they have put an after market intercooler on it. Because I only ever see the 4.2 patrols with after market turbos and intercoolers

Great stuff Justin. Dont think I need it at the moment, but Im sure one day I will be reding this again.
cheers
Phil
newbe with a 98 GU 2.8Ti
hey I will put pictures up in the post in the next couple of days.. im on my work pc and they dont let me do it!!!
lachiek (17th March 2011)
Mate you're a legend for posting this. I've done some hunting around and have heard pretty mixed reviews of how easy it is to do the rebuild yourself. Those pictures really clear up the process but the other half is getting a good kit. Have you got a kit that you've used or heard good things about? Not sure if I want to trust fleabay on this one.
Cheers, Lachie
GQ Safari 2.8TD. BFG AT's / Safari Snorkel / Straight thru exhaust / Lots of electrical mods
 Posting Permissions

 Reply With Quote