


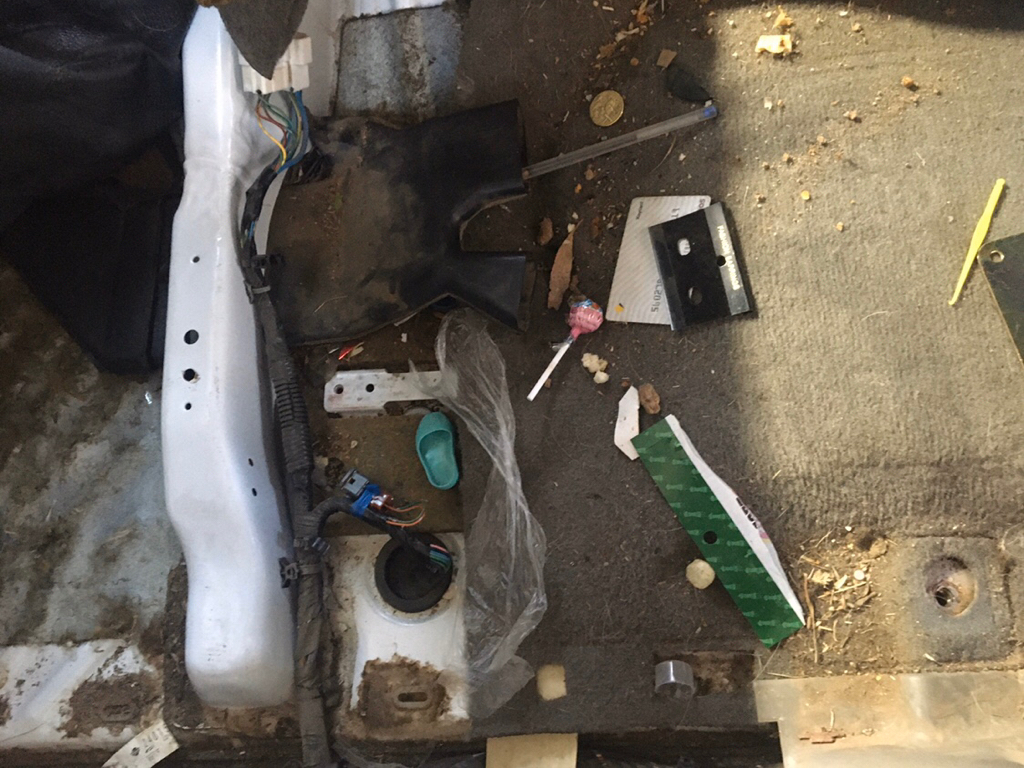
Finished earlier installing an ARB single compressor on Mrs MB’s 2001 GU TD42T wagon inside under her front passenger seat.
(no passenger side airbag as I believe our old family 2002 ZD30 ‘safety pack dual airbags’ may have had some electrical goodies in this location below.....unsure?)
Pretty happy as not one single Tex-Screw was needed throughout the making of this post....all OEM holes utilised :-)
#1 Removed her front passenger seat and commenced dry retching upon discovering what little animals have left under there!
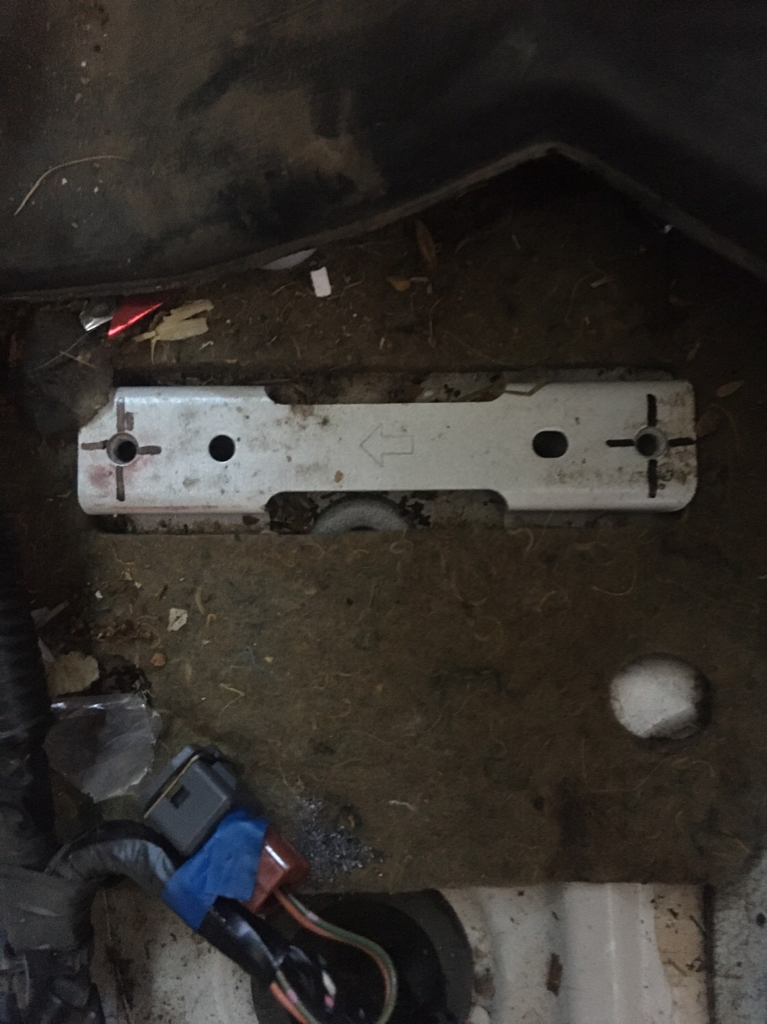
#2 Found that two out of the four holes on here pictured below (I’ve marked with a + ) were threaded to M6mm and assuming this may have been airbag models ready?
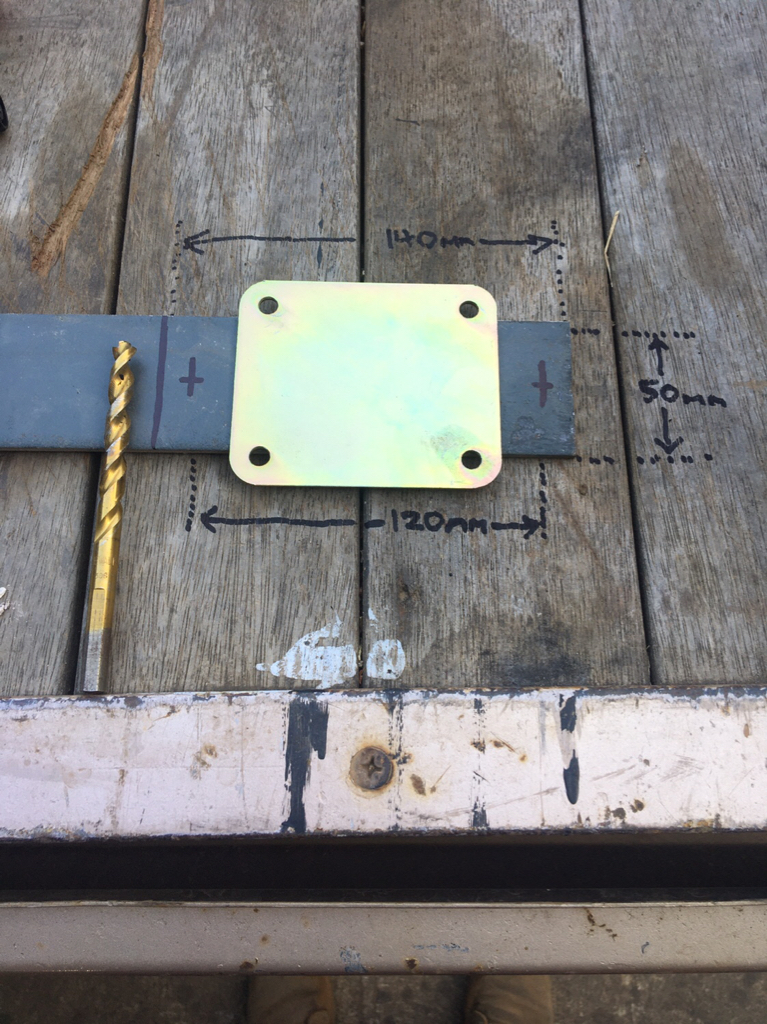
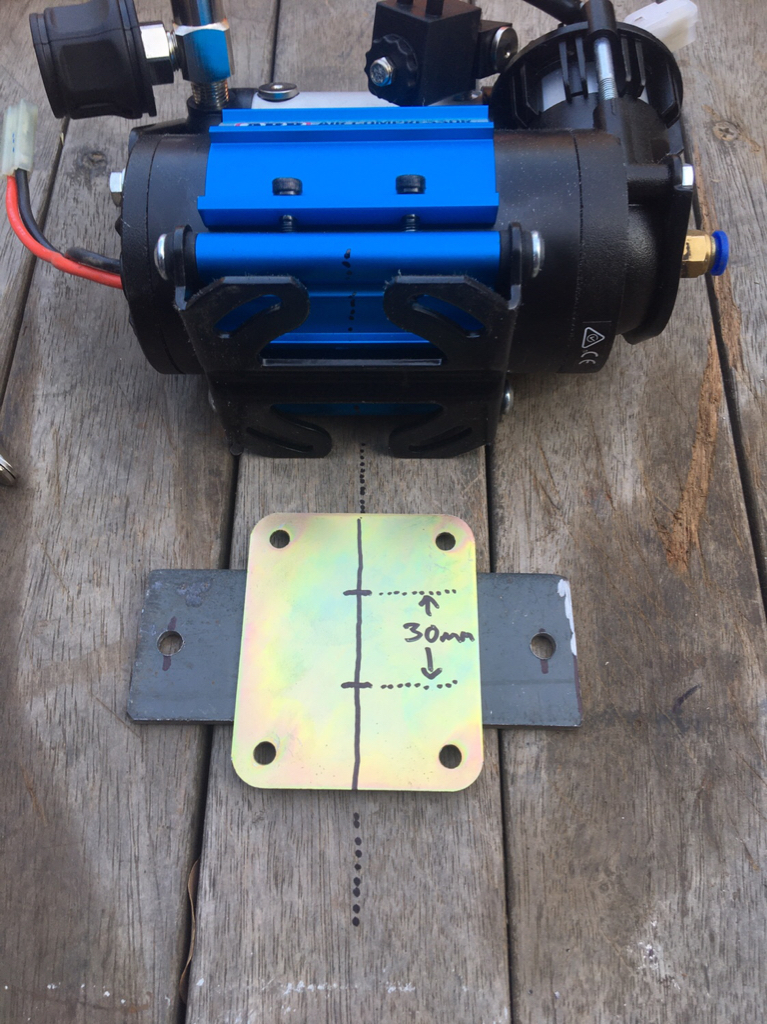
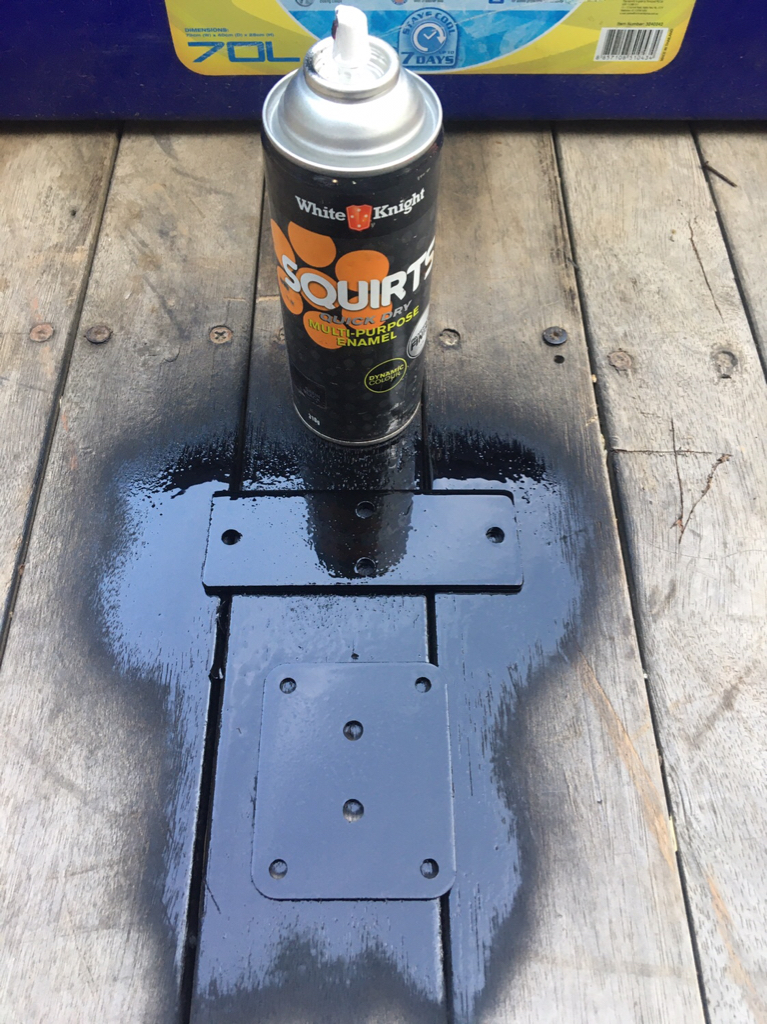
#3 Used the ARB supplied backing mount plate and some 5mm flat bar I had leftover to start work on the back of the old GQ tray :-)
#4 Caught my rushed self just in time to realise the ARB backing plate needs to be 90degrees/perpendicular to my first nuffy thoughts!
#5 Drilled 8mm holes in locations pictured to allow for dodgey 6mm bolt hole measurements and gave both plates a good fast drying squirt :-)
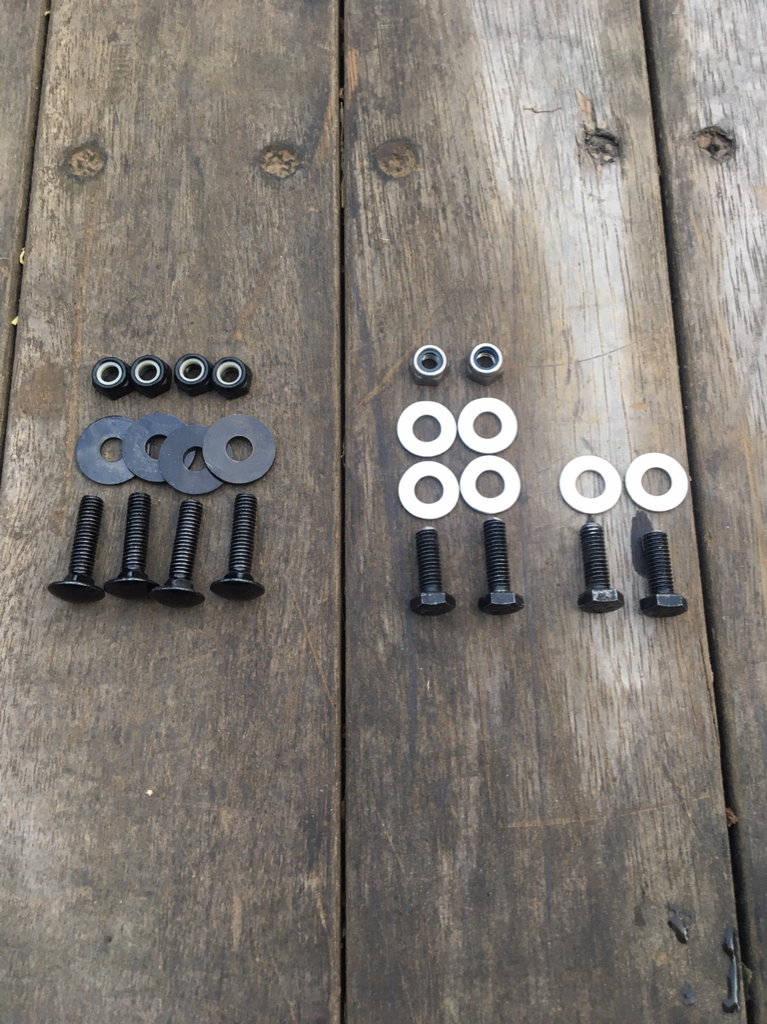
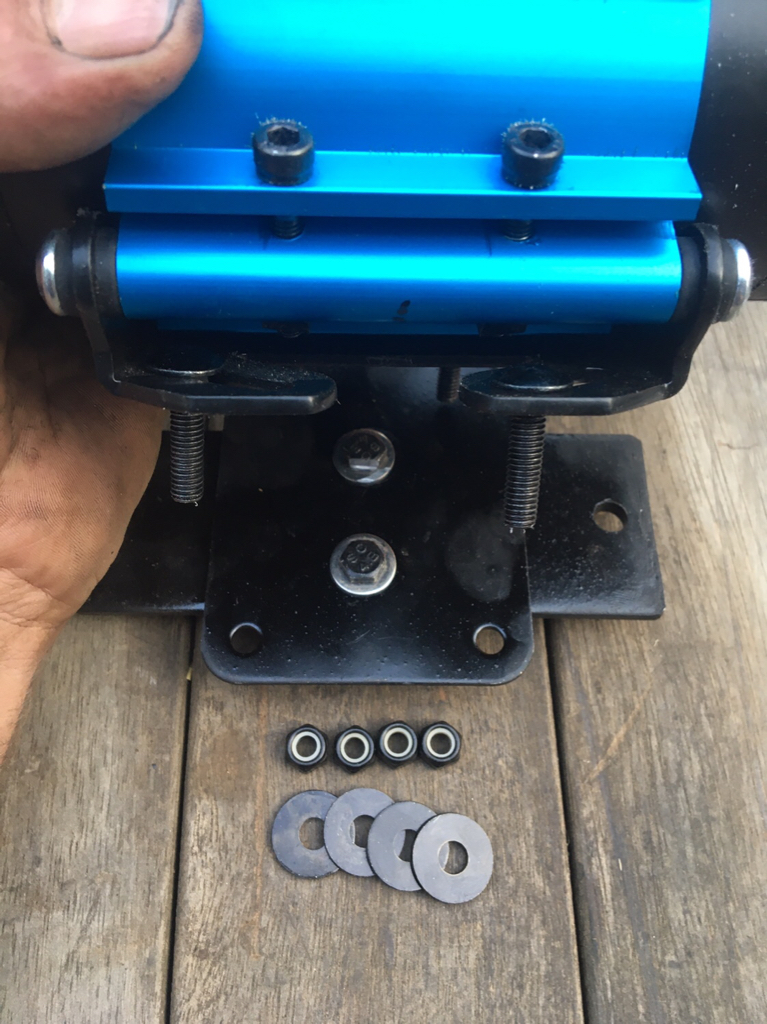
#6 ARB supplies two sets of mounting bolts for different applications of which found on this installation idea all eight can be utilised.
(4x cup head bolts & 4x hex head bolts)
#7 Cut down the hex head bolts supplied to 20mm long or alternatively use 6mm x 20mm fresh new bolts.
#8 If modifying the supplied bolts you will still need 6 x extra 6mm washers and 2 x extra 6mm nyloc nuts preferably or similar locking methods.
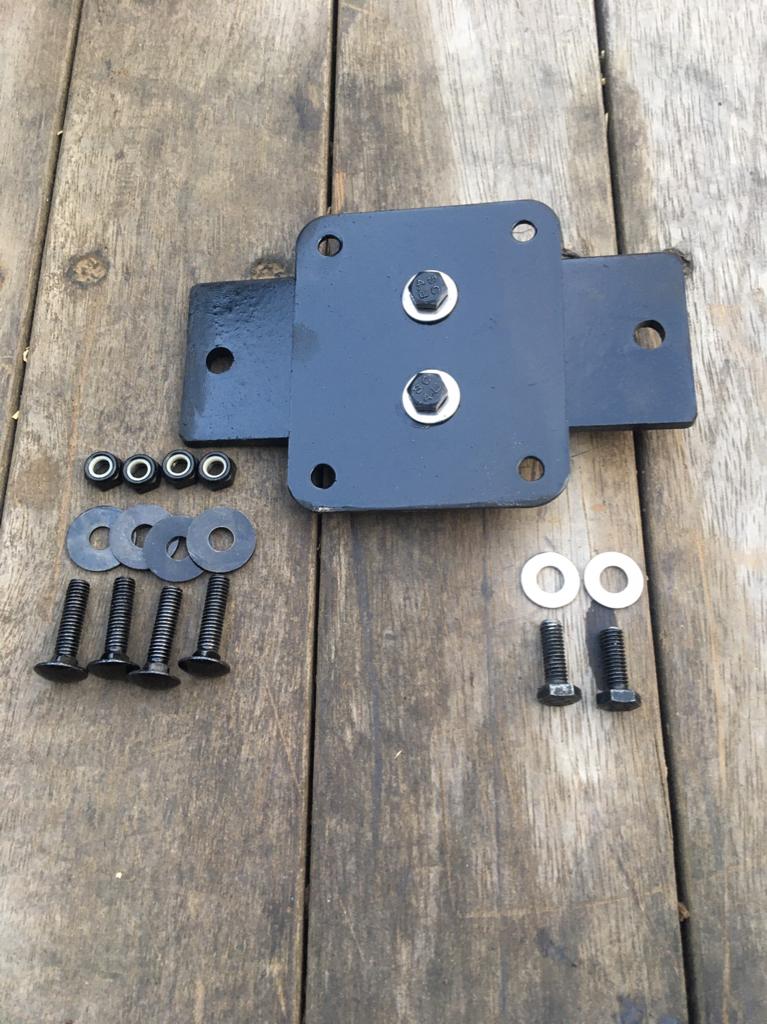
#9 Bolt the two plates together perpendicular using two of the now shorter hex head bolts, washers either side and two of the new 6mm nyloc nuts.
#10 Using the supplied cup head bolts that are designed to anti-spin on the upper side mounting slotted bracket finish by installing the supplied four washers and nyloc nuts underneath.
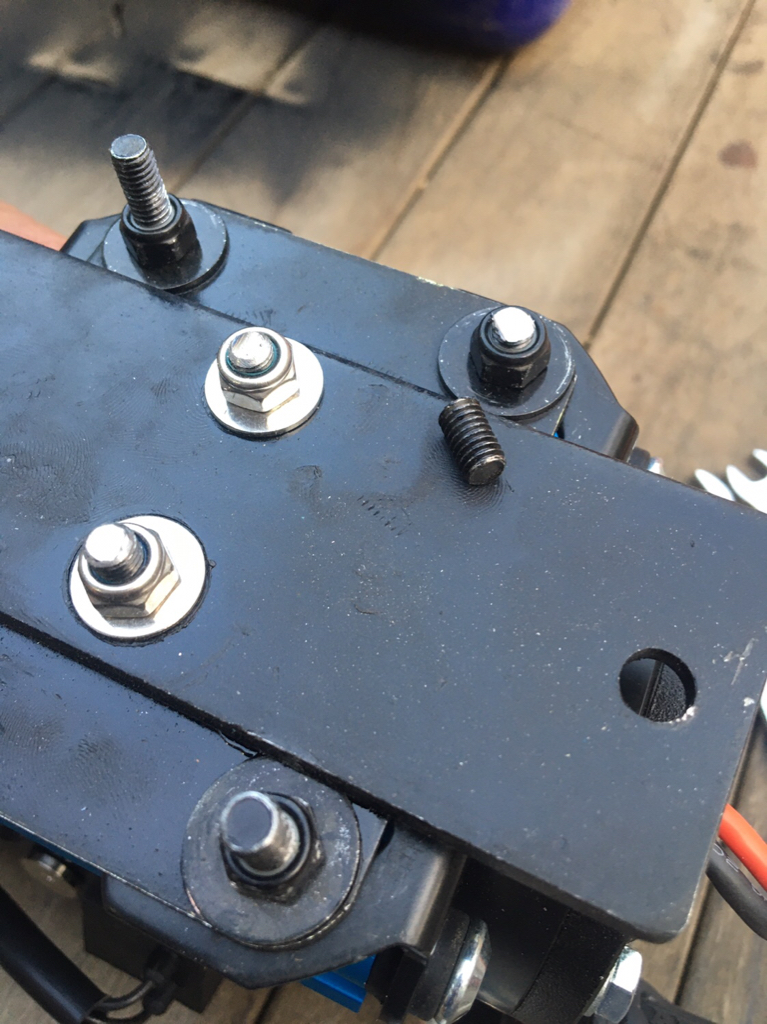
#11 Cut excess cuphead bolts to similar length of previous hex head bolts protrusion. (not too close and or hot as the nyloc may be affected?)
#12 Using the final two remaining ARB and previously cut hex head bolts with two new washers as before mentioned with fresh thread locking goo a decent slimline 10mm ratchet ring spanner can fit underneath for final OEM holes installation.
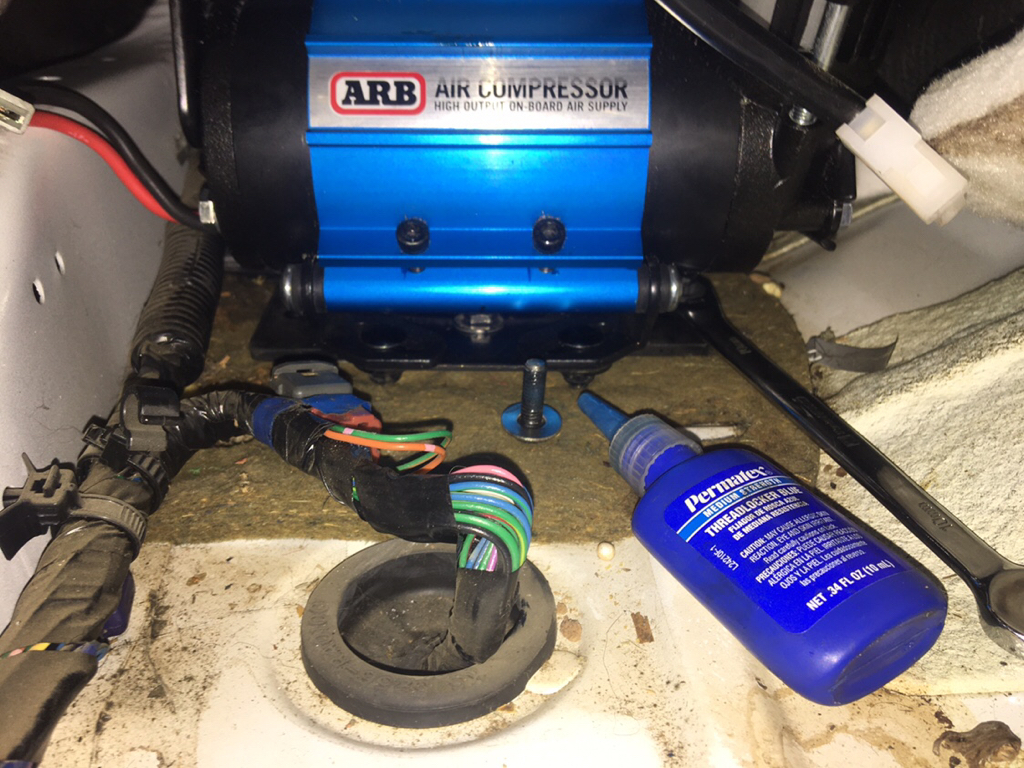
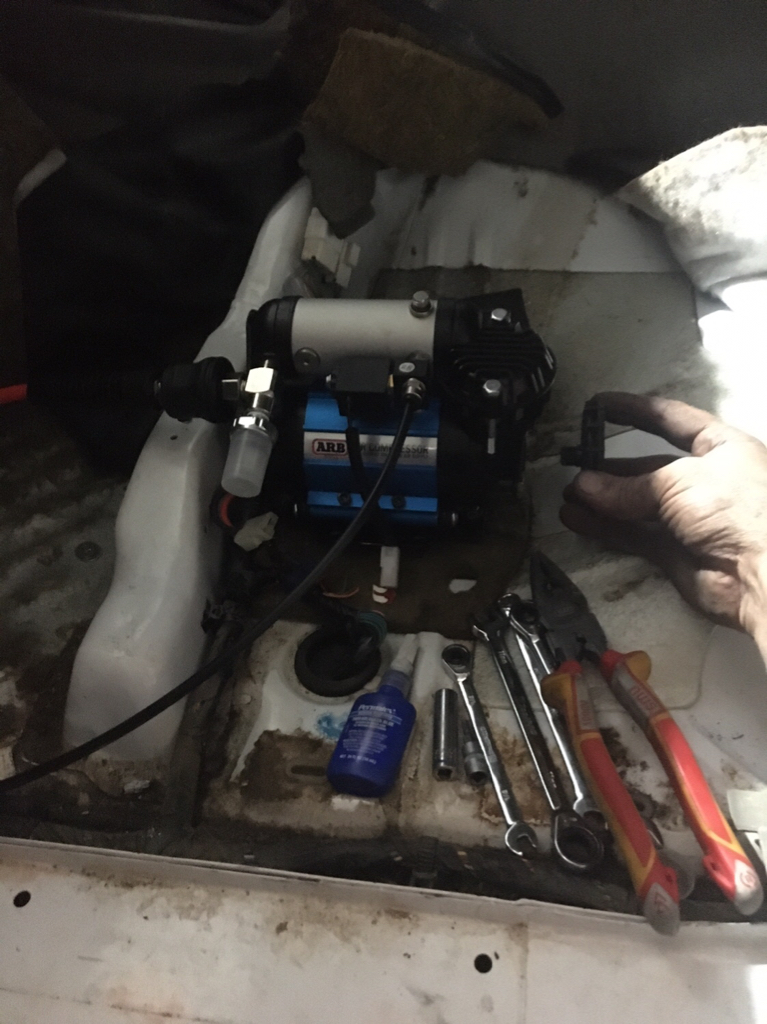
#13 Each to their own but I chose to install the compressor with air filter rearwards so as can unscrew for maintenance from under behind the rear of the seat. Also adjusted the ARB manifold and fittings to have the tyre inflation forwards with her new front locker only solenoid line pointing directly at the left side door to be able to run its hosing under the plastic floor trim up to the firewall tomorrow.
Sent from my iPhone using Tapatalk


 Reply With Quote