Yeah he is so anal like that... the guy is a neat freak!!!!!!!!Originally Posted by pbk1776

Looks really good as I have seen it first hand and is a bloody good use for that space.


Yeah he is so anal like that... the guy is a neat freak!!!!!!!!
Looks really good as I have seen it first hand and is a bloody good use for that space.


Until you walk into my garage BA. That ain't neat.


Hey Mudski,
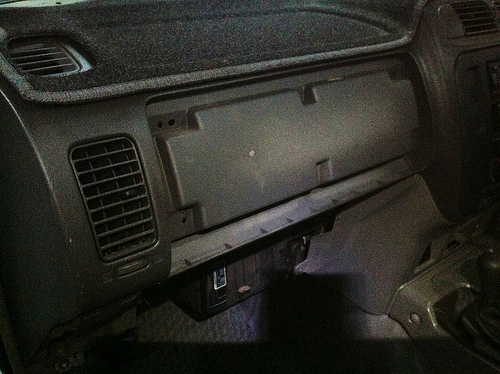
I got slightly enthused late this arvo & pulled out the glovebox & removed the dash cover. However as yet I haven't made the 'big cut' from which there is no turning back!
I hadn't expected to find no hole under the cover, I had thought there would be some sort of opening.
A couple of questions before I make the cut.
1. What did you do to allow for the thickness of the carpet where it folds over the front to prevent the cover sticking out more than it usually does? Did you trim the cover edges by the thickness of the carpet, or did you leave a space around the side of the carpet where the edge of the cover sits?
2. Along the bottom of the cover there is a piece of steel. The latch for the original glovebox screws into it. Did you remove this, or part of it? I'm wondering how important it is to give rigidity to the plastic along the bottom. I know I can cut it & glue it in place to provide for attaching the original glovebox latch, but on it's right hand end it also seems to be an integral part of what's holds the dash facia in place, & I'm wondering if removing it will compromise some of the dash's integrity? What did you do with it?
Would welcome your thoughts.
Cuppa
2006 4.2TDi ex-Telstra Remote area Camper. Patrol Sold after 11 years of ownership Replaced with 2006 OKA NT Expedition Truck. Cummins, Allison & lots of goodies
A Nomadic Life (Blog)

Don't cut too far past the bit that is sitting proud in the middle.
You need to leave the bottom rail, and enough material around the edges for the outer cover to sit against.
Mic
GU PATROL 2011 Ti, with goodies...
Answer to Question one.
I did trim the cover edges back so it would sit flush and still be able to be pushed in to release the cover. But I did that right at the end.
I didn't really allow for the carpet thickness on the edges I just made sure I was about 20 or so mm from the most outer edge of where you want to cut. This part you can decide as this will be the size of the box you need to make it too.
Answer to question two.
That metal strip needs to be there so the latch for the original glove box has something to screw into. Plus the two outer top screw go into it aswell.
Mine wasn't attached to anything on the right hand side, although I suspect it was supposed to be I didn't do anything there.
After I trimmed the metal strip down I had to hold the strip onto the dash somehow. Glueing it didn't work so I just taped it on and after the lower glove box is screwed in it doesn't matter anyway.
Get into it Cuppa!!!!
Edit. I think mate that the metal strip screws onto a bracket up behind that plastic section you need to cut. If so this bracket you need to bend out of the way anyhow.
I'm only guessing on this part as the metal strip on mine wasn't actually attached to the dash on the rhs at all. I just remembered this bracket I had to bend out of the way.
Last edited by mudski; 22nd May 2013 at 08:02 PM.
Cuppa (22nd May 2013)
oowww scary Ian...... it's like doing your own snorkel, cut that big hole on the side of your car?
Watching closely, because my glove box has looked like the Pic above for over 6 months now.

Just cut it open and build the box it is a very simple job
IF ITS NOT BROKEN IT MUST BE A PATROL
Well there's no going back now! Ooo-er, gulp.
Hole is cut.
Am trying to retain the piece of steel along the bottom of the new opening without compromising the size of the opening. I think it will work & might help to avoid creaks & groans on rough roads?
Btw Mudski, that piece of steel attaches with a single screw to the plastic facia on it's right hand end. With the radio surround removed & the use of a torch & mirror you can just see the screw head. With the hole cut it is possible to unscrew it with a stubby philips screwdriver, the head of the screw faces forwards giving just enough room to get the screwdriver in there. Might be fun lining it up to put back though
Have cut the piece of steel, whilst ensuring that I can still attach the original glovebox to it on the top left side. Have left small tabs of plastic in the bottom corners of the hole I cut so I can rivet the steel piece in place. Will take some pics after I've eaten & before proceeding further.
Cuppa
2006 4.2TDi ex-Telstra Remote area Camper. Patrol Sold after 11 years of ownership Replaced with 2006 OKA NT Expedition Truck. Cummins, Allison & lots of goodies
A Nomadic Life (Blog)
Just read my walkthrough mate. It's all there for you.
Thats right it does too. I remember now unscrewing it. Duh! I basically had to half the length ways width of the steel so I could make the opening the size I wanted.
Just remember when making the box. Don't try to cut the ends to the contours of the glove box by measurement. Its easier to make the box with longer sides. Fit it in and screw it to the back bar. Then get a pencil out and trace the edge line. If you know what I mean. Or in my case, just used my Dremel and cut it on the spot. Then I removed it and sand it back a little.
 Posting Permissions

 Reply With Quote