-
21st June 2020, 10:06 AM
#9531
Expert

I spent the last 2 enjoyable days trying to make my new carter pump fit my Gq Patrol where it needed to go, with all the negotiation cursing and swaring going along with it, I haven't finished the wiring properly yet but at least it is together enough to finally get it tuned and to top it of most of it was done in miserable wet days of course it is predicted to be fine days when I am back at work grrr.
-
The Following User Says Thank You to First Pooy For This Useful Post:
-
21st June 2020 10:06 AM
# ADS
Circuit advertisement

-
21st June 2020, 09:17 PM
#9532
Patrol God


Put a light bar in,no biggy...not game enough to wire it up so going to auto electrician for that shit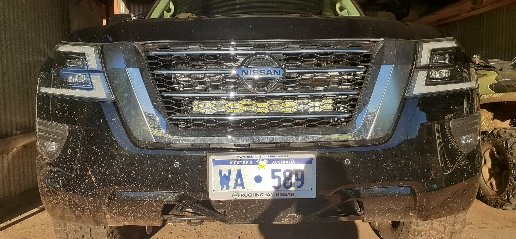
Sent from my SM-A205YN using Tapatalk
Watch this space, as there maybe a comment added soon
-
The Following User Says Thank You to Avo For This Useful Post:
-
21st June 2020, 09:18 PM
#9533
Patrol God
There's no point washing it down here during winter,
Sent from my SM-A205YN using Tapatalk
Watch this space, as there maybe a comment added soon
-
The Following User Says Thank You to Avo For This Useful Post:
-
22nd June 2020, 08:05 AM
#9534
SUCH IS LIFE

What did you do to your Patrol today!

Originally Posted by
Avo

Put a light bar in,no biggy...not game enough to wire it up so going to auto electrician for that shit
Sent from my SM-A205YN using Tapatalk
Mate, just buy a light bar harness. Comes prewired with switch, plug, relay, light globe adaptor, etc.
All you need to do is put pos+ and neg- to your battery, pull out your globe and plug into adaptor, then plug your light bar in and your done.
I’ve done a few and it’s about 10minutes work....
Around 20-30 bucks on eBay
Sent from my iPhone using Tapatalk
________________________
______ 2017 D-Max _______
I don't have a short temper. I just have a quick reaction to bullshit
WARNING: Towballs used for recoveries can, and do kill people and damage property.
-
The Following 3 Users Say Thank You to Maxhead For This Useful Post:
10G (9th July 2020), Avo (22nd June 2020), rusty_nail (22nd June 2020)
-
22nd June 2020, 08:19 PM
#9535
Patrol God
Originally Posted by
Maxhead
Mate, just buy a light bar harness. Comes prewired with switch, plug, relay, light globe adaptor, etc.
All you need to do is put pos+ and neg- to your battery, pull out your globe and plug into adaptor, then plug your light bar in and your done.
I’ve done a few and it’s about 10minutes work....
Around 20-30 bucks on eBay
Sent from my iPhone using Tapatalk
There's no way I am going anywhere near this car trying to play electrician,I've ear on blown every fuse in cars just trying to fit the old tape players mate,me n electrikkidy don't get along,play it safe,
Sent from my SM-A205YN using Tapatalk
Watch this space, as there maybe a comment added soon
-
The Following 3 Users Say Thank You to Avo For This Useful Post:
10G (9th July 2020), Maxhead (22nd June 2020), Rossco (22nd June 2020)
-
22nd June 2020, 08:26 PM
#9536
SUCH IS LIFE
Originally Posted by
Avo
There's no way I am going anywhere near this car trying to play electrician,I've ear on blown every fuse in cars just trying to fit the old tape players mate,me n electrikkidy don't get along,play it safe,
Sent from my SM-A205YN using Tapatalk
Few Jacks and you’ll be an expert in no time mate
Just kidding mate, get it over to auto sparky if not confident
Sent from my iPhone using Tapatalk
________________________
______ 2017 D-Max _______
I don't have a short temper. I just have a quick reaction to bullshit
WARNING: Towballs used for recoveries can, and do kill people and damage property.
-
The Following User Says Thank You to Maxhead For This Useful Post:
-
9th July 2020, 01:41 PM
#9537
Patrol Guru

Front RDA slotted and dimpled rotors and yellowstuff pads, thanks @Cuppa (I think it was you) for your recommendation. Also put a new extended main braided brake line on there too.
They say no emergency braking for first 200 miles, so haven't been able to stomp them. They do definitely feel like I'm driving a different car already though!
IMG_20200709_123238.jpg
IMG_20200709_123244.jpg
IMG_20200709_123410.jpg
2003 GU TD42 with a few extra ponies
-
The Following 6 Users Say Thank You to 0-TJ-0 For This Useful Post:
10G (9th July 2020), Cremulator (9th July 2020), Cuppa (9th July 2020), jack (9th July 2020), jay see (9th July 2020), PeeBee (9th July 2020)
-
9th July 2020, 03:38 PM
#9538
Legendary

Walked out earlier today and noticed a bit of green coolant on the ground. Quick look around and the top radiator hose is slightly leaking from the thermostat housing. After having the heater hose let go a few weeks back while on the freeway. I called the local three. Autobarn no stock, Supercheap, no stock, Repco yes 2 on hand. Picked up a pair of clamps too. A little job for tomorrow.
Sent from my CPH1979 using Tapatalk
12/97 GEE YOU
4.5lt Gas blower. Lots of mods to come.....all in good time.
-
-
9th July 2020, 04:36 PM
#9539
Patrol Guru

Pardon my ignorance but why the extended brake line ? Surely the factory 1 isnt to short to allow wheel travel ? Unless youve got a big lift & no sway bars I guess
-
-
9th July 2020, 05:54 PM
#9540
Travelling Podologist

Originally Posted by
0-TJ-0
Front RDA slotted and dimpled rotors and yellowstuff pads, thanks @
Cuppa (I think it was you) for your recommendation. Also put a new extended main braided brake line on there too.
They say no emergency braking for first 200 miles, so haven't been able to stomp them. They do definitely feel like I'm driving a different car already though!
Good stuff, braided line too!
Have you got the bedding on instructions - easy to do, but important I think. I did the x3 for Yellowstuff. Performance noticeably improved whilst out doing it.
When a vehicle has had both new rotors and/or just new pads fitted, there are two processes or objectives, to getting the brake system to operate at optimal performance.
The first step is to make sure the disc face is clean of all oils/anti rust or any foreign matter like previous brake pad material. If the rotors are not being replaced, then it is imperative that the disc is machined, prior to the fitment of new pads- without exception.
The second step is heating (not cooking) the brake rotor and pads, to transfer the pad material evenly, onto the rotor face.
This step involves performing a series of stops, so that the brake rotor and pad are heated steadily, to allow the transfer of pad material onto the brake rotor friction surface. The friction surface should be clear of all oils, which are used to stop the rotor from rusting, before being fitted to the motor vehicle. Whilst these will be burnt off, they risk transferring and possibly polluting the brake pad material and will definitely lead to a longer bedding-in process. Whilst performing a series of brake applications to transfer the pad material, care should be taken to not come to a complete stop, as this can lead to the transfer of pad material unevenly on the disc at the point where the pad comes to rest on the friction surface.
A typical program of 8-9 brake applications, from 60km down to 10km p/hour, without any cool down in between would be sufficient.
For performance pad materials, a further two sequences of ten stops will be required after a cooling down period between each cycle, to ensure that the pads have reached the required higher operating temperature to allow for the pad material to transfer effectively.*
At all times during the bedding in process, care should be taken to not apply the brakes in a harsh manner or decelerate from high speeds, as this will corrupt the transfer of materials and lead to uneven material build up on the rotor surface, which in most instances will require machining to regain a flat rotor surface for optimal operation (Disc thickness vibration-DTV-which leads to brake judder or vibration-see RDA/EBC Bulletin #1
 2006 4.2TDi ex-Telstra Remote area Camper. 425w roof mounted solar, 360Ah Aux batts, BCDC1240, Onboard hot & cold pressurised & filtered water, (25 litre hot water calorifier), ARB fridge, ARB freezer, Built in kitchen, heaps of easy access storage, 240v, 3 Genie exhaust + dynotune, 2 lift, 3900kg GVM upgrade, second glovebox, ROH Blaktrak steel wheels, Bridgestone D697's (now Toyo RT's), Redarc gauges/pillarpod, Hema HX-1, Icom 450 CB, dual rear view cameras, Onboard 30amp Victron mains charger, second glovebox, dual seat conversion, TPMS, Boss PX7 onboard air with 9 litre tank, 350w inverter, Steel bullbar, Harrop Eaton diff lock (front), Warn winch, Snorkel, Dual spares , 160 litre water tank, 180 litre fuel in two tanks (approx 1200km range) 2010 Tvan Tanami. (incl another 70 litre water tank) with matching wheels/tyres (& 3rd spare)
A Nomadic Life (Blog)
2006 4.2TDi ex-Telstra Remote area Camper. 425w roof mounted solar, 360Ah Aux batts, BCDC1240, Onboard hot & cold pressurised & filtered water, (25 litre hot water calorifier), ARB fridge, ARB freezer, Built in kitchen, heaps of easy access storage, 240v, 3 Genie exhaust + dynotune, 2 lift, 3900kg GVM upgrade, second glovebox, ROH Blaktrak steel wheels, Bridgestone D697's (now Toyo RT's), Redarc gauges/pillarpod, Hema HX-1, Icom 450 CB, dual rear view cameras, Onboard 30amp Victron mains charger, second glovebox, dual seat conversion, TPMS, Boss PX7 onboard air with 9 litre tank, 350w inverter, Steel bullbar, Harrop Eaton diff lock (front), Warn winch, Snorkel, Dual spares , 160 litre water tank, 180 litre fuel in two tanks (approx 1200km range) 2010 Tvan Tanami. (incl another 70 litre water tank) with matching wheels/tyres (& 3rd spare)
A Nomadic Life (Blog)
-
The Following User Says Thank You to Cuppa For This Useful Post:


 Reply With Quote
