-
14th December 2021, 11:56 PM
#41
.........


-
The Following User Says Thank You to MB For This Useful Post:
Cremulator (15th December 2021)
-
14th December 2021 11:56 PM
# ADS
Circuit advertisement

-
30th December 2021, 08:45 AM
#42
Patrol Guru

Wiring the Rear Tail Lights
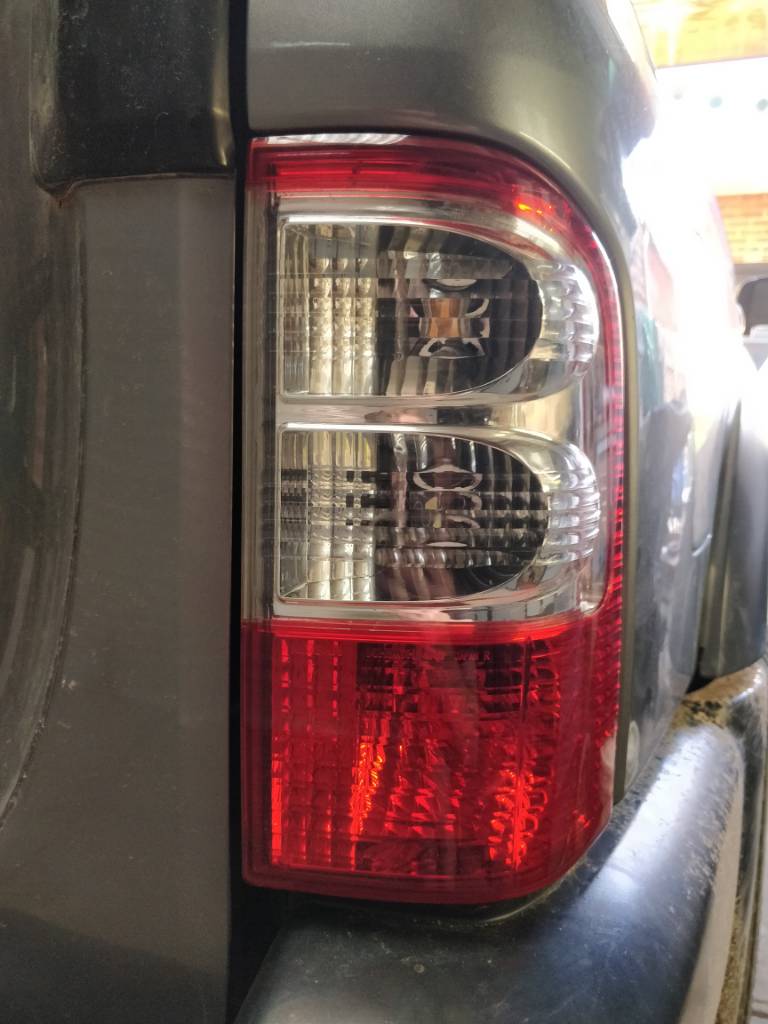
I wanted to get the dummy tail lights to function on my GU III but didn't want to buy whole replacement units just to get the working sockets.
So I looked at other Nissan models to try to find matching bulb sockets and hopefully a simple and cheap solution.
The bulb sockets needed to be no bigger than 32mm diameter to fit in the taillights. Most I found were 37mm.
They also need to have a rubber seal. 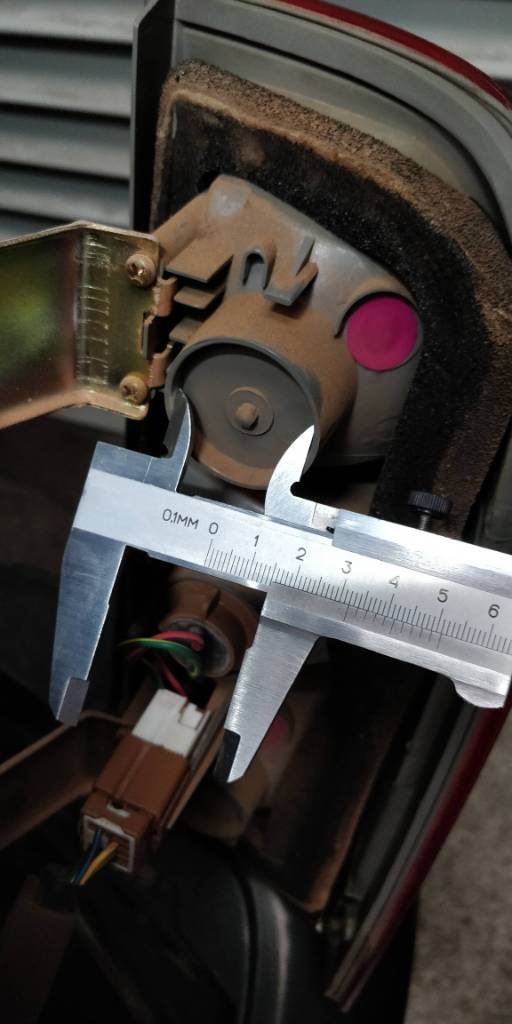
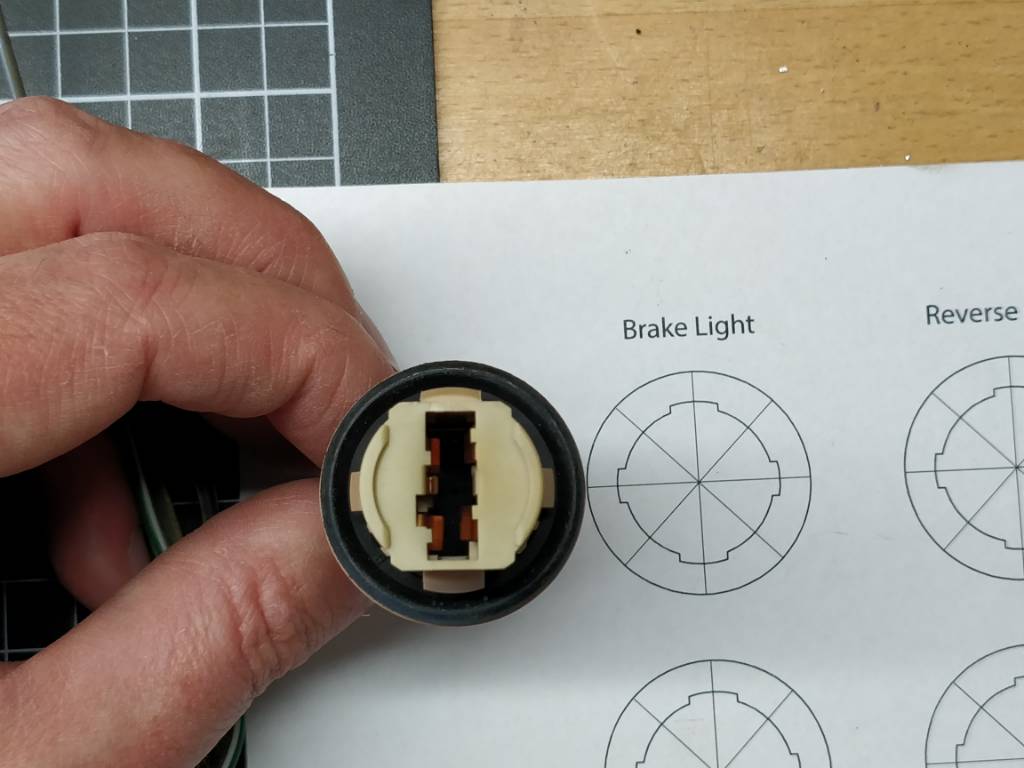
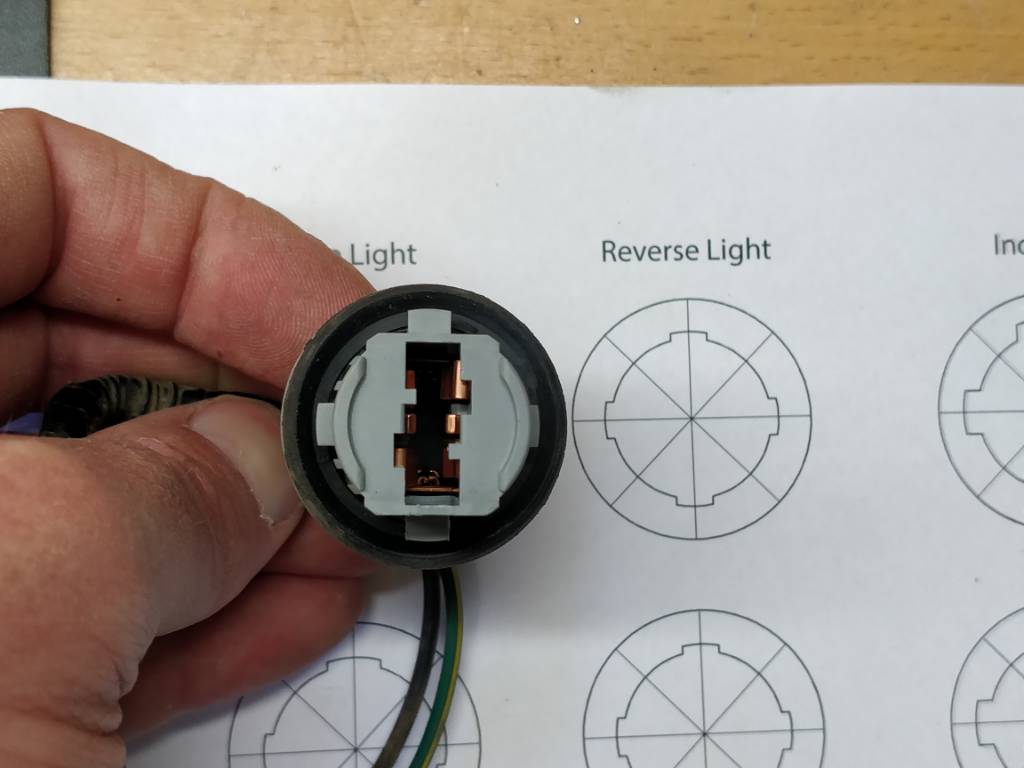
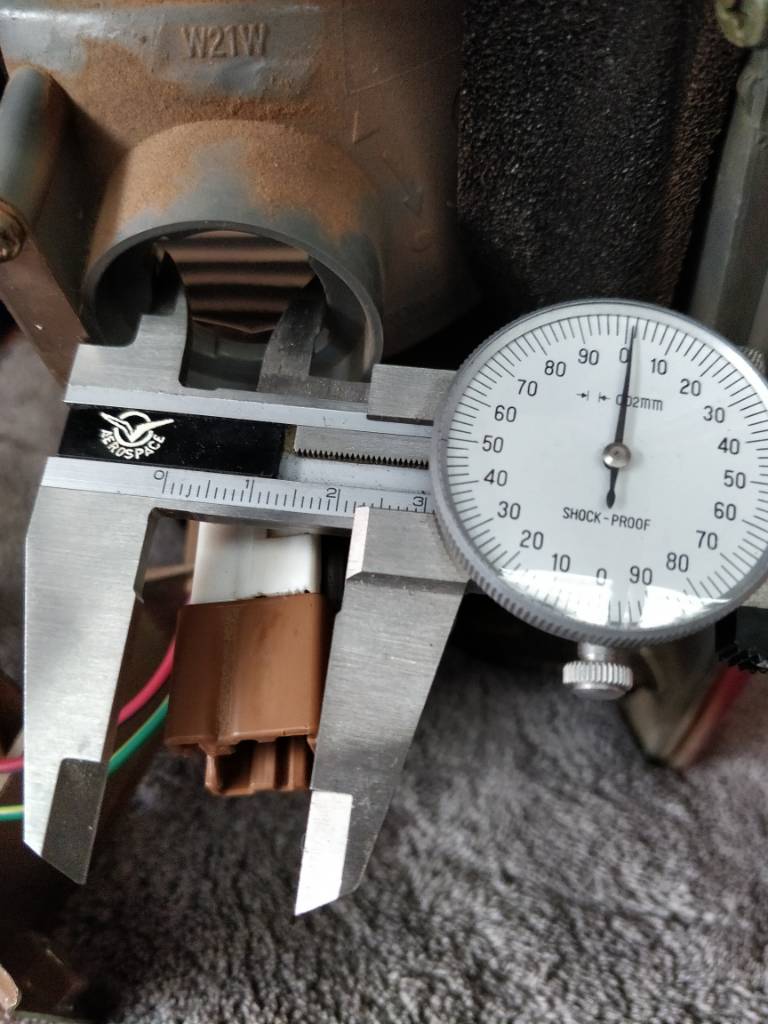 I ended up finding 32mm brake light and reverse wedge sockets on a 2004 T30 model X-Trail, but the indicators were larger 37mm bayonet fitting. However the front indicators are the 32mm wedge sockets that are required.
Go to a wreckers and source the whole rear tail light loom - including the plug! (You need these) - and also the front indicators with about 200mm of wire.
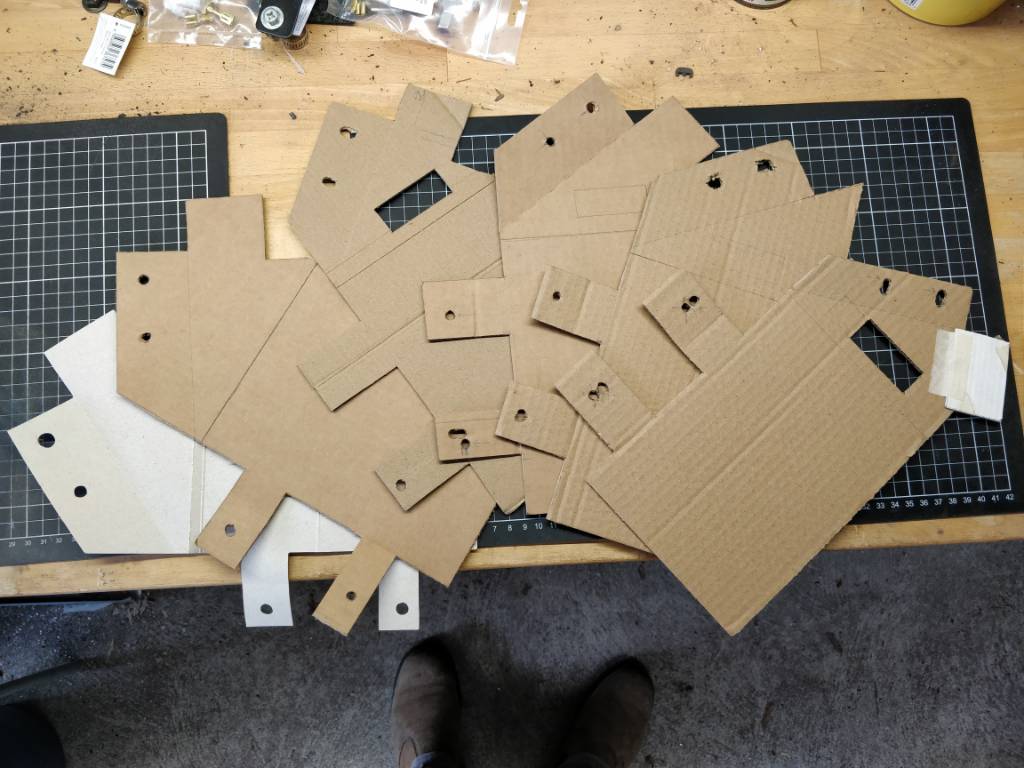
These cost me $16 for two tail light looms and $2.50 for the two front indicators from a self service wreckers. 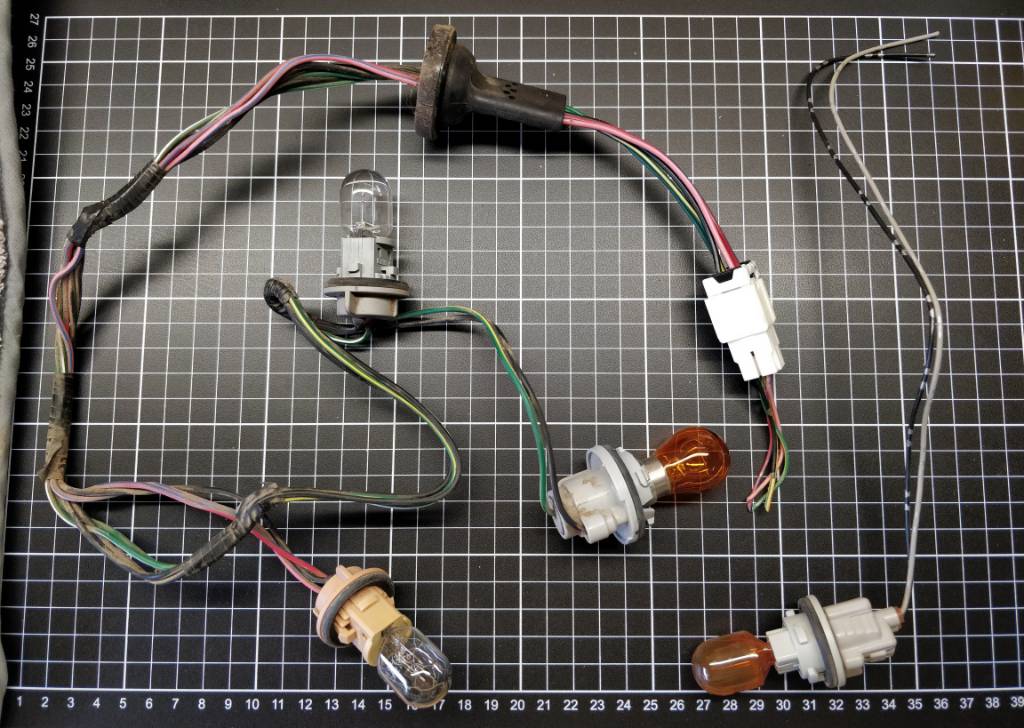 I measured up each bulb socket and the different tabs, then drew them to scale as a template. (I've attached the template to download at the bottom of this post - print it out at 100% on A4)
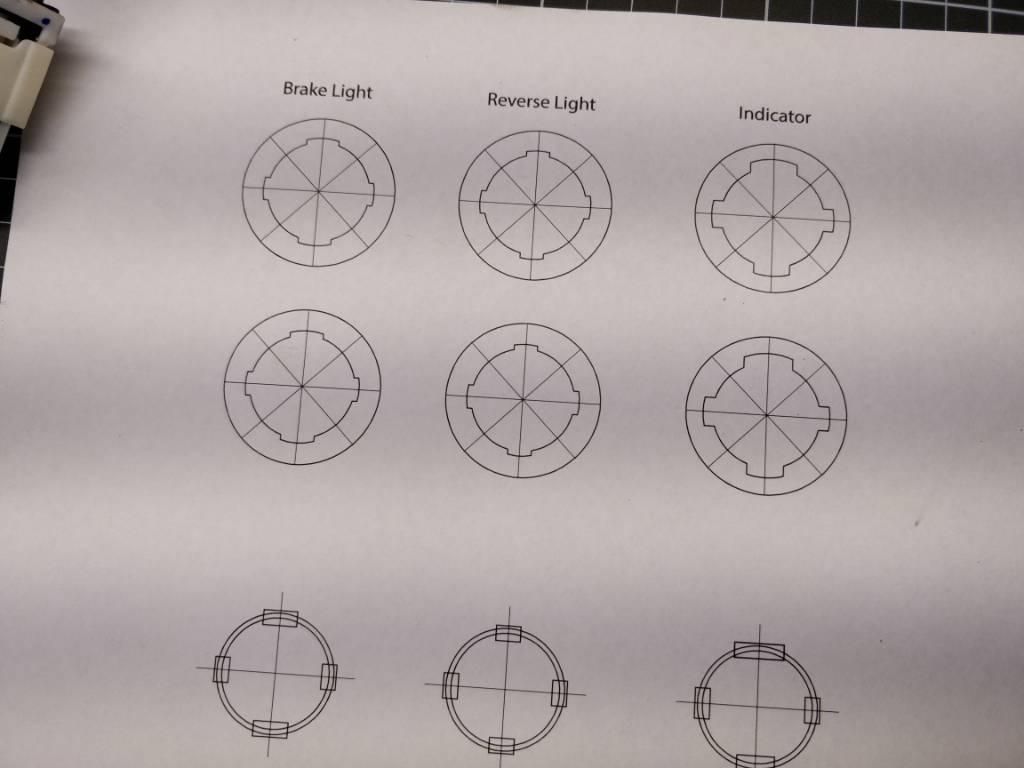
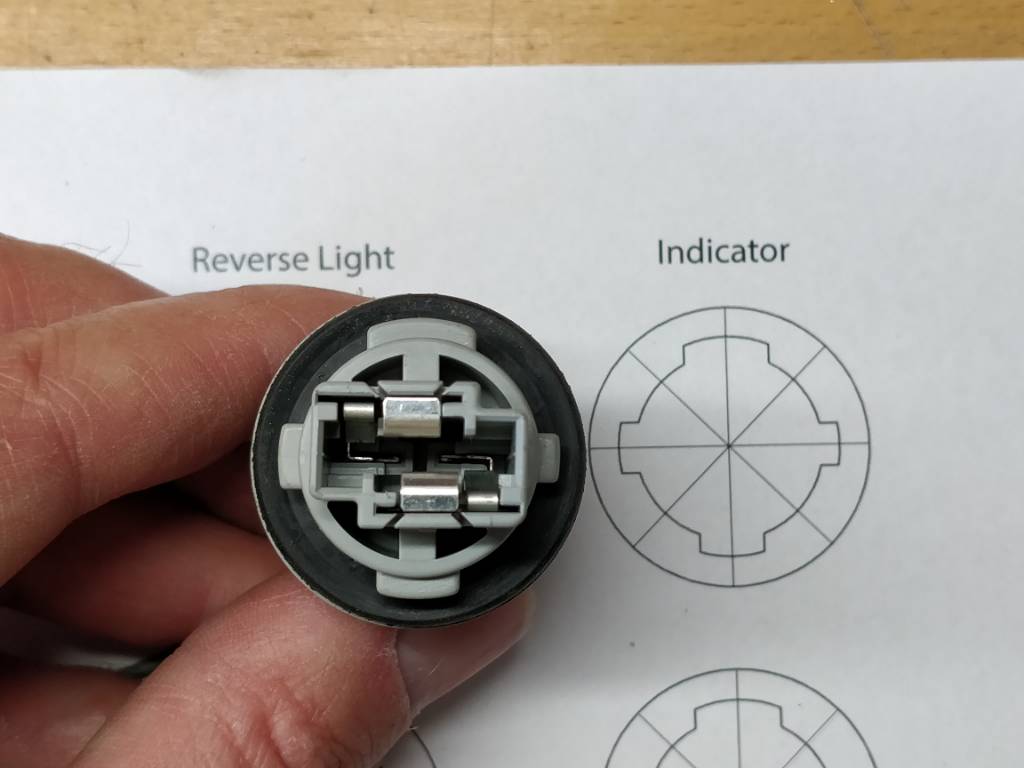
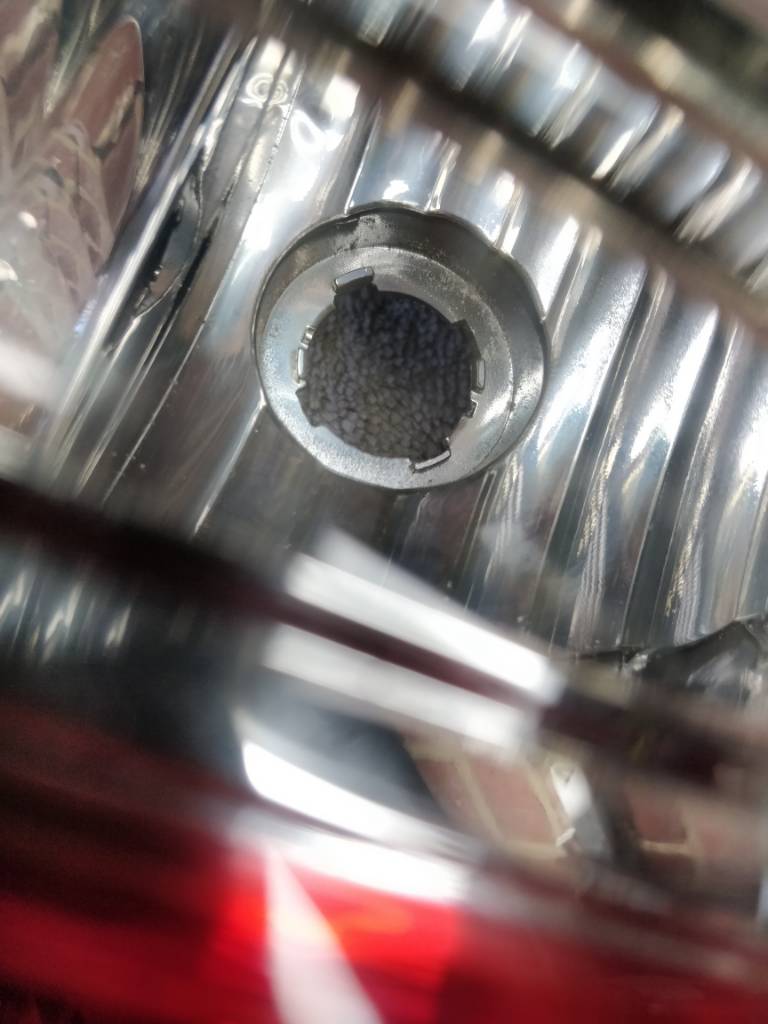
I took note of the angle the factory reverse socket inserts as there are little tabs on some of the other internals of the dummy lights. 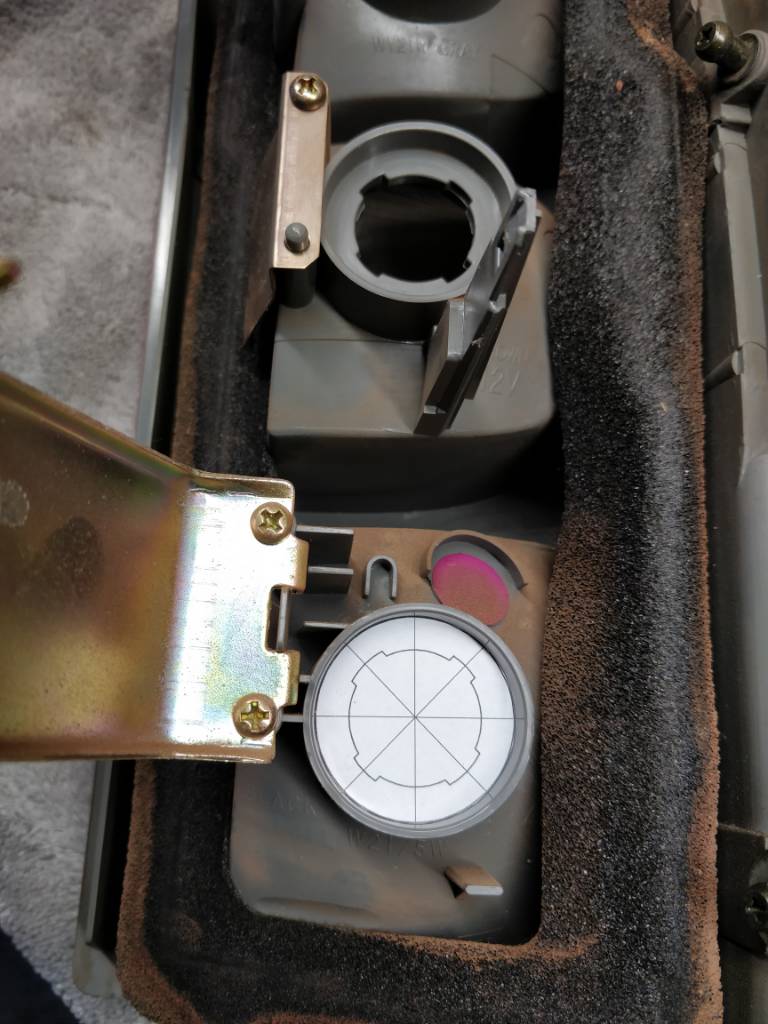 Cut out the template for the appropriate socket and use it to mark the centre.
 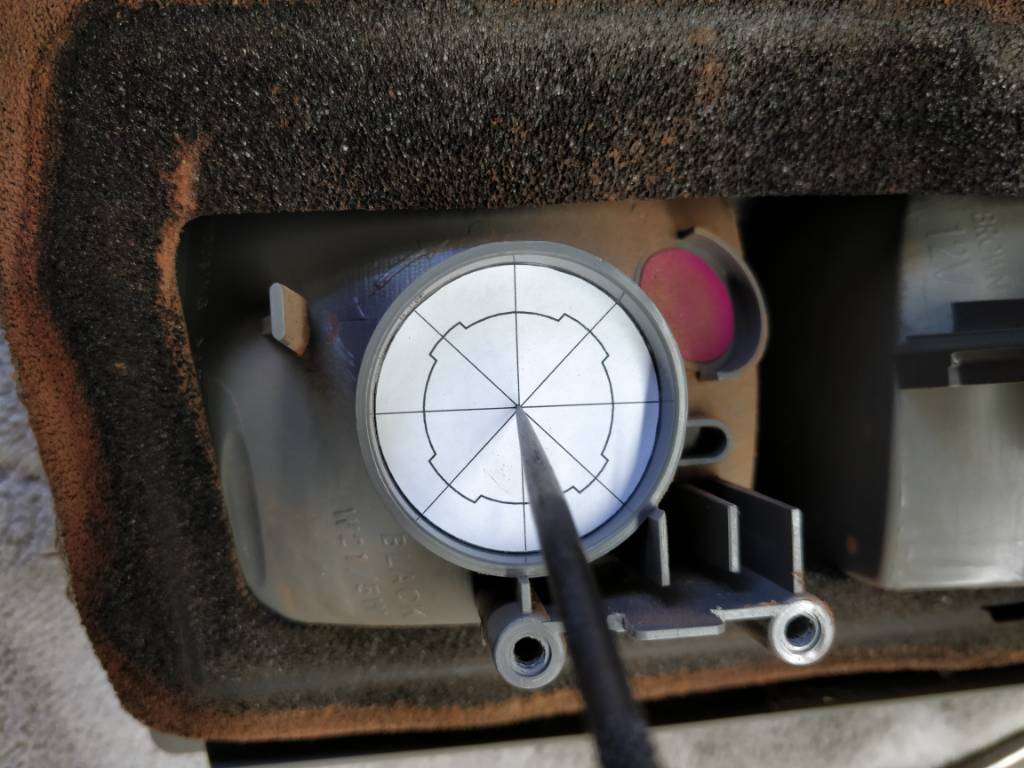 Then cut the centre out and mark it on the plastic.
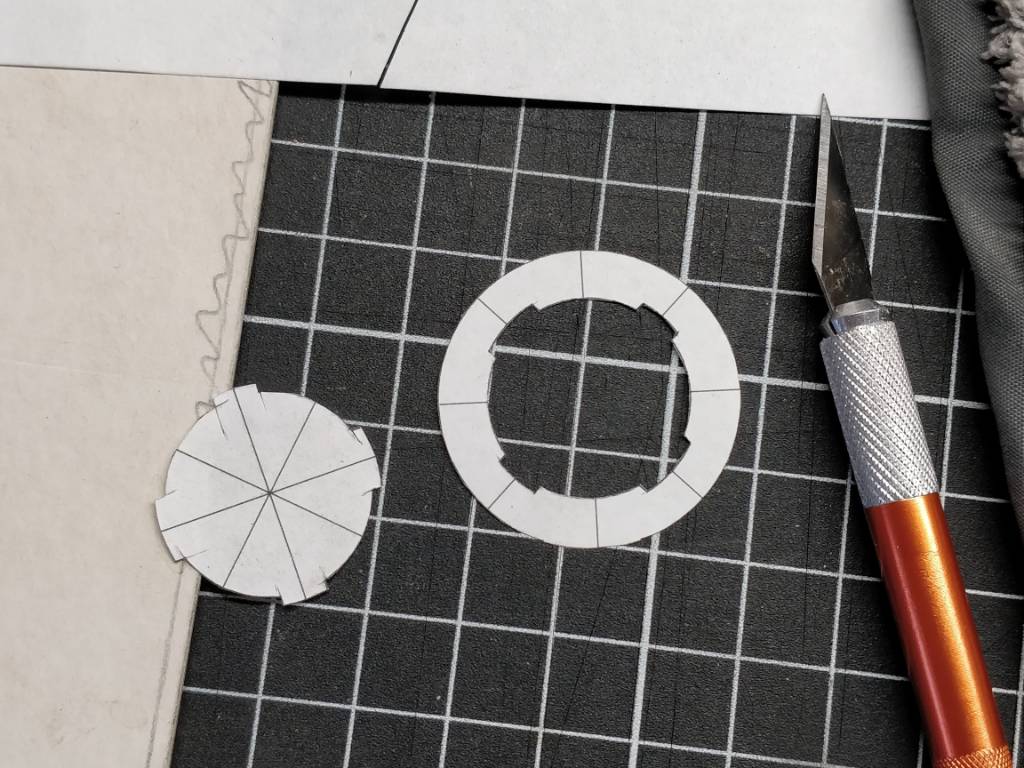
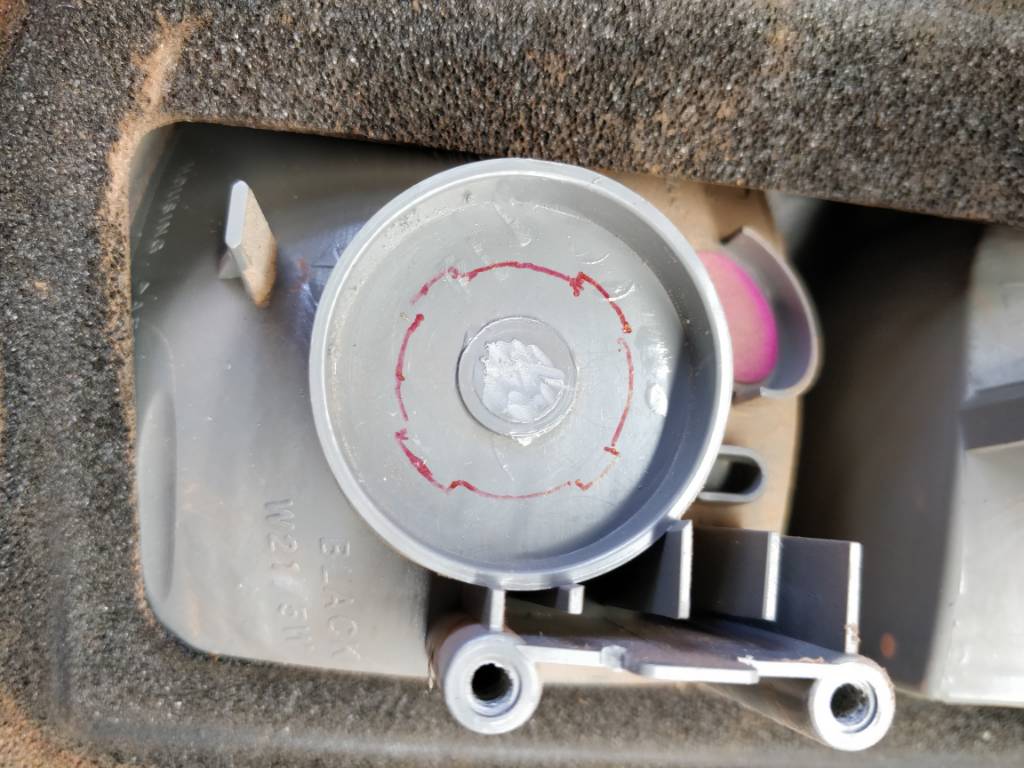 I pre-drilled a small hole before switching to a stepped drill bit to easily increase the hole while keeping it centred.
 Then place the template back in and use a file to cut in the tabs.
 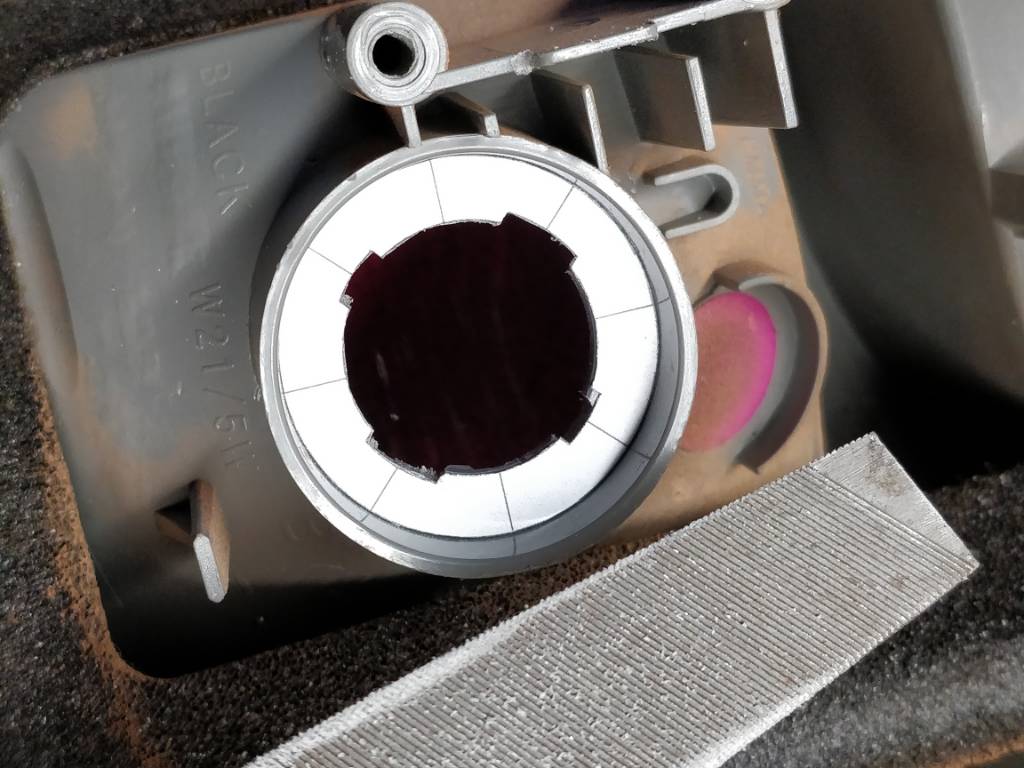 You can see some of the small tabs that stop the socket.
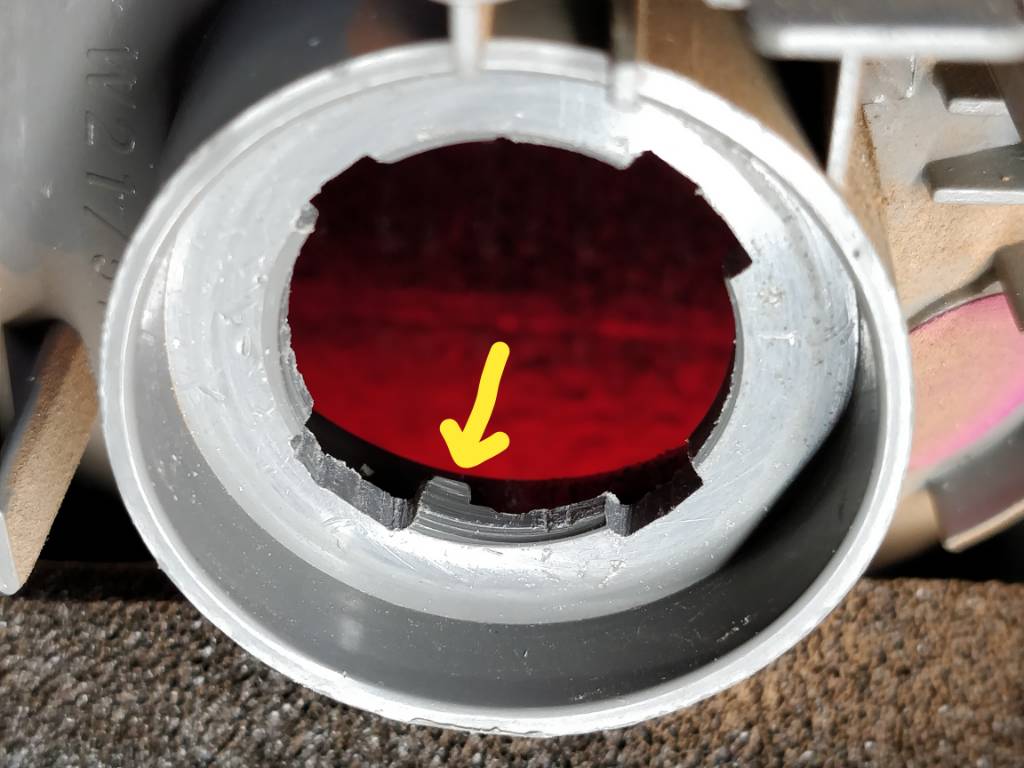
 Here are all three holes cut and tabs filed out on the drivers side light.
 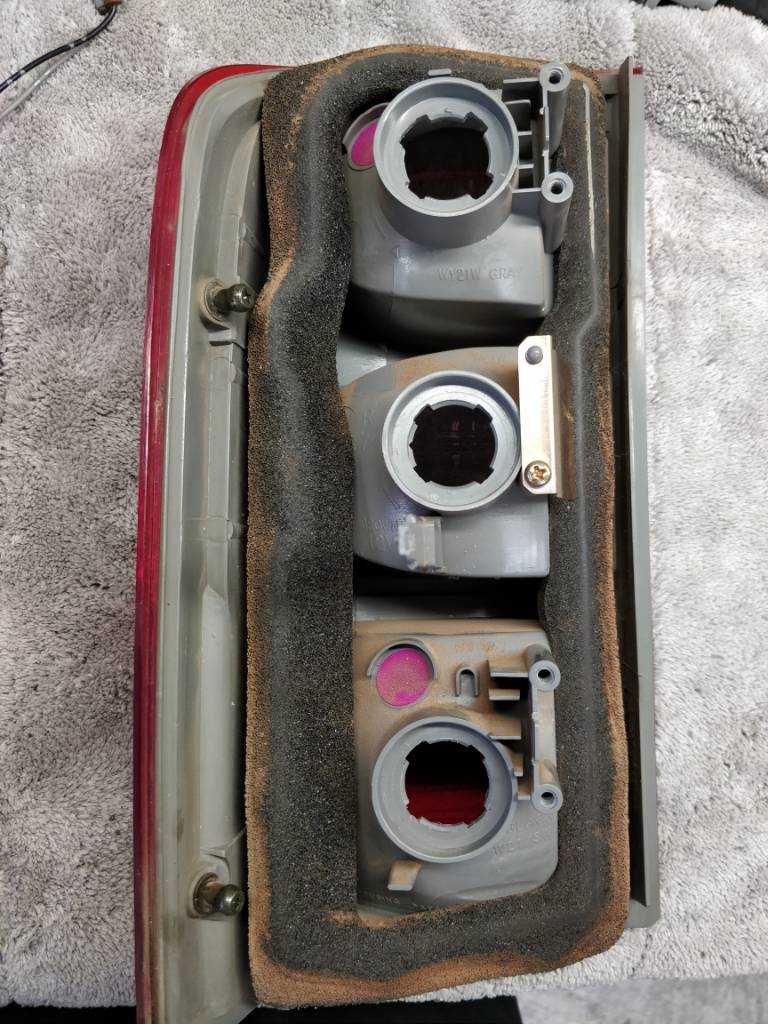 To wire the sockets into the existing plug, just remove the pins from the plugs you get with the X-Trail looms. They are almost the same and fit into the factory plug.
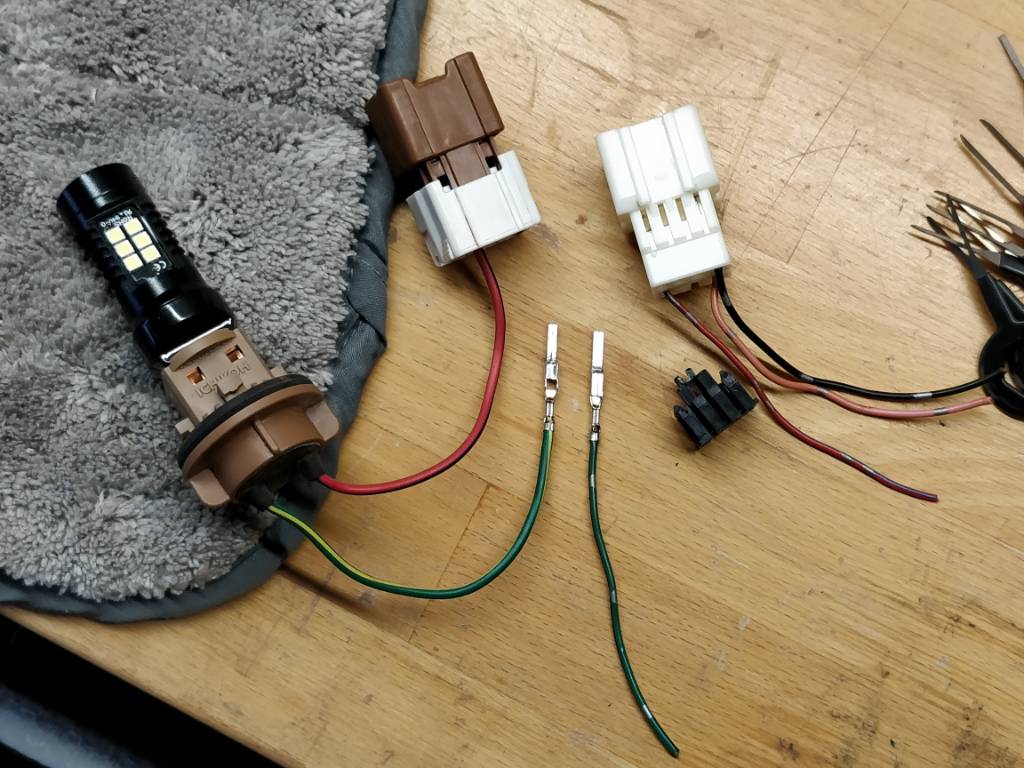
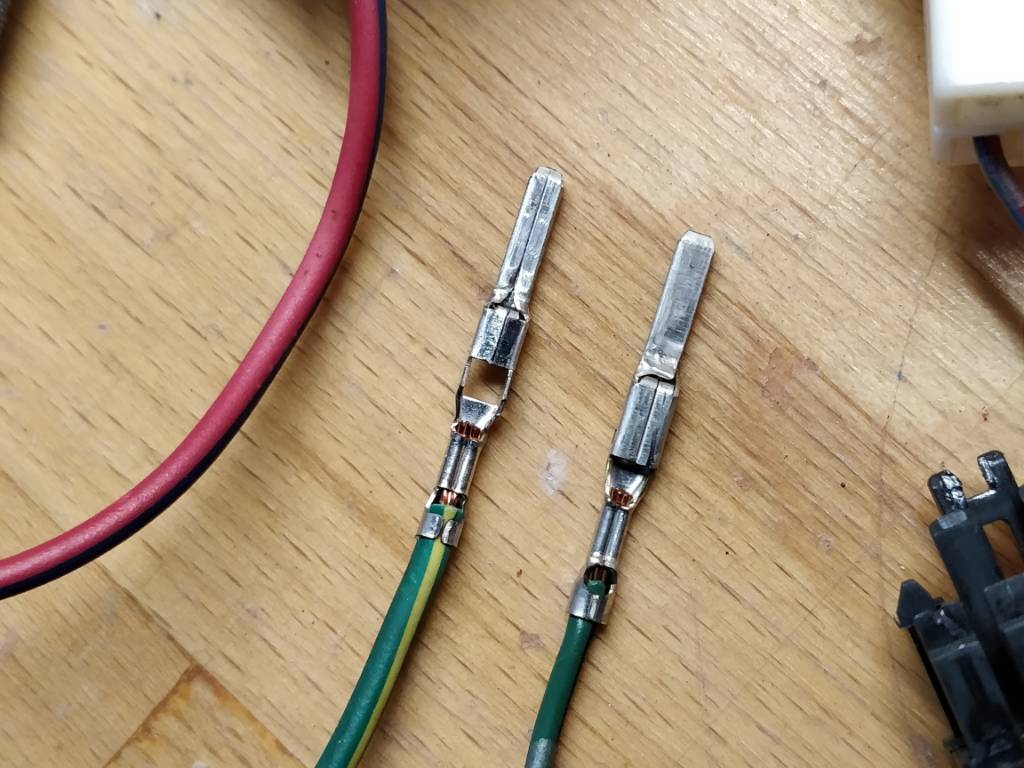 Because the X-Trail pins have a slightly longer back half the factory Patrol plug doesn't compress and lock in.
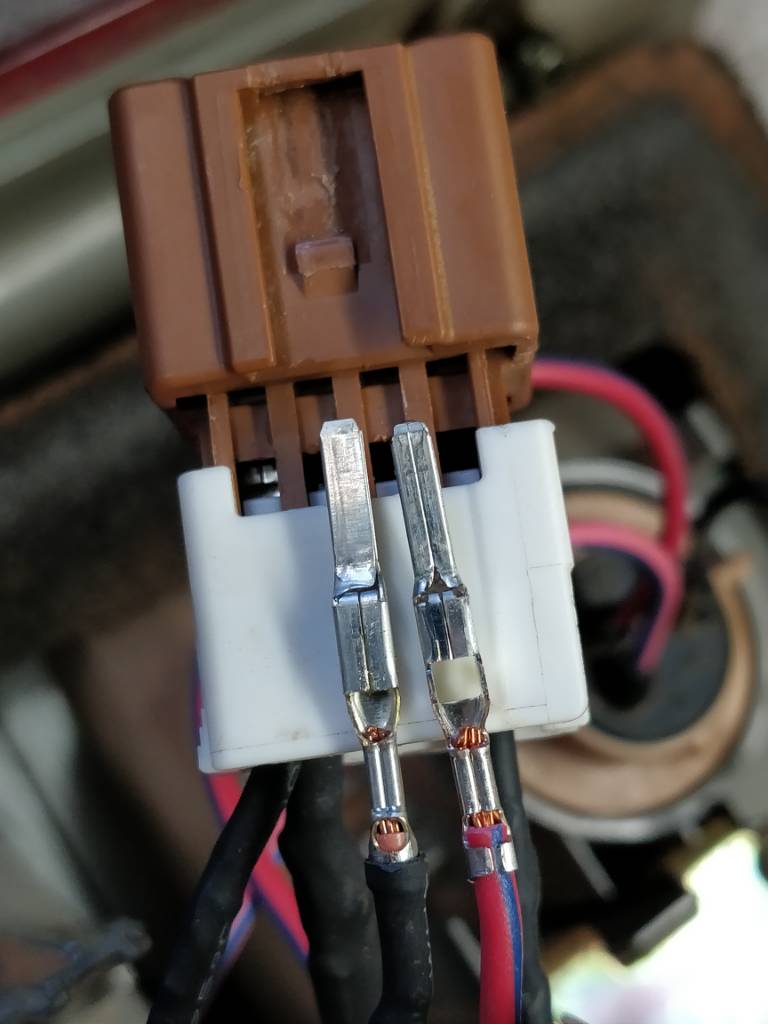
 As you have to run wires from the passenger tail light to the drivers side light, I spliced them in by removing the pin from the plug, pulling the wire back through the insulation, soldering on my connecting wire, then I was able to heat shrink the connection, feed the wire back through the insulation and click the pin back into the plug.
 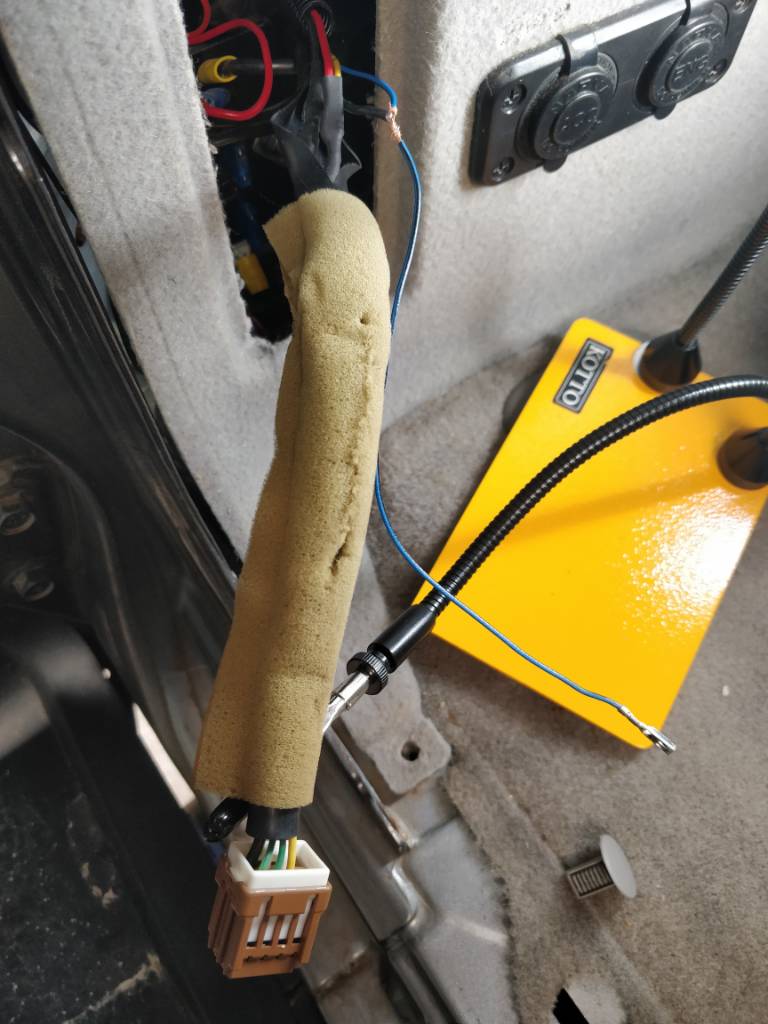 I choose to run the wires up and around the barn doors tucking it into the roof lining.
 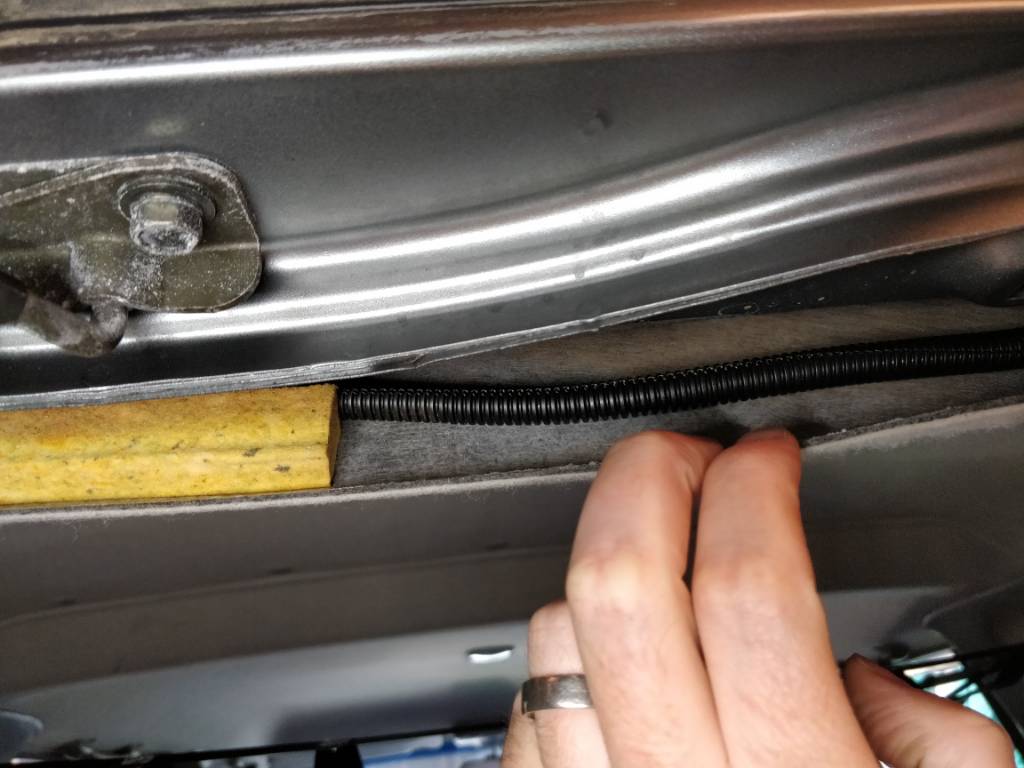 On the drivers side I soldered the female pins I removed from the X-Trail plug to the end of the 3 wires. These are reverse, parkers and earth.
 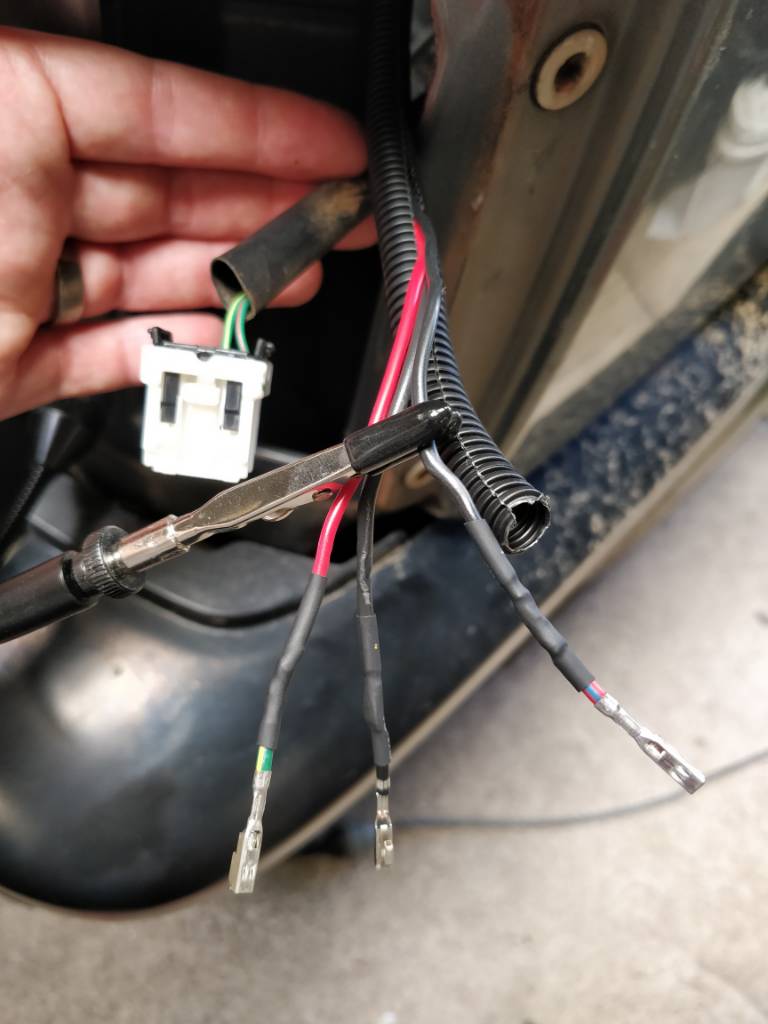 I decided to use the plug from the X-Trail on the drivers side light to replace the factory Patrol plug as the female pins are identical and I was using all male pins from the X-Trail plug anyway.
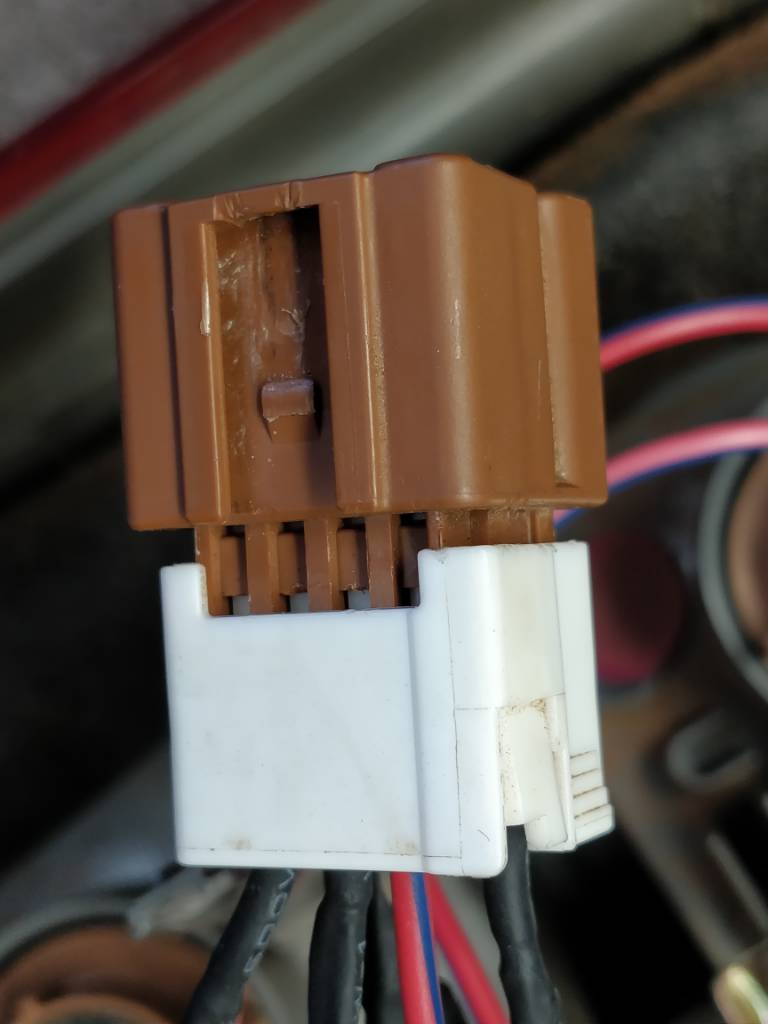
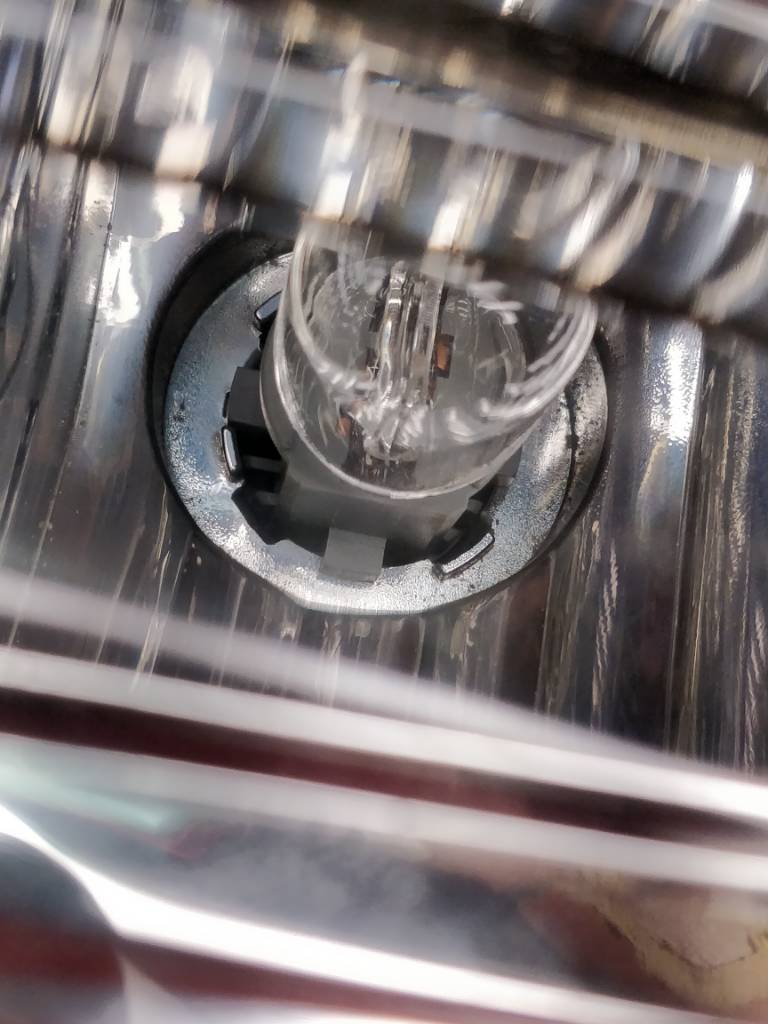
Even though the plugs look very similar, the channels on the sides are different, so you can't just connect the X-Trail and Patrol plugs unfortunately. 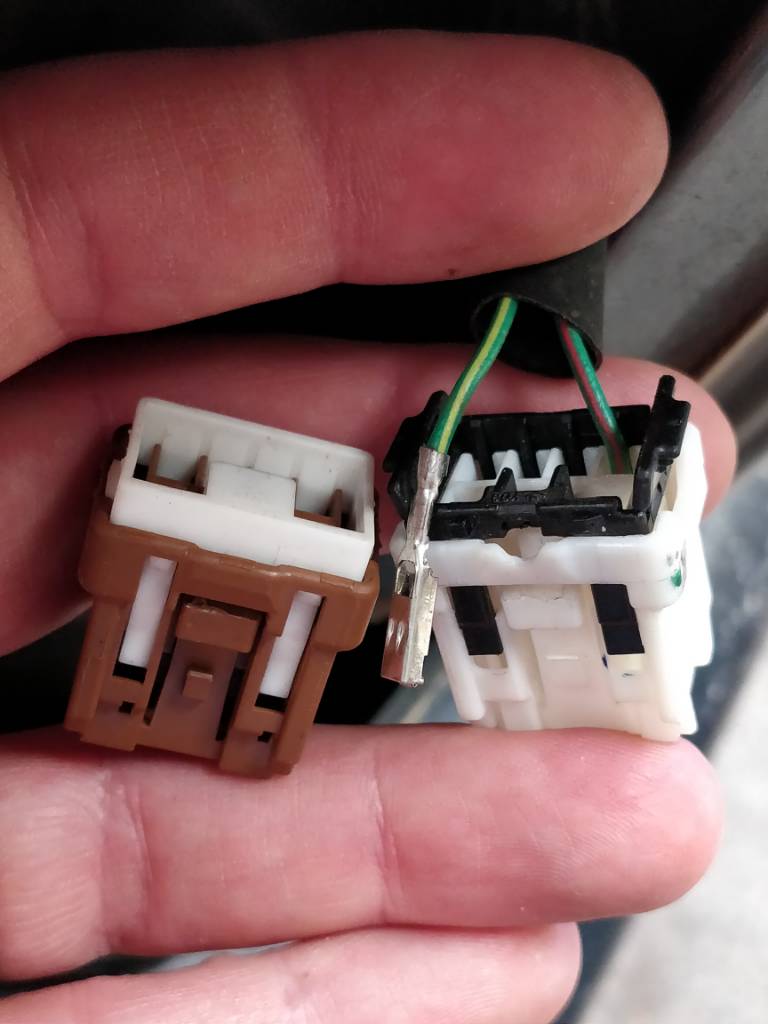 Here is the drivers side all wired up and plugged in.
 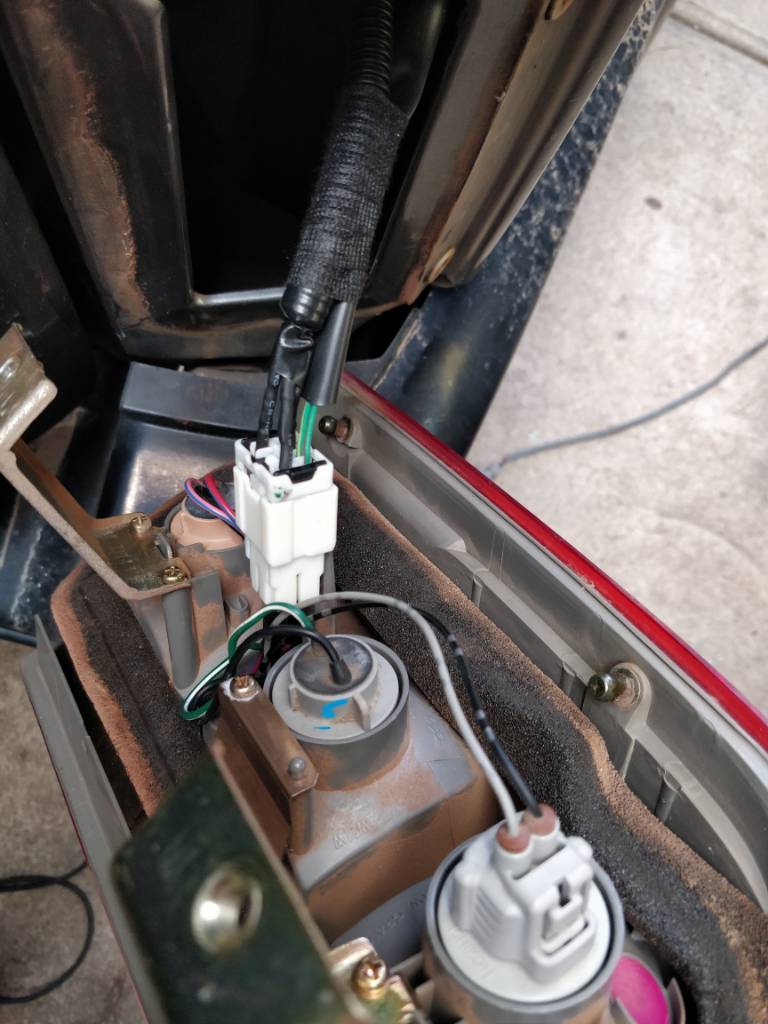 I decided to use all LED bulbs to limit the draw on the rear lighting circuit.
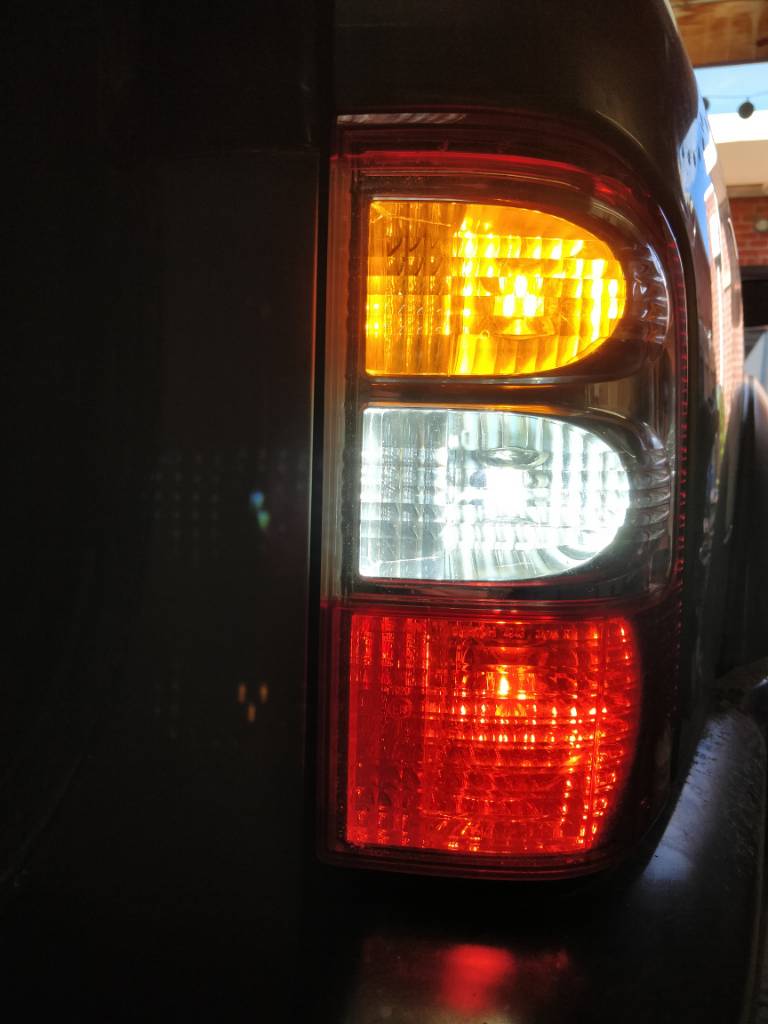
Some JW Speaker bulbs for brake light and indicators and some cheap AliExpress ones for the reverse lights. 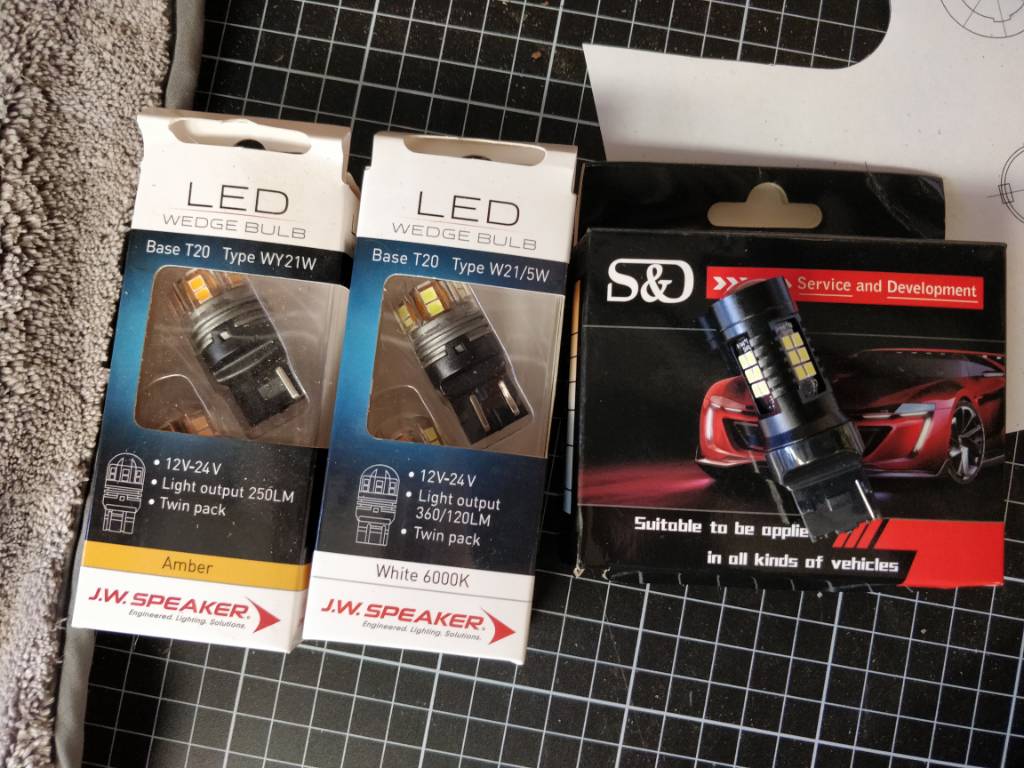 And here they are all working!
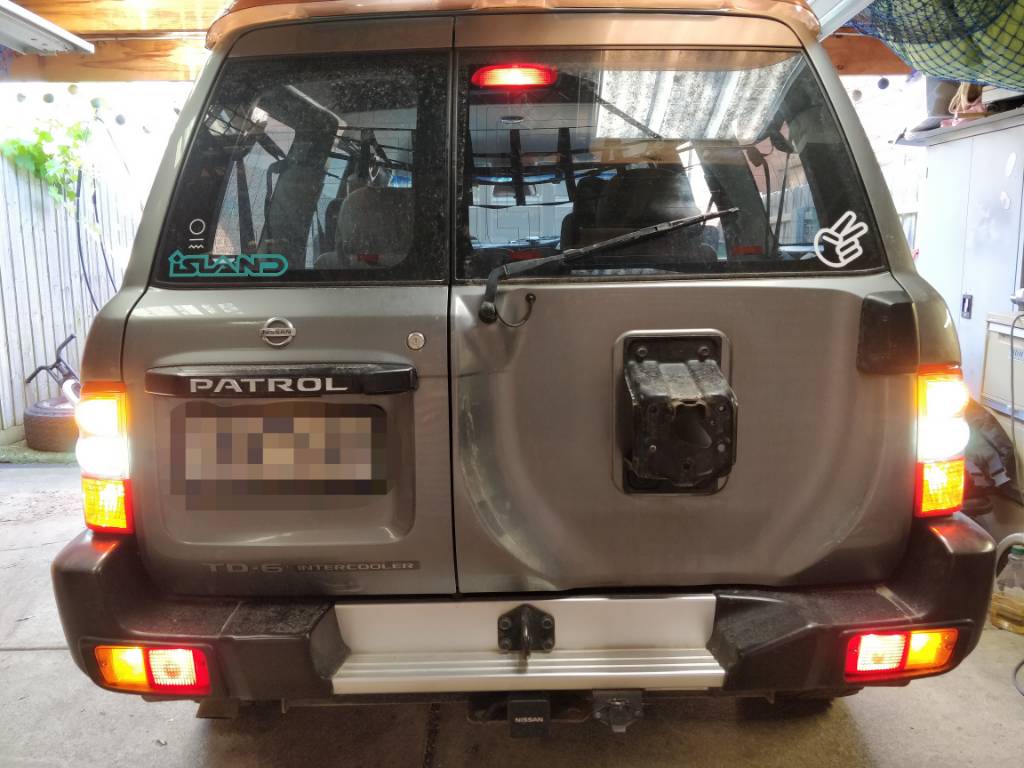
http://cloud.tapatalk.com/s/61ccd4e8..._Templates.pdf
Last edited by Cremulator; 30th December 2021 at 09:10 AM.
-
The Following 7 Users Say Thank You to Cremulator For This Useful Post:
Hodge (30th December 2021), jff45 (30th December 2021), MB (30th December 2021), mudski (22nd August 2022), PeeBee (12th April 2022), Plasnart (30th December 2021), Touses (30th December 2021)
-
12th April 2022, 06:33 PM
#43
Patrol Guru
Marks 4WD Adaptors Hydraulic brake booster upgrade
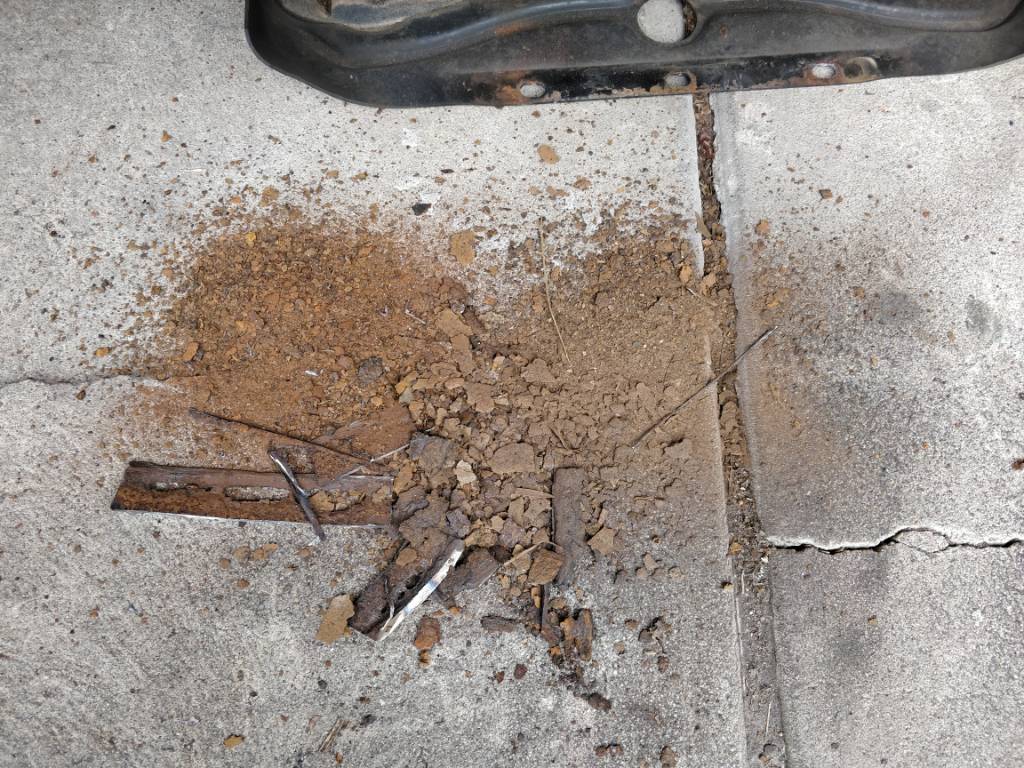
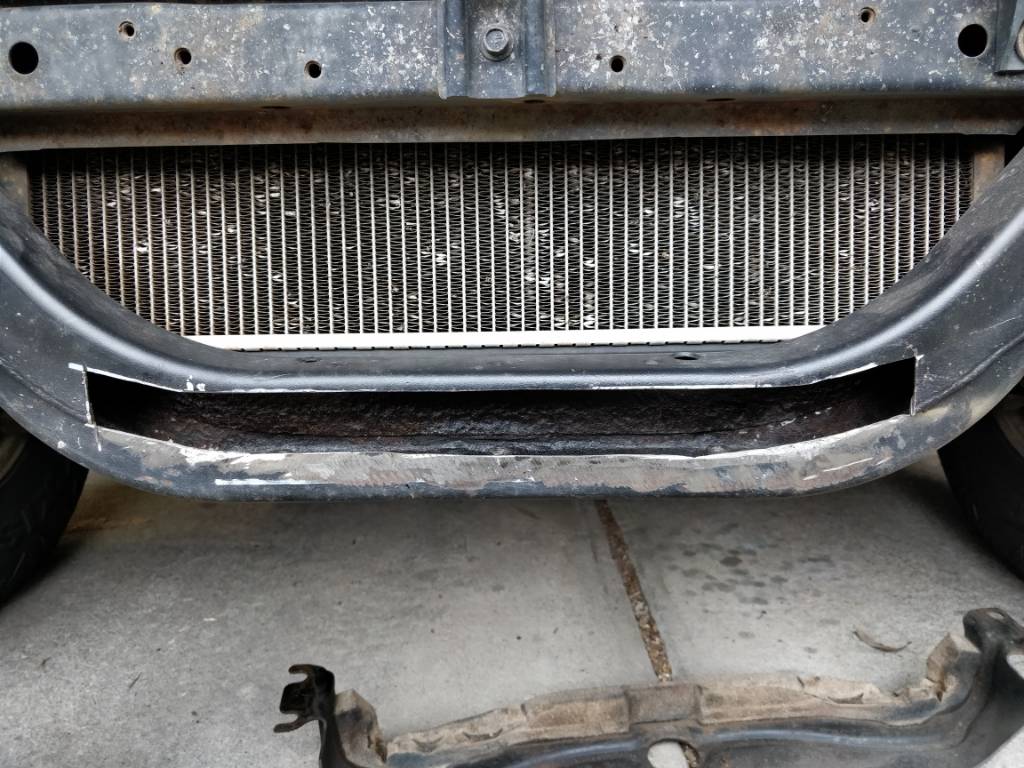
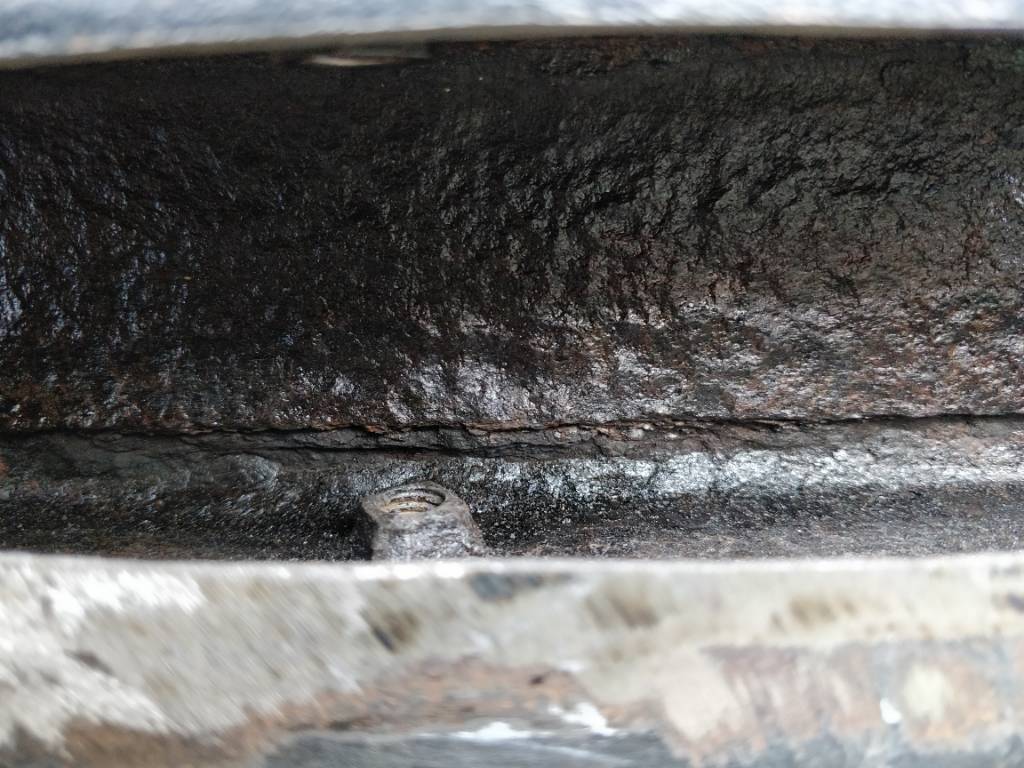
Some of you will probably remember this incident that really made me look at options for improving the stopping power.
Last month I fitted the Marks 4WD Adaptors hydraulic brake booster and braided brake lines.
I'll skip the whole removal and installation, but flag some points that may be helpful for others fitting this unit.
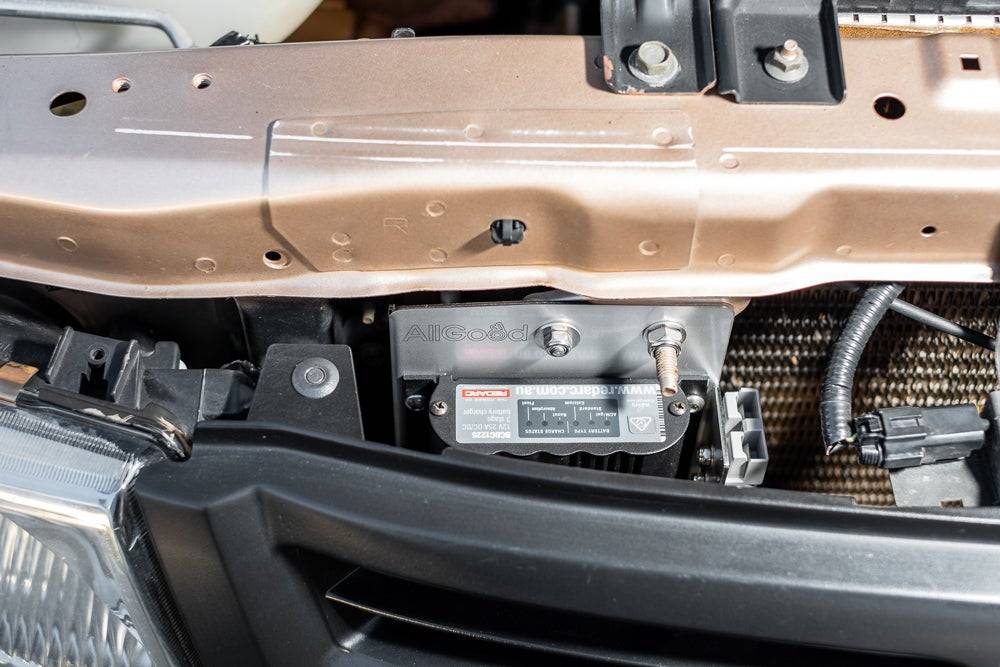
The kit comes with everything required and is pretty straightforward to install. Having said that, the unit is about 30mm-40mm longer than the factory booster so it is challenging to fit with the fuse box in the engine bay.
It took two of us a whole day to remove and fit the booster and replace all brake lines with the braided ones.
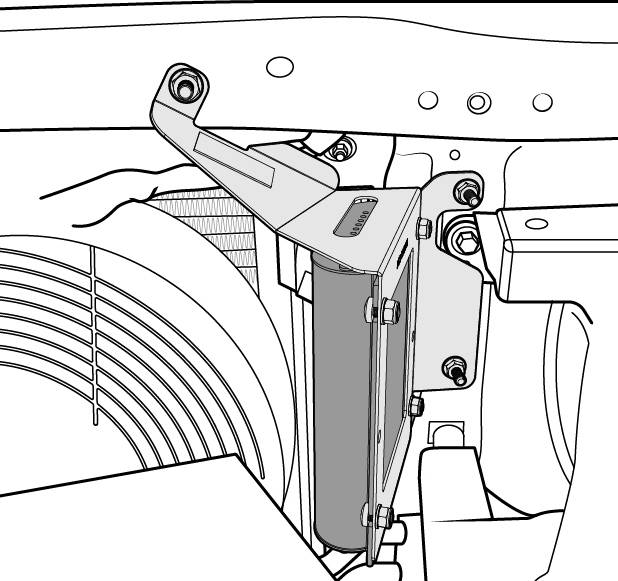
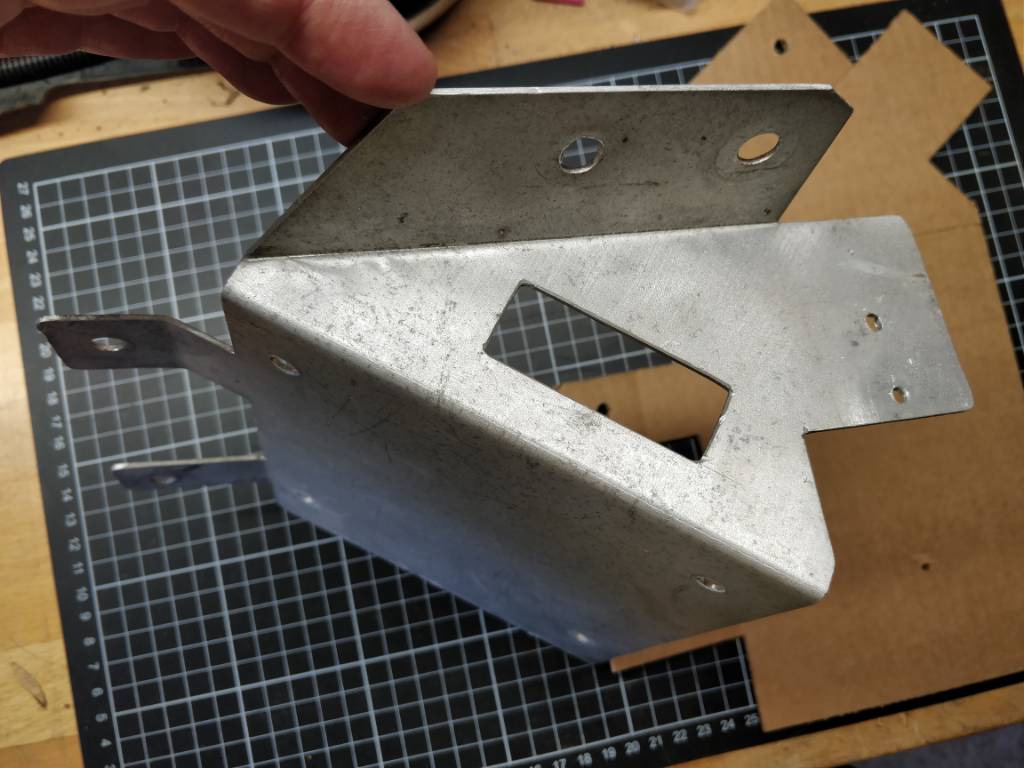
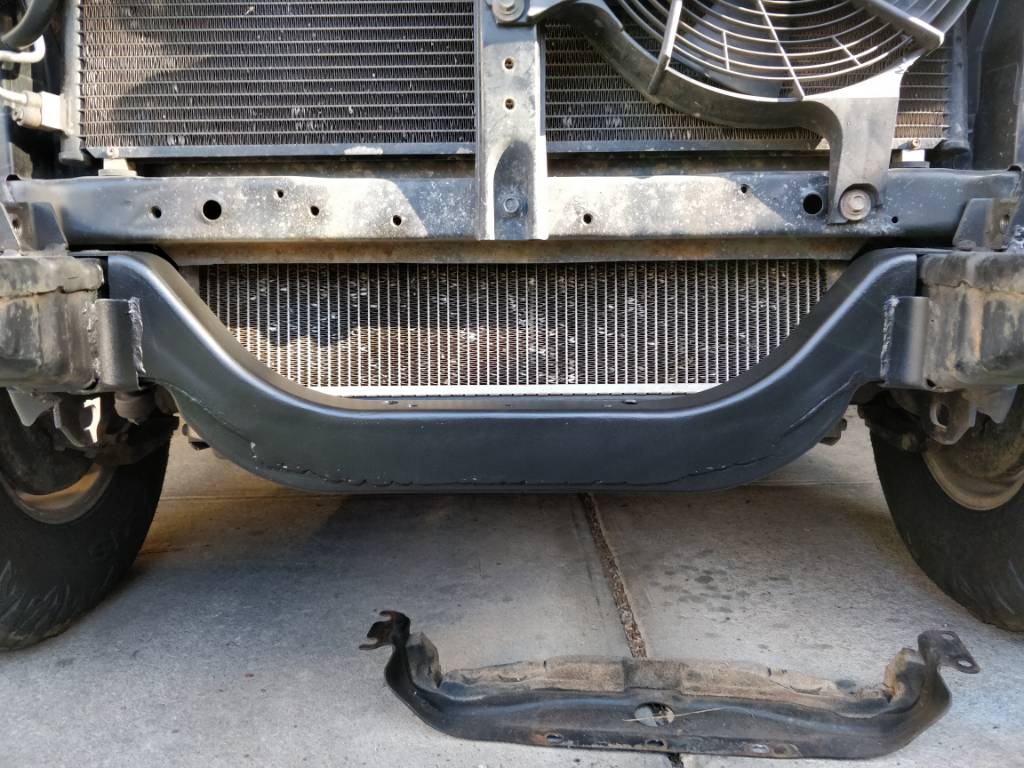
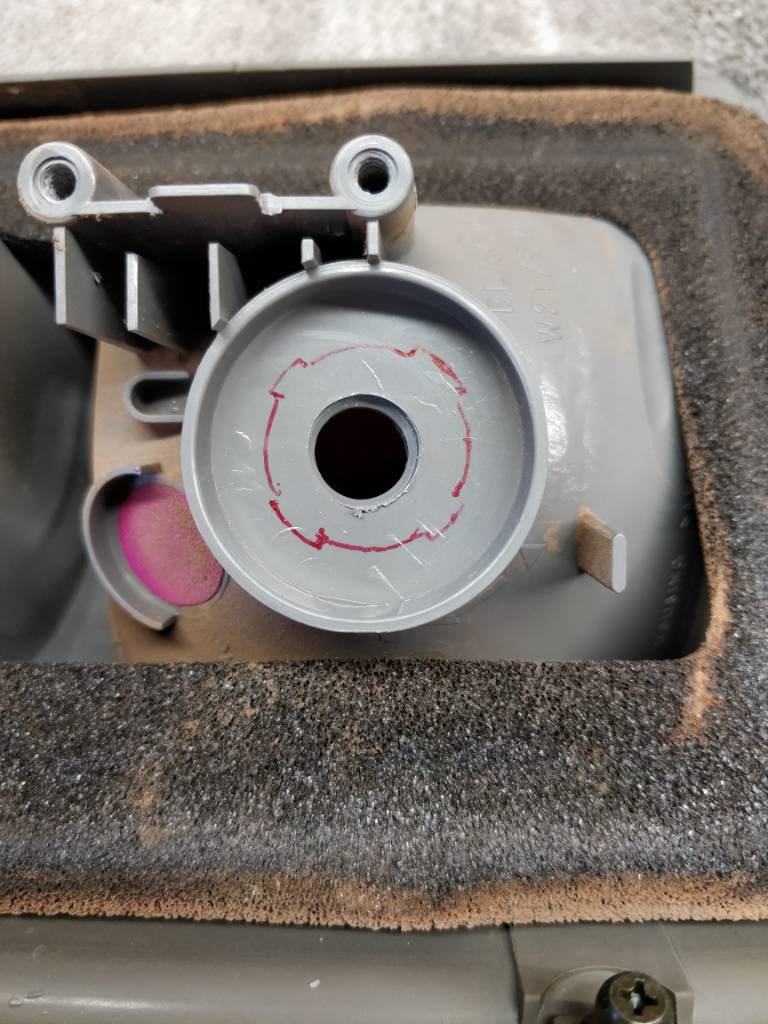
The only thing that required some modification was the bracket that holds the fuel filter, as one of the hard lines from the master cylinder fouled on it due to the extended length of the hydraulic unit.
Before:
IMG_20220313_103410 (Custom).jpgIMG_20220313_101819 (Custom).jpg
After:
IMG_20220313_184714 (Custom).jpgIMG_20220313_184708 (Custom).jpg
Here are pics of trying to fit it with the fuse box:
IMG_20220313_132546 (Custom).jpgIMG_20220313_132600 (Custom).jpg
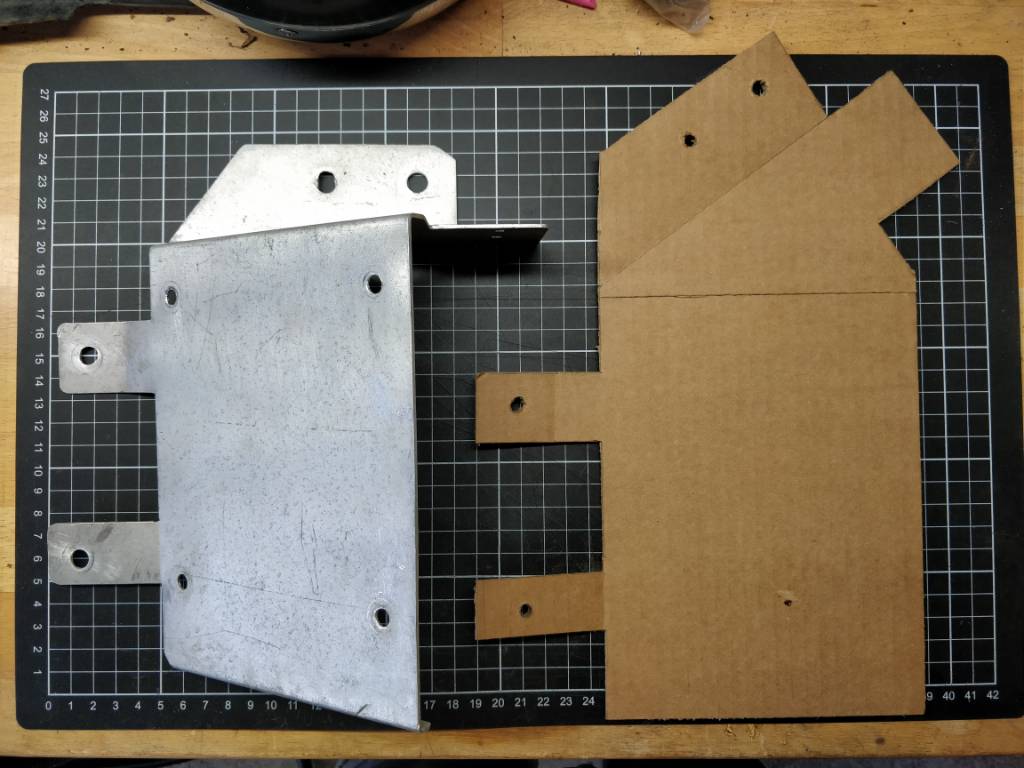
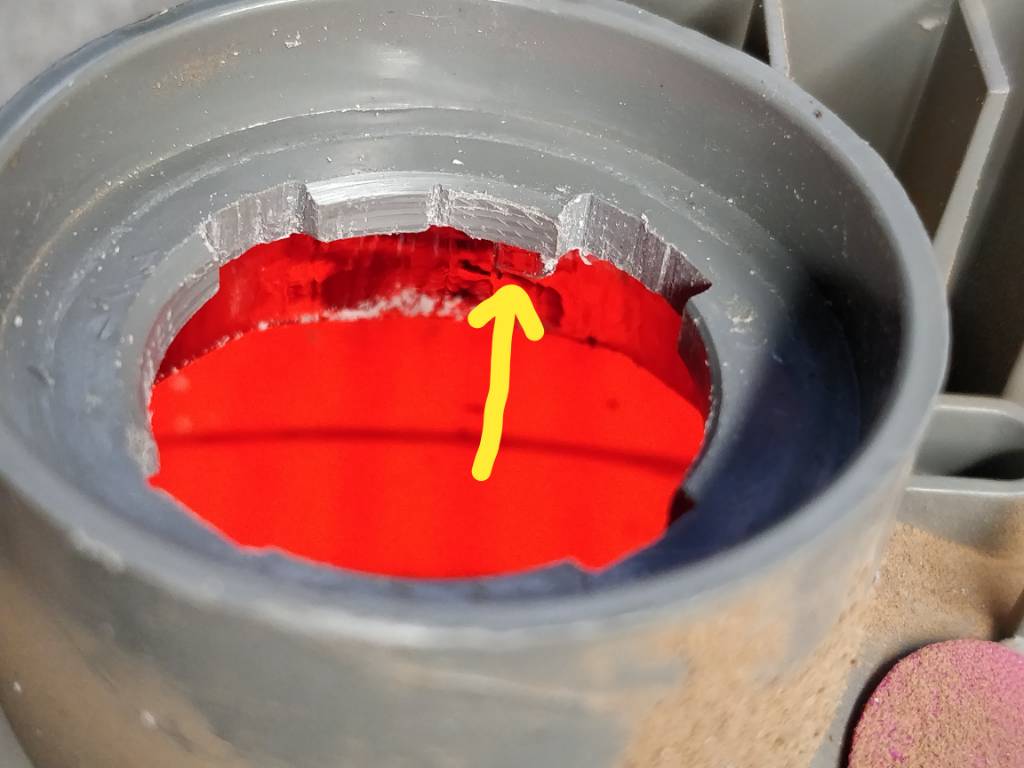
And this is the part of the bracket we had to modify to clear the brake line:
IMG_20220313_145709 (Custom).jpgIMG_20220313_145722 (Custom).jpg
So I will say the difference is amazing!
Instead of slowing you down like you were coming to the end of a theme park ride, as the factory brakes do, it now responds more like a car. The brake pedal has a firm feel with little give in it, and it now takes less pressure to get a response.
A friend of mine runs a garage that performs roadworthy inspections. They use a machine to measure braking performance as part of that test, so I arranged a before and after to see the difference it made on my car. It has a sensor to also measure pedal force.
IMG_20220129_131503 (Custom).jpgIMG_20220129_131507 (Custom).jpg
(Note: on Marks 4WD Adaptors website, they have test results braking from 100km/h using a 79 series dual cab LandCruiser weighing 3780kg)
Braking Distance Standard factory vacuum 98 metres
Braking Distance Marks4wd Hydraulic booster 58 metres
So this is the result of my experience, and I made sure nothing changed between tests (this is with an unloaded car, no passengers, no spare wheel, front tyre pressure 33 PSI, rear tyre pressure 35 PSI running 10+ year old 285/75R16 tyres with roughly 5mm tread, standard rotors and callipers)
Stopping_test_before_and_after.jpg
You can see that the distance was reduced slightly, but the pedal effort was greatly reduced. During the hydraulic adaptor test, pedal application had to be backed off as the wheels started to lock up (no ABS). With the factory set up, there was absolutely no way that you would be able to lock the wheels on my car.
I am very pleased with this modification and I don't feel like I will require any heavy-duty pads to further improve the performance as it may just induce locking the wheels more easily.
-
The Following 5 Users Say Thank You to Cremulator For This Useful Post:
jff45 (13th April 2022), MB (12th April 2022), mudnut (14th April 2022), Rossco (12th April 2022), Stropp (12th April 2022)
-
12th April 2022, 06:58 PM
#44
-
The Following User Says Thank You to PeeBee For This Useful Post:
Cremulator (12th April 2022)
-
12th April 2022, 07:38 PM
#45
Legendary

Yep bloody awesome have only heard good things about the upgrade definatly on the cards one day I think. . .
Sent from my SM-G781B using Tapatalk
-
-
13th April 2022, 08:14 AM
#46
Patrol Freak

"Instead of slowing you down like you were coming to the end of a theme park ride, as the factory brakes do, it now responds more like a car"
Excellent analogy!
I also recently did this hydroboost mod and, in my opinion, this should be a mandatory upgrade with any GVM increase.
Hmm, should probably be mandatory for any GU..
John
2001 GUII TI 4500 - Now converted to TD42T auto with Nomad valve body
-
The Following 3 Users Say Thank You to jff45 For This Useful Post:
Cremulator (13th April 2022), mudski (14th April 2022), Rossco (13th April 2022)
-
14th April 2022, 01:22 PM
#47

Originally Posted by
jff45

"Instead of slowing you down like you were coming to the end of a theme park ride, as the factory brakes do, it now responds more like a car"
Excellent analogy!
I also recently did this hydroboost mod and, in my opinion, this should be a mandatory upgrade with any GVM increase.
Hmm, should probably be mandatory for any GU..
Yeah I did the TB48 brake upgrade to mine, and when the engineer did the brake test he said he's never been in a Patrol that stopped like mine. Problem is, it stopps too good now, very skatey in the wet if Im not careful. ABS would be a nice addition.
-
The Following 2 Users Say Thank You to mudski For This Useful Post:
Cremulator (14th April 2022), jff45 (14th April 2022)
-
5th July 2022, 09:43 PM
#48
Patrol Guru
-
The Following 5 Users Say Thank You to Cremulator For This Useful Post:
Hodge (6th July 2022), jff45 (6th July 2022), MB (5th July 2022), Stropp (5th July 2022), Touses (6th July 2022)
-
7th July 2022, 04:50 PM
#49
Patrol Guru
-
The Following 4 Users Say Thank You to Cremulator For This Useful Post:
BrazilianY60 (7th July 2022), jff45 (8th July 2022), MB (8th July 2022), mudnut (7th July 2022)
-
7th July 2022, 06:49 PM
#50
Patrol Guru

Nice work.
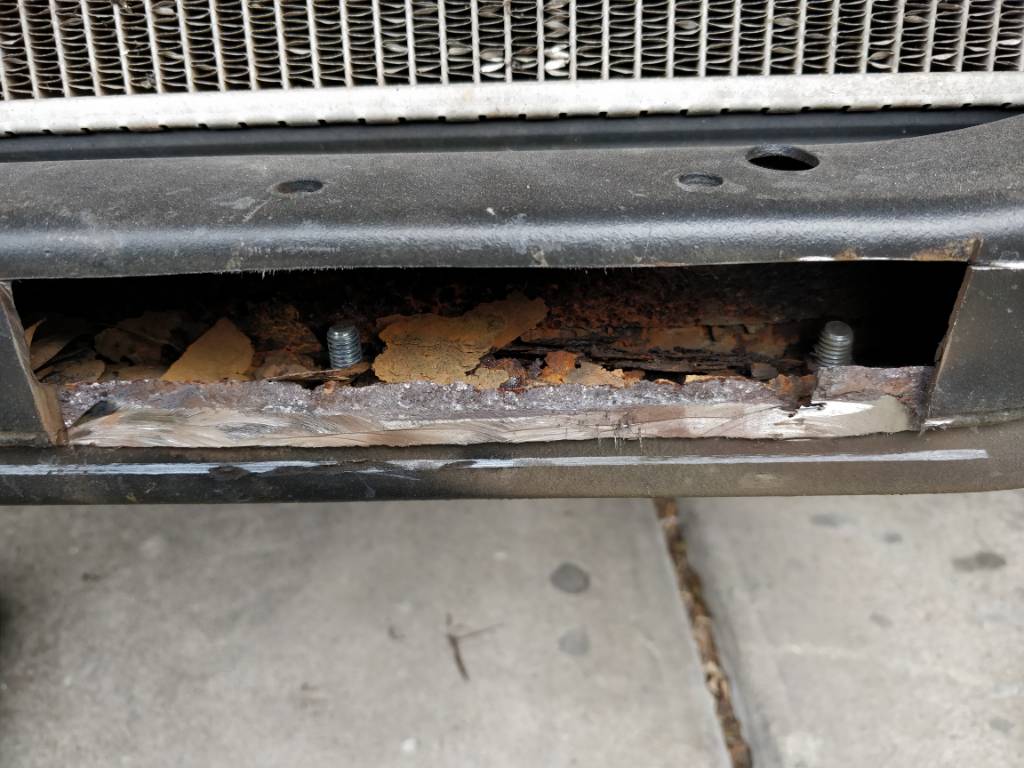
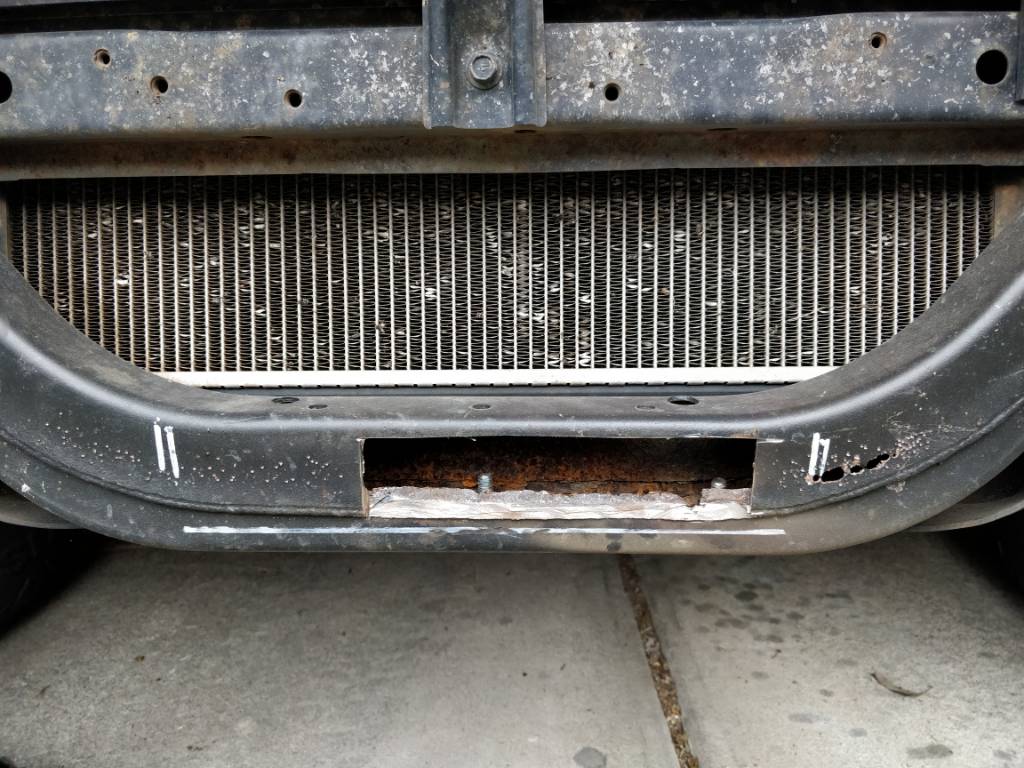
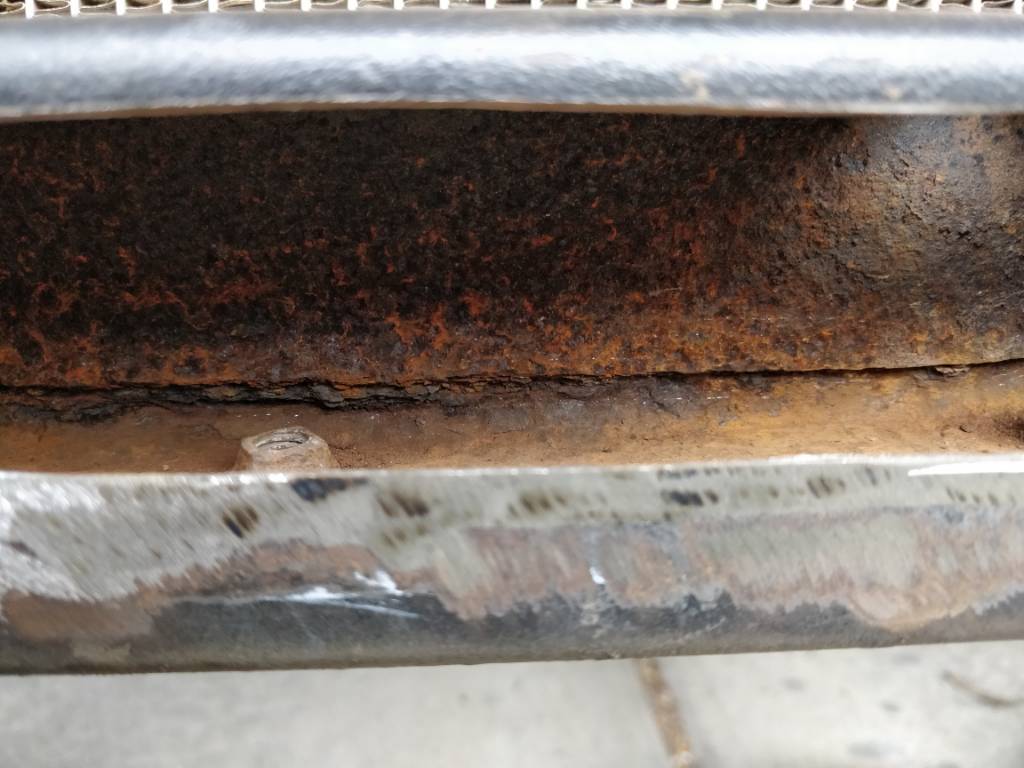
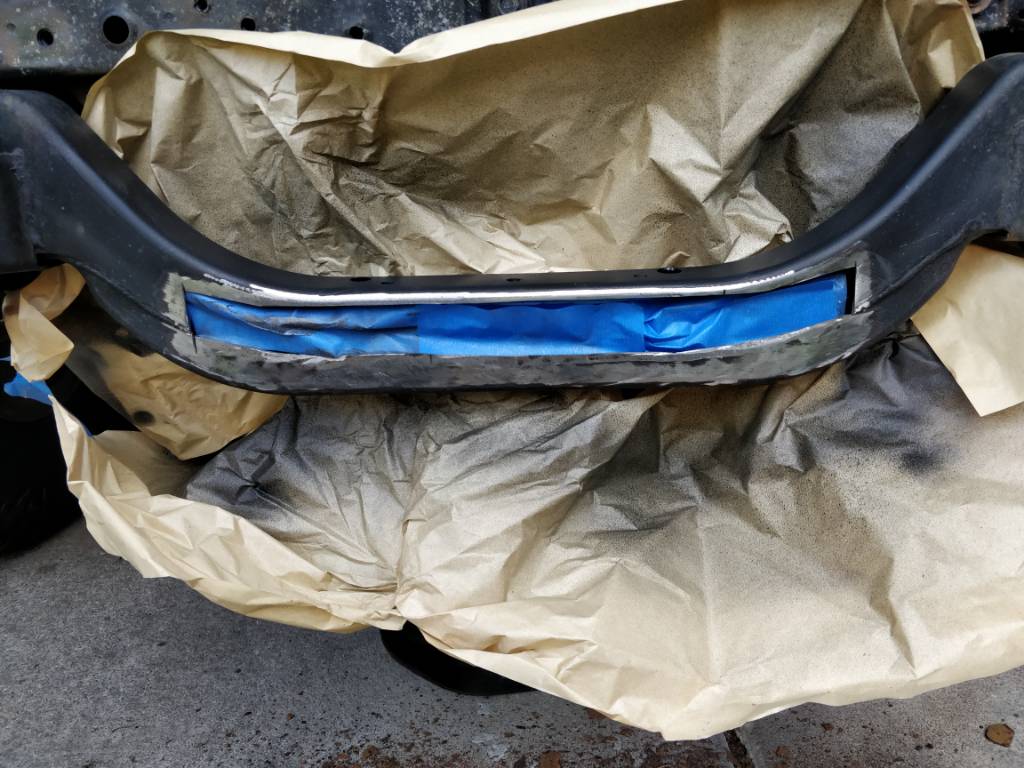
The inside rust that you protected with fish oil, why not use a rust converting product and then zinc-prime / paint as well?
Regarding the new welder, was it stick or mig? I have plans to learn to weld as well but I´ll start with stick. Stick welders nowadays are small, light and inexpensive due to inverter instead of transformer construction.
-
The Following User Says Thank You to BrazilianY60 For This Useful Post:
Cremulator (8th July 2022)


 Reply With Quote