-
8th July 2022, 10:37 AM
#51
Patrol Guru


Originally Posted by
BrazilianY60

Nice work.
The inside rust that you protected with fish oil, why not use a rust converting product and then zinc-prime / paint as well?
Regarding the new welder, was it stick or mig? I have plans to learn to weld as well but I´ll start with stick. Stick welders nowadays are small, light and inexpensive due to inverter instead of transformer construction.
Yep, I could have used a rust converter and painted it internally, but I felt like the access was difficult and that process was more labour intensive.
The fish oil was one application.
The welder I bought was a CIGWELD EasyWeld 160 MIG/stick inverter welder.
I used the gasless MIG to weld this.
I think the unit is really aimed at beginners as it's very easy to set up. It has a digital display and you set the wire thickness, and metal thickness and the amps are preprogrammed, but you can adjust and fine tune the settings as you gain experience.
You can also use it with gas too. 
-
The Following User Says Thank You to Cremulator For This Useful Post:
-
8th July 2022 10:37 AM
# ADS
Circuit advertisement

-
20th August 2022, 06:49 PM
#52
Patrol Guru
Swapped out the factory yellow 16 tooth speedo pinion gear with the brown 15 tooth gear and got to test it out on the freeway today.
With the speedo needle right on the 100 mark I'm seeing exactly 100km/h on the GPS speedo app on my phone. That's with 285/75R16 tyres and 3.9 diff ratios.
Previously with the same sized tyres I was reading about 92 on the speedo when the GPS speedo app was showing 100km/h.
Very happy with this modification and it's really easy to do.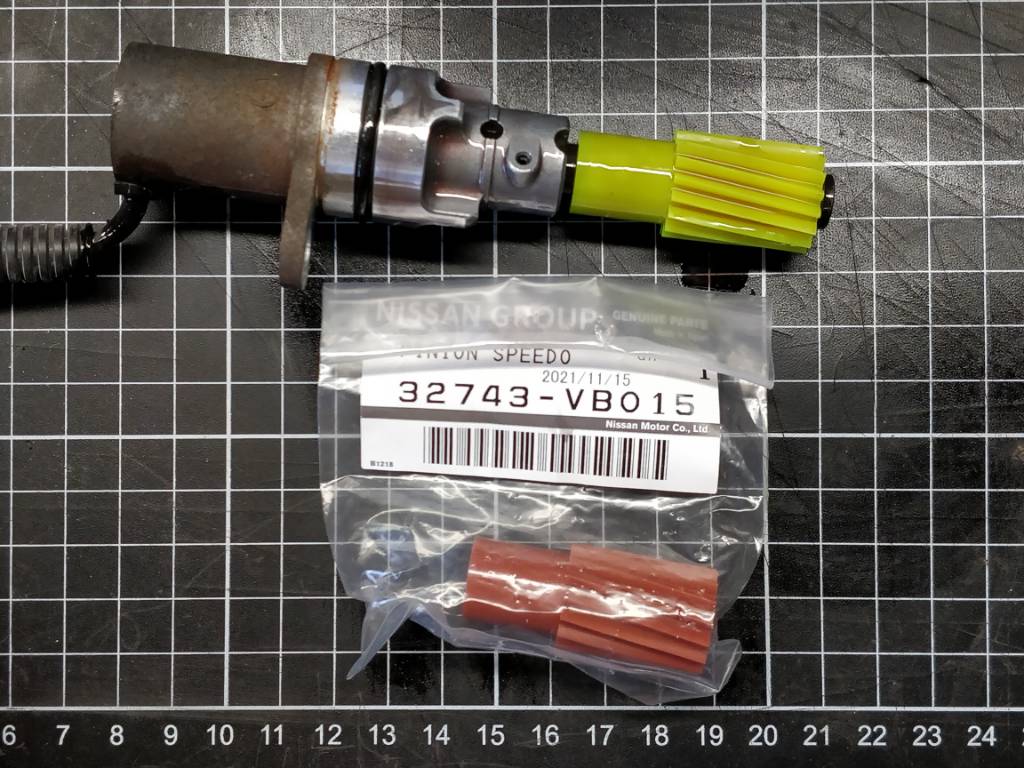
-
The Following User Says Thank You to Cremulator For This Useful Post:
-
5th September 2022, 09:21 AM
#53
Patrol Guru
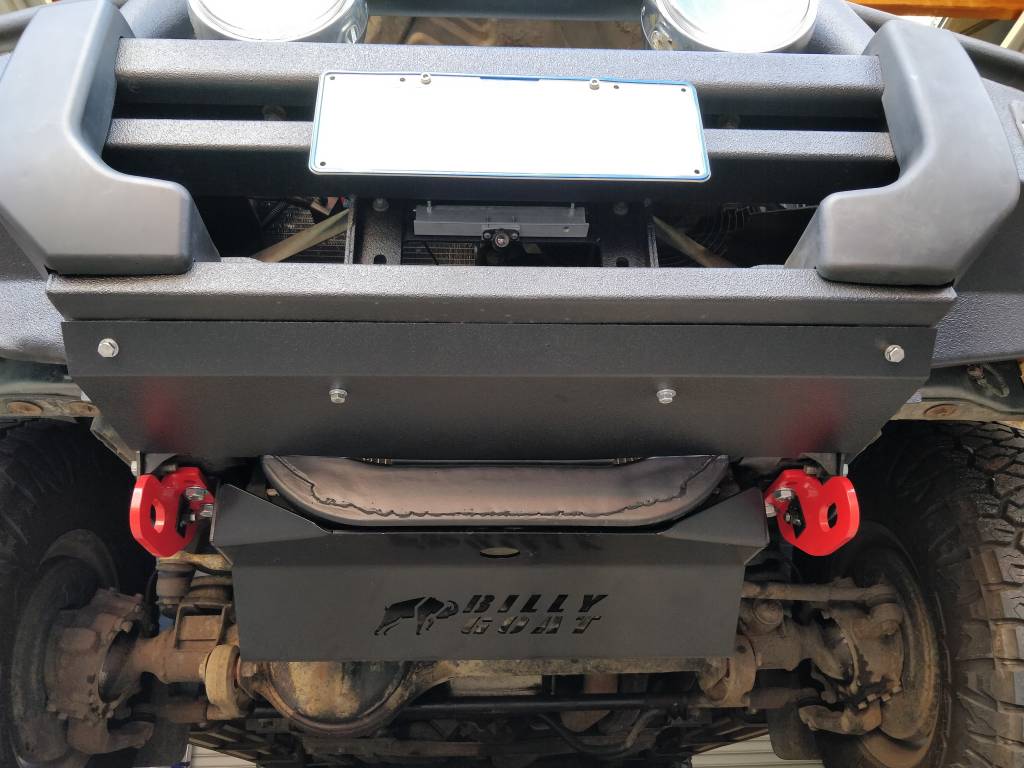
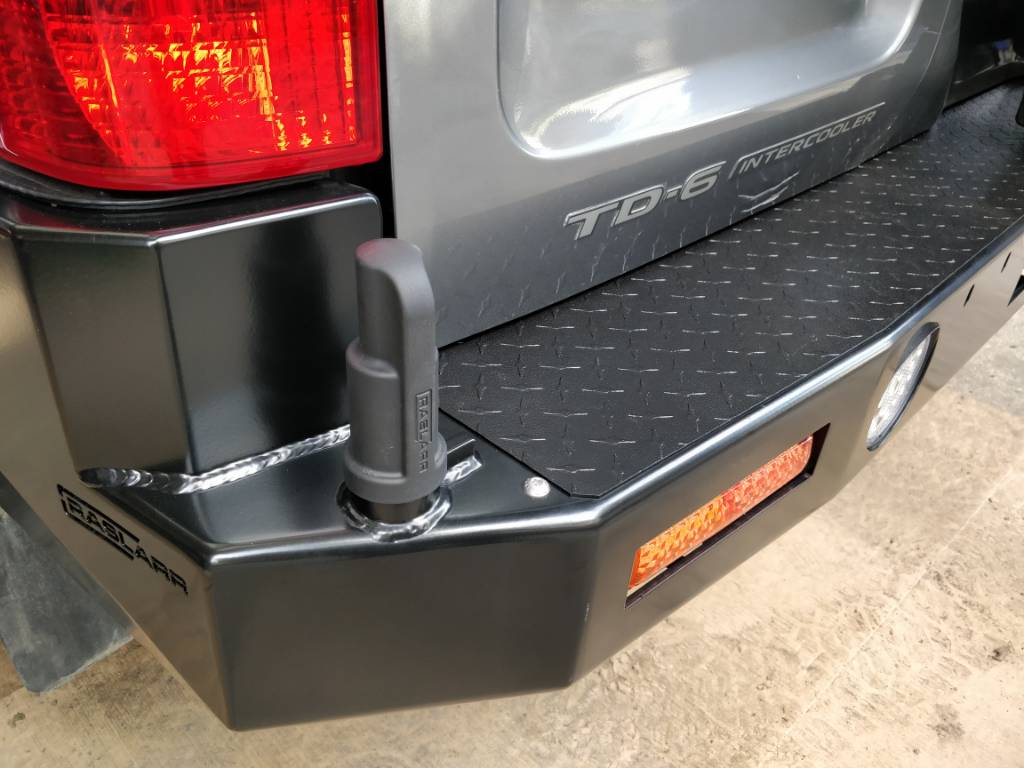
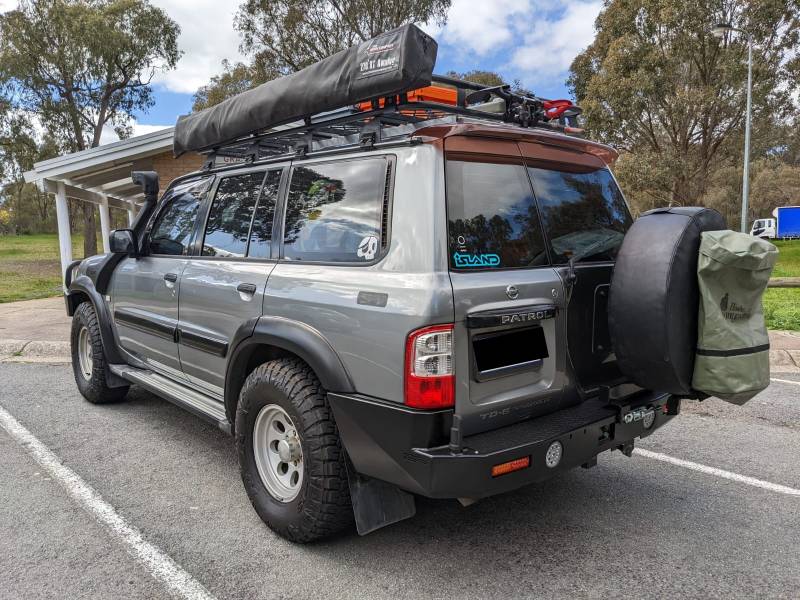
Radiator dam/guard and new Raslarr rear bar
My old aluminium bull bar had a plastic dam that attached from the bottom edge of the bar to the large front cross member.
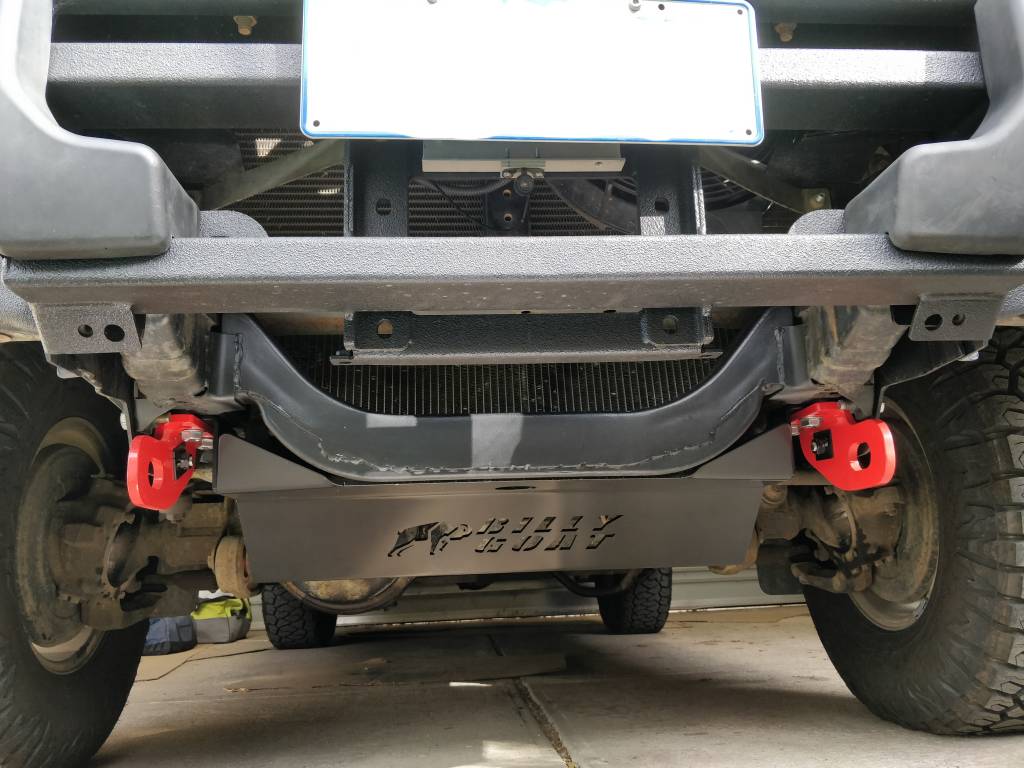
Here are the mounting points on the new steel bull bar for something similar, four on the bar and three along the cross member.

My bull bar didn't come with any other components so I thought I'd make one up to fit, to aid cooling and add some protection.
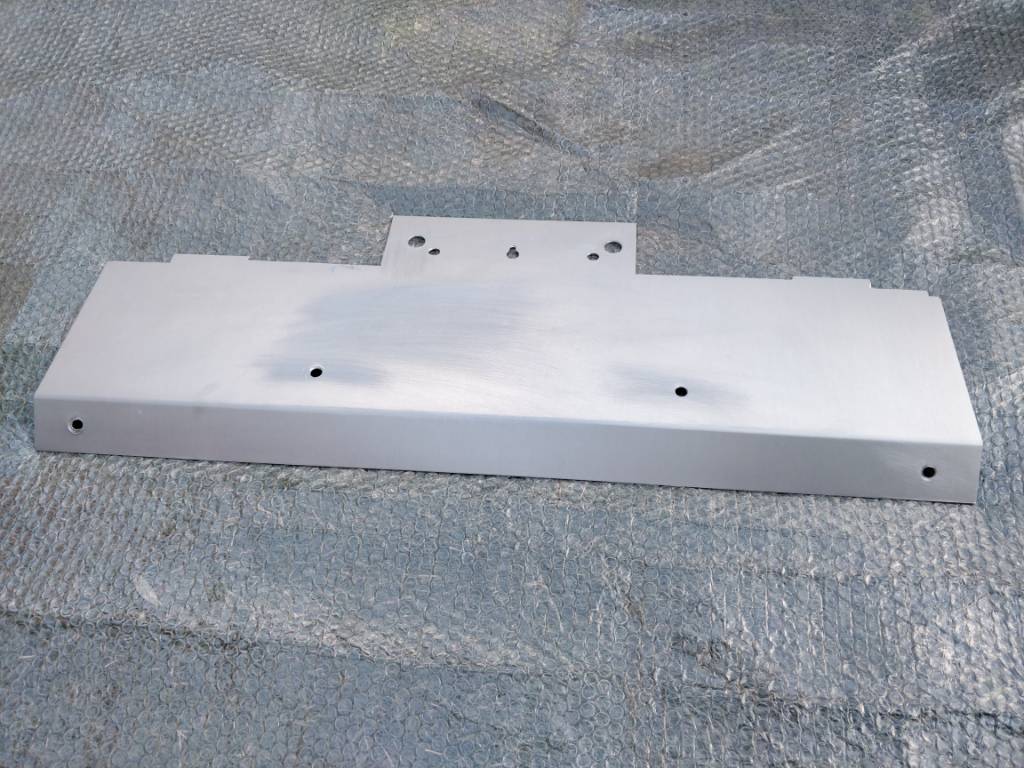
I created a cardboard template, then measured up the dimensions and bend angle and got a local metal shop to cut me a 810mm x 300mm x 2mm piece of aluminium and had them put a 45° bend 50mm inset on the long edge.

I cut the corners out with a grinder and hacksaw and drilled holes for all the bolt points. This was a little time consuming and challenging, but drilling oversize makes it easier to fit.
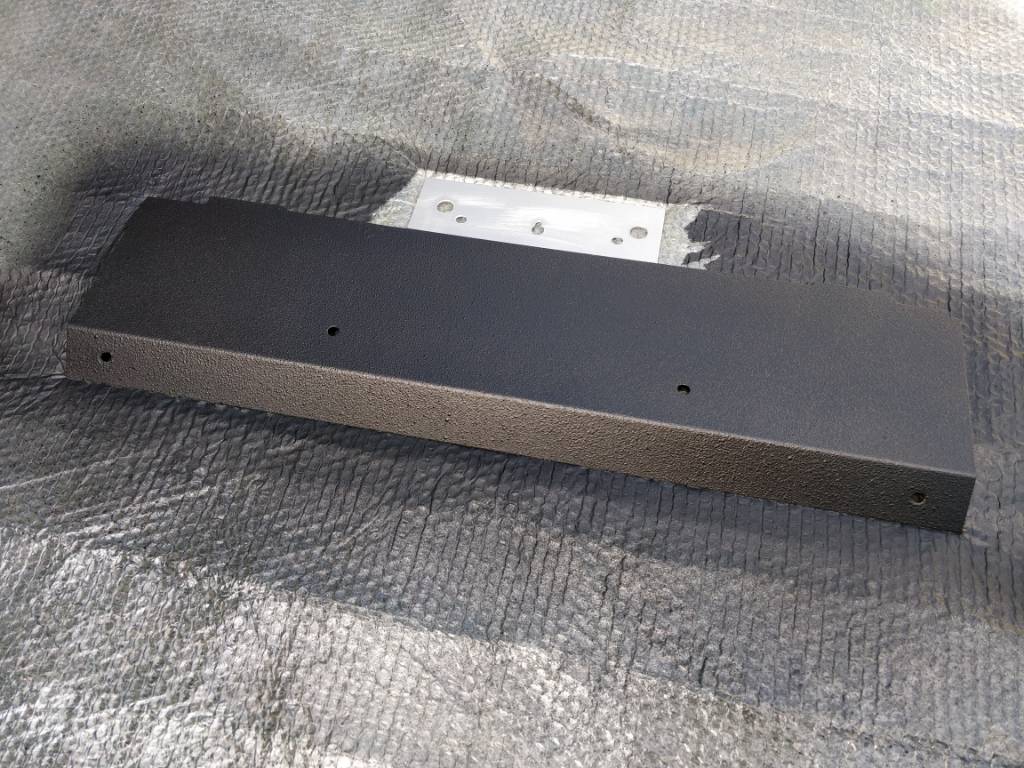
As I had painted the bull bar in raptor coating already, I thought I'd match this new piece with raptor paint too. I just used one of the raptor 2K Aerosol 400ml cans.
Here it is bolted up into place to the underside of the bull bar and top of the cross member.
The Raslarr rear bar I picked up and fitted myself - and I can tell you I see why their installation cost seems quite high, it was just more challenging and time consuming than I anticipated, but I got it done over a couple of days.
The rear bar is bloody well engineered and nicely finished. The new Raslarr laser cut logos on the sides are a nice touch.
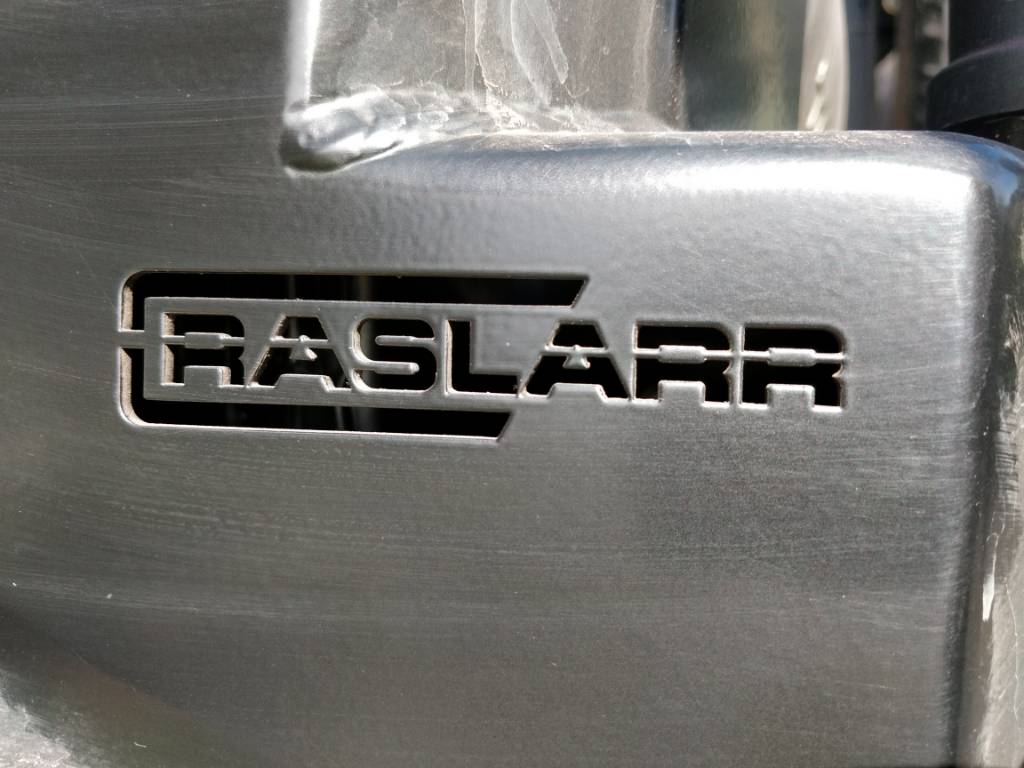
I ordered it with one swing away for the spare wheel.
The only thing I didn't really like, and this is totally personal preference, was the aluminium checker plate step. It fits well and is functional, but I didn't like the silver finish. It felt out of place with the rest of the car.
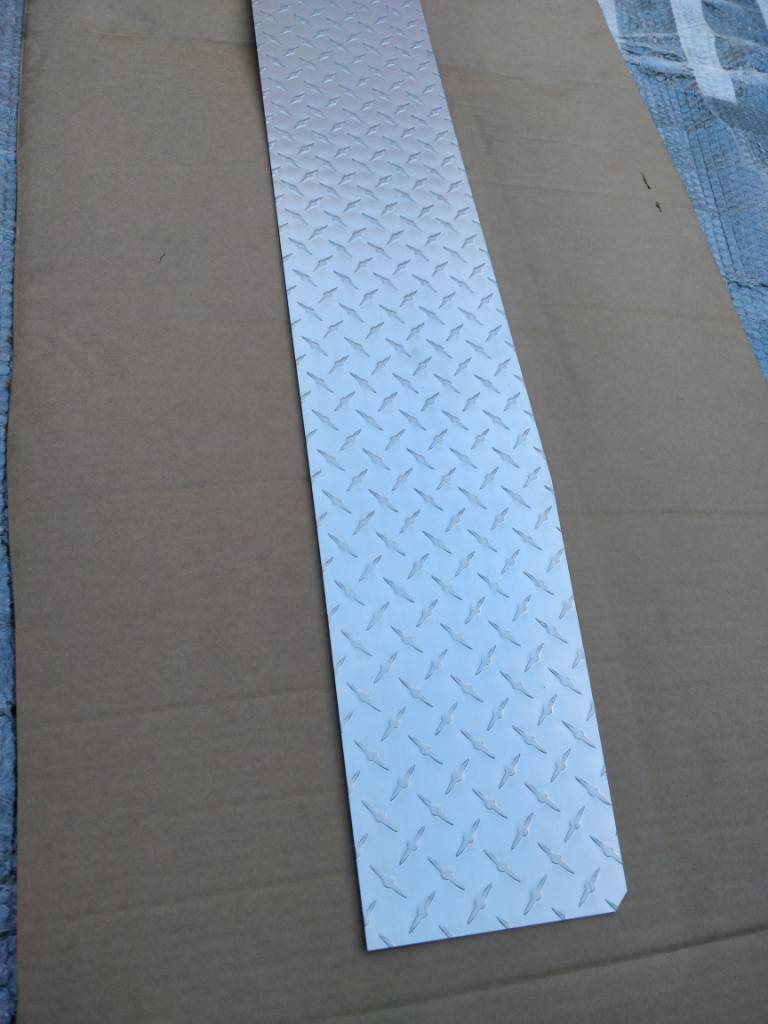
So I prepped it with some raptor adhesion promoter and gave it a coat alongside painting the radiator guard.
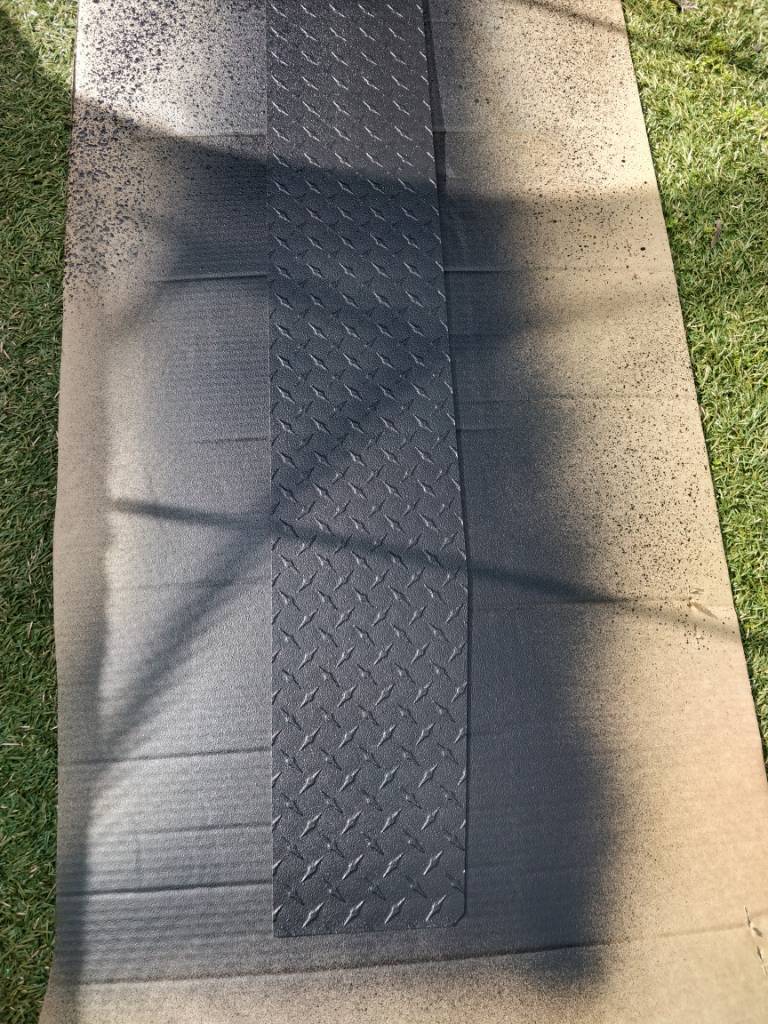
It came up well and looks right at home on the black powder coated bar.

Last edited by Cremulator; 13th September 2023 at 09:26 PM.
Reason: Clarification on photos
-
The Following 6 Users Say Thank You to Cremulator For This Useful Post:
growler2058 (6th September 2022), Hodge (5th September 2022), jff45 (6th September 2022), MB (16th July 2023), MB TD42 (19th July 2023), mudski (5th September 2022)
-
16th July 2023, 12:55 AM
#54
Thanks 
-


 Reply With Quote
