-
24th May 2015, 12:00 PM
#1
Expert

-
The Following 6 Users Say Thank You to LaughingBeagles For This Useful Post:
4bye4 (24th May 2015), Bigcol (24th May 2015), Clunk (10th June 2015), skiman (24th May 2015), threedogs (7th December 2015), Woof (24th May 2015)
-
24th May 2015 12:00 PM
# ADS
Circuit advertisement

-
24th May 2015, 01:08 PM
#2
Expert
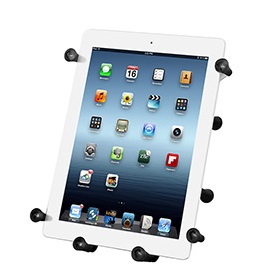
USB Charger and Tablet Holder
Next was adding a USB Charger and Tablet Holder.
With thanks to Rocket55 for the info in this thread, and thanks to TimE for the info in this thread.
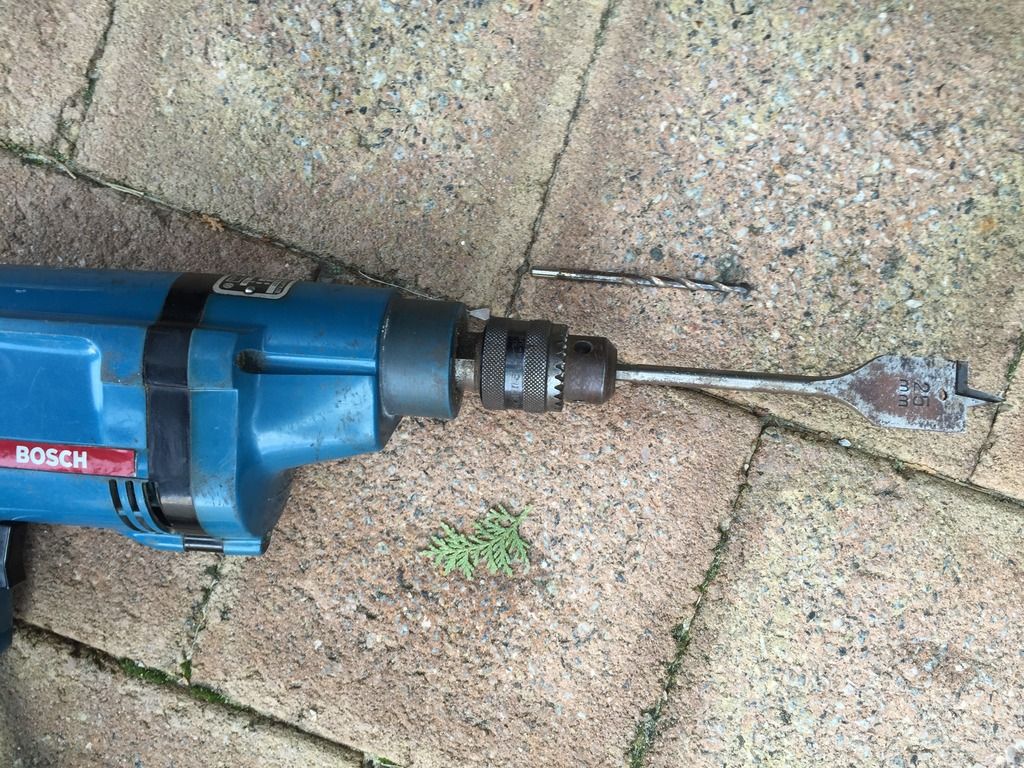
First up, tools you will need:
- Medium Phillips head screwdriver
- Smaill Phillips head screwdriver
- Medium flatblade screwdriver
- Plyers
- Side cutters
- Soldering Iron
- 5mm drill bit
- 25mm Drill bit
- 4mm socket or ring spanner or spanner
- Half round file
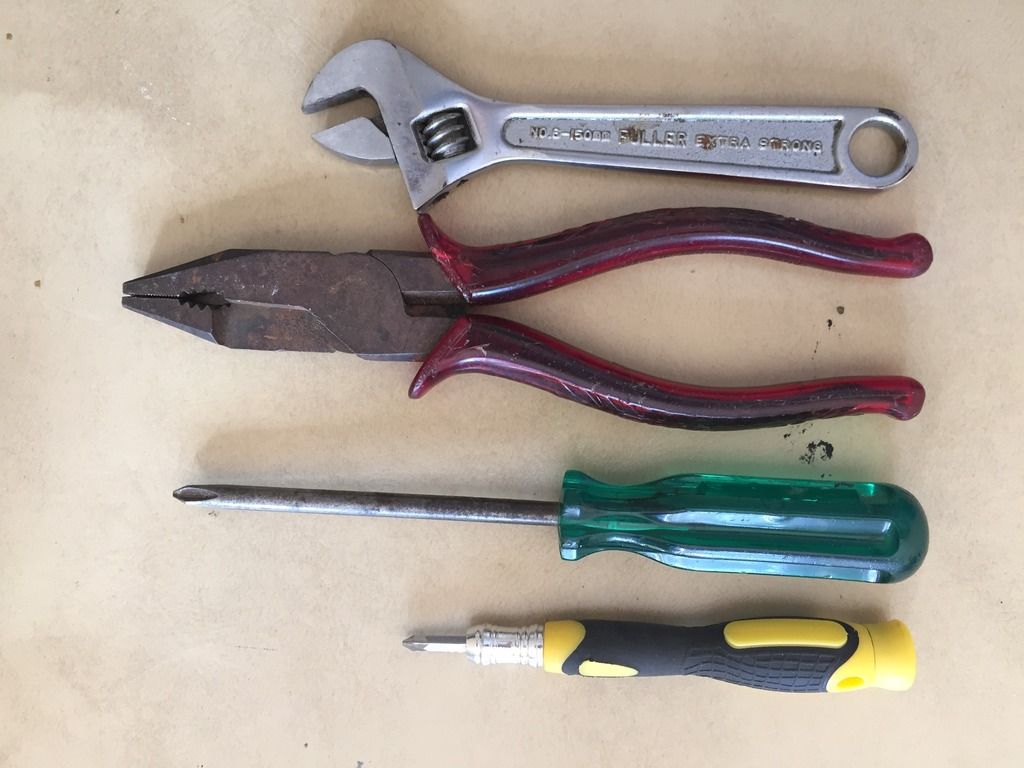
(Yes, a couple of tools missing sorry about that!)
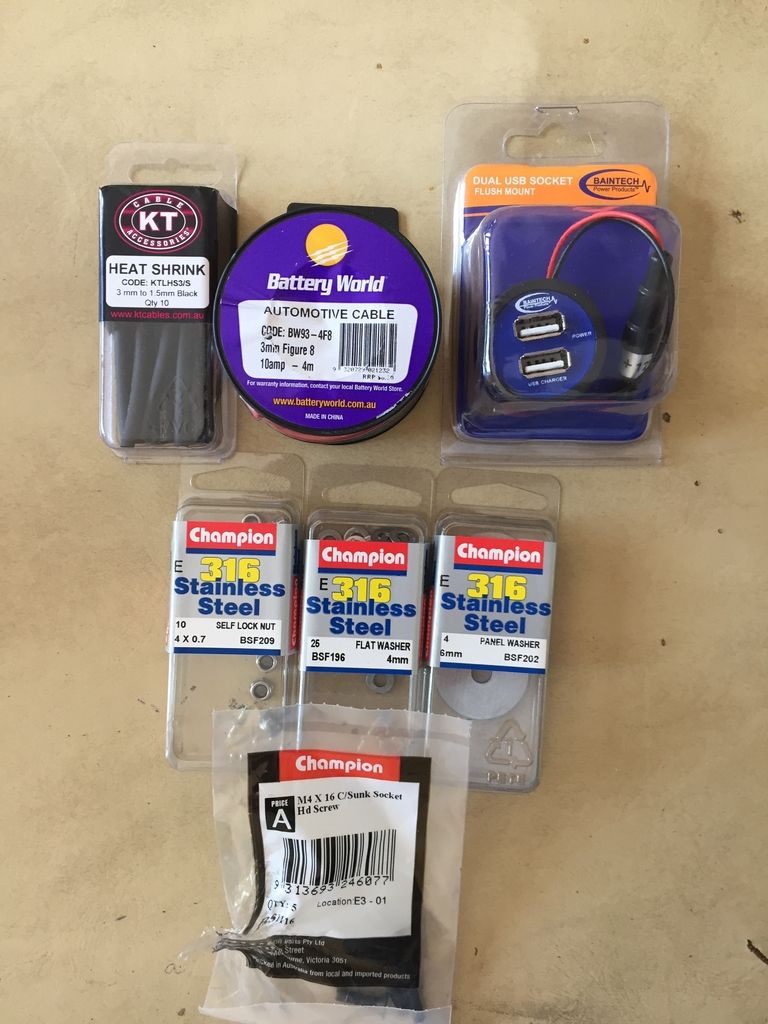
Next, this gear to install:
- M4 self locking nuts (for USB)
- M4 Flat washers (for USB)
- M6 Panel Washers for the RAM ball
- M4 Counter sunk HD Screws (for USB)
- M5 Machine Screw Panhead (not shown)
- M5 Self Locking Nuts (for Tablet Ball)
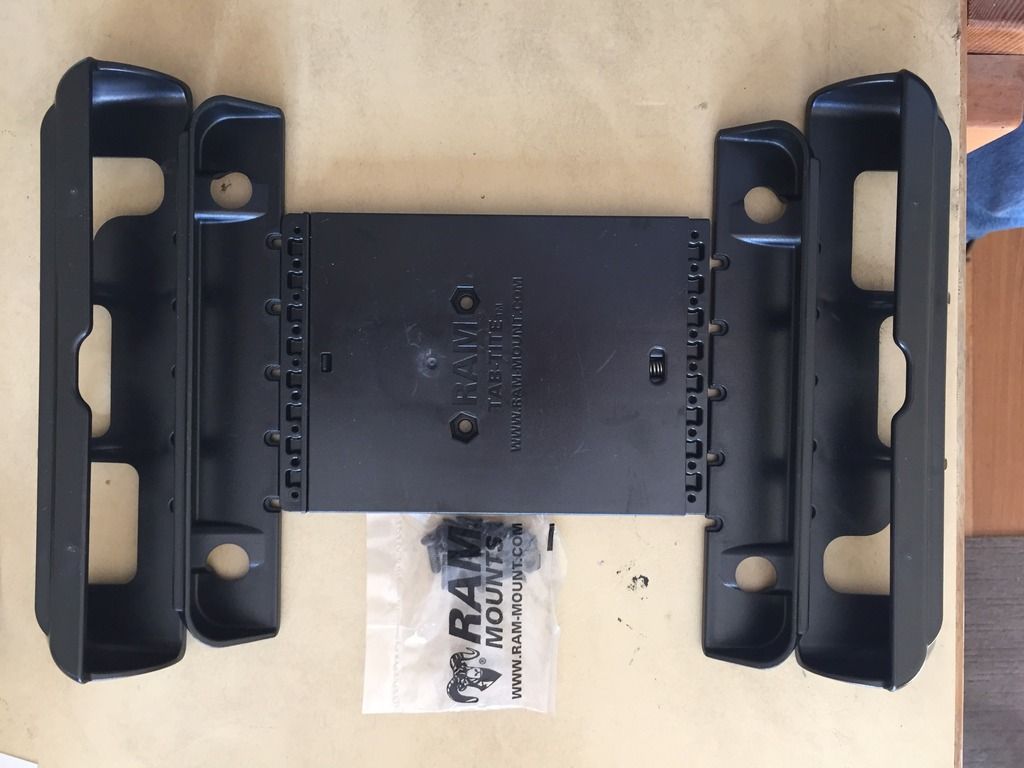
Parts List
From Southern Insight:
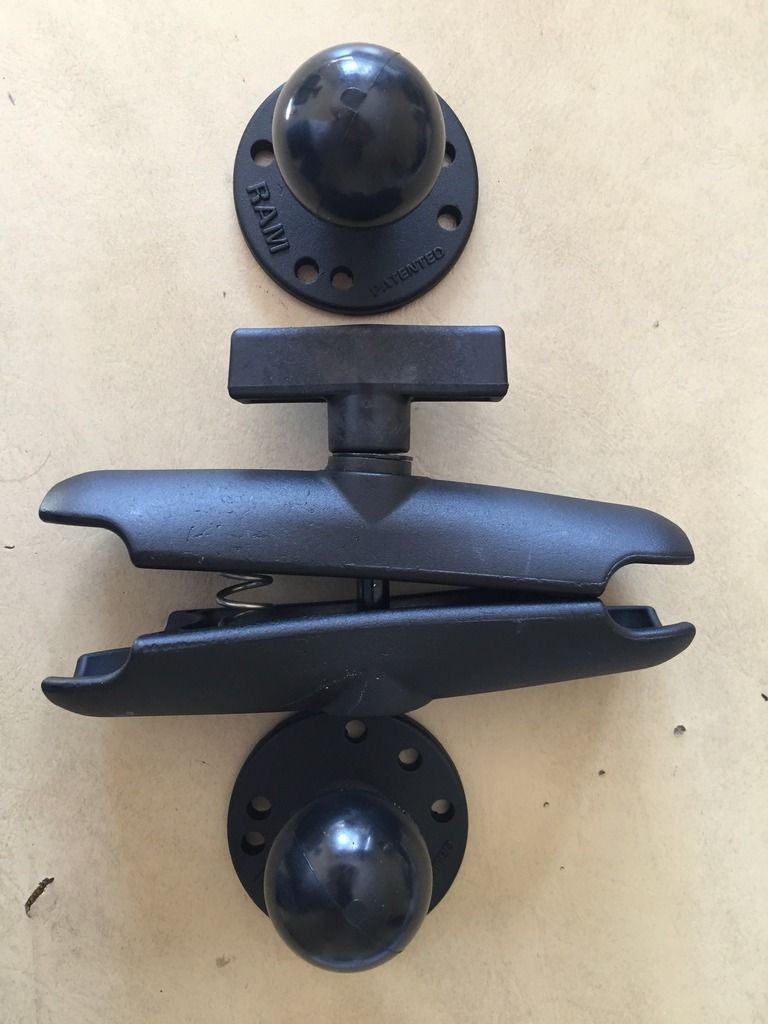
- RAM-101U arm
- RAM-HOL-TAB-LGU tablet holder
From Battery World Joondalup:
- Baintech Dual USB Socket - Flush Mount. BTUSB-001. Small enough profile to fit in the small space behind the cubby hole.
- 3mm figure 8 auto cable (to wire the USB to power)
- Relevant sized heatshrink (I did not end up using this)
Steps
Step 1 - Removing the front panel and cubby hole
I am going to quote Rocket55 (credit to him, not me). I followed this without a hitch:
- Start by removing the 2 screws just above the temperature control know, these nearly point straight up so you'll need to have a little look see.
- Once these are out, simply grab the silver panel and pull it off. It comes straight back towards you, ie: towards the back of the car. I find it easiest to start with the bottom right hand corner, pop this out, then bottom left and pop this out, then just pop the top off. It's only held on by spring clips.
- Unplug the rear demister and hazard light switches. [In my case, I also had to unplug the LED Bar light switch]
- Once the radio surround is off, you'll see 3 screws that hold the bottom of the aircon vents in. Remove these. Grab the vents and unclip them from the dash, ie. Pull them towards you. They are a bit stiff but the come out. Again I start with one side at a time. The vents don't feel too strong so be a bit careful and sensible here.
- Now for the tricky bit. You'll now find the whole air vent panel ie: the two air vents and the centre storage box is loose and only being held in at the top in the centre. There is a plastic clip there. It's a spring loaded "tongue" that goes through a slot. The tongue is on the car and the slot is on the panel which comes off (I think). I use a small screwdriver and squeeze it in between the dash and the panel, coming from the side as opposed to straight in and depress the tongue to release the panel. It can be a bit fiddly.
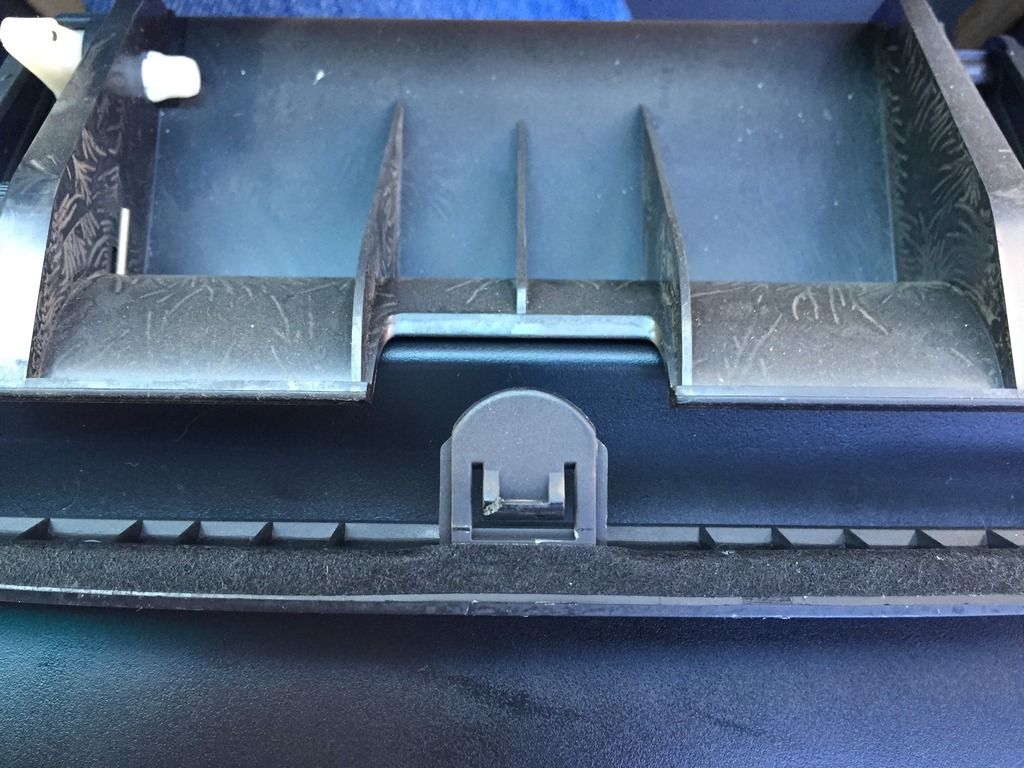
- This photo shows the clip that needs to be pushed gently down - exactly as Rocket55 describes.
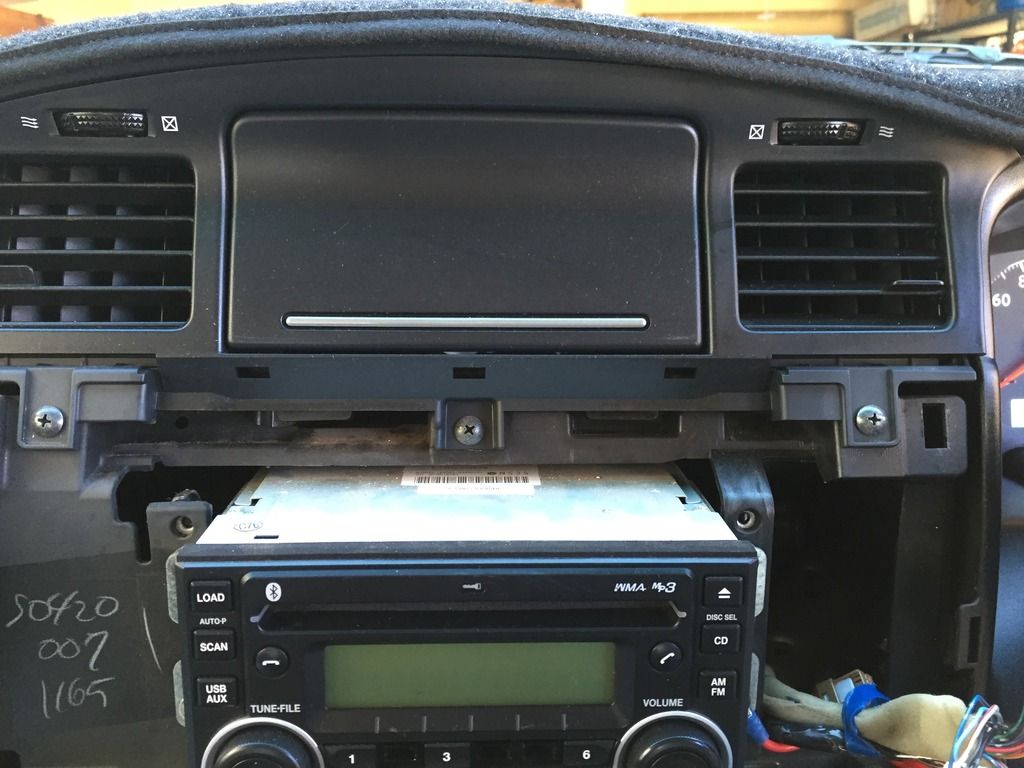
It should now look like this:
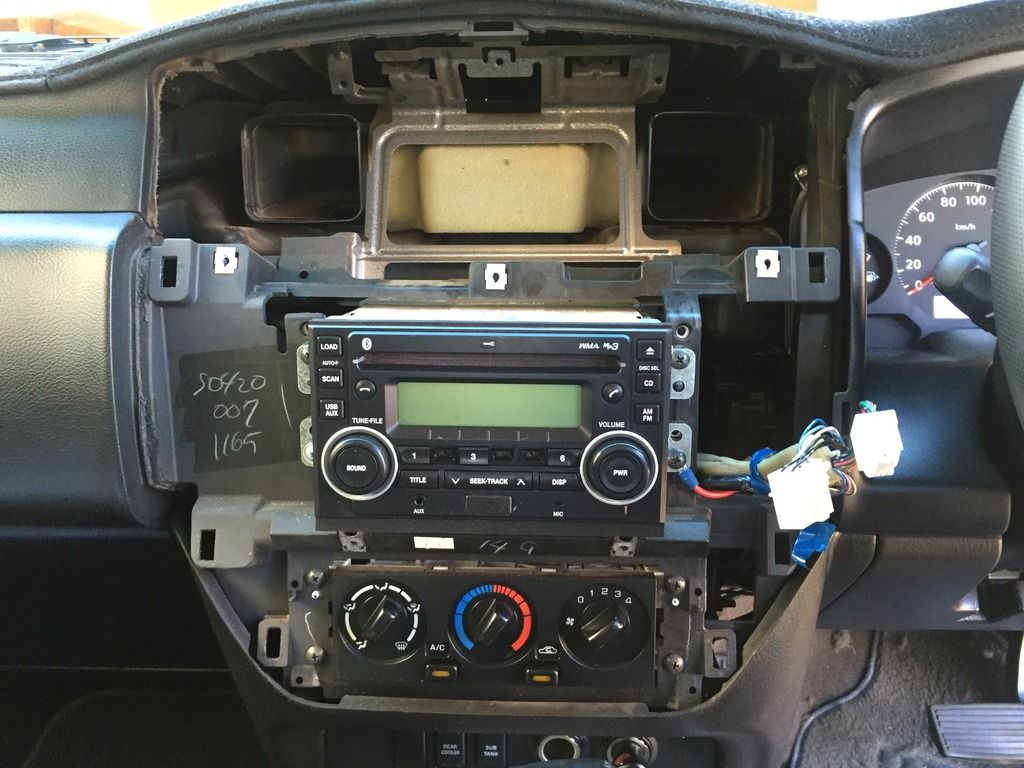
Note in the middle top where the dash is, is the clip into which goes the cubby hole unit.
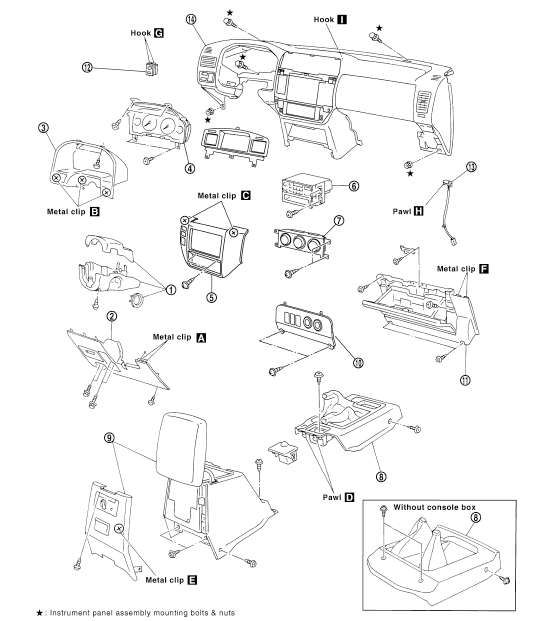
Here's a diagram of where all the dash screws are that helped a lot - again credit to Rocket55:
Step 2 - Remove the bottom unit containing the cigarette lighter (I chose the cigarette lighter as my power source for the USB)
- There are three screws on the centre console - two on the outside bottom edge and one underneath the ashtray. Remove those
- Next, pull the console up and towards you so as to show a gap where the cigarette lighter unit is
- Then, find the two screws holding the unit in and remove those (easier than removing the cigarette lighter - believe me, I faffed about with that for ages).
- Pull the unit up and to the left and it will slide out exposing the cigarette lighter wiring
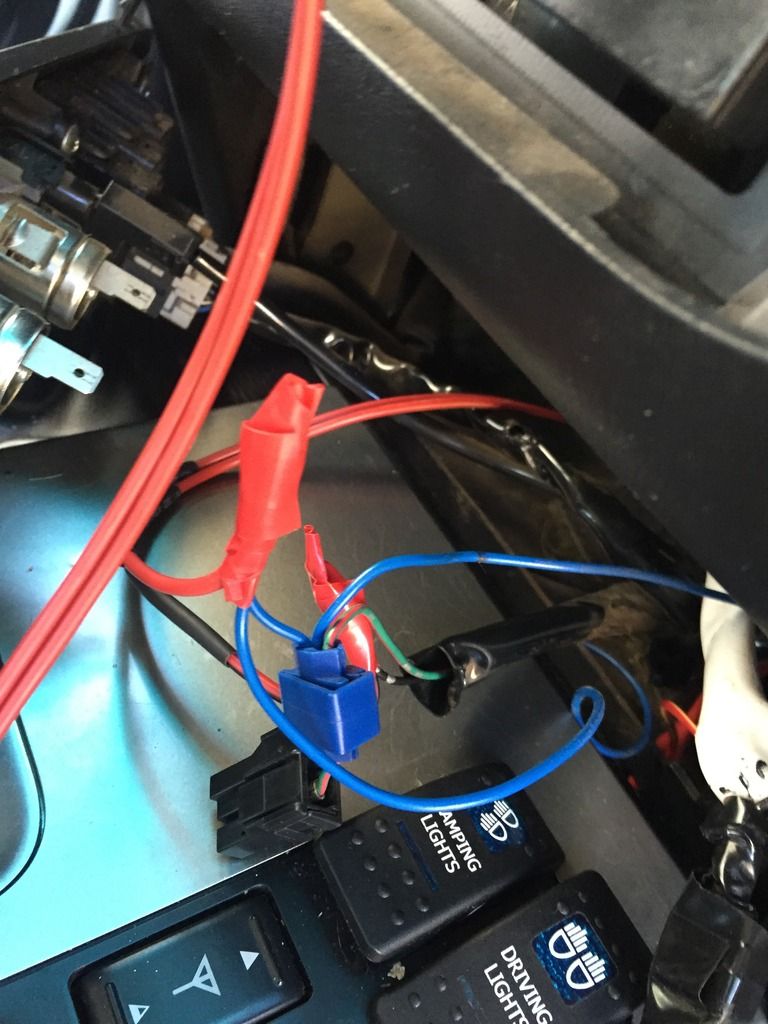
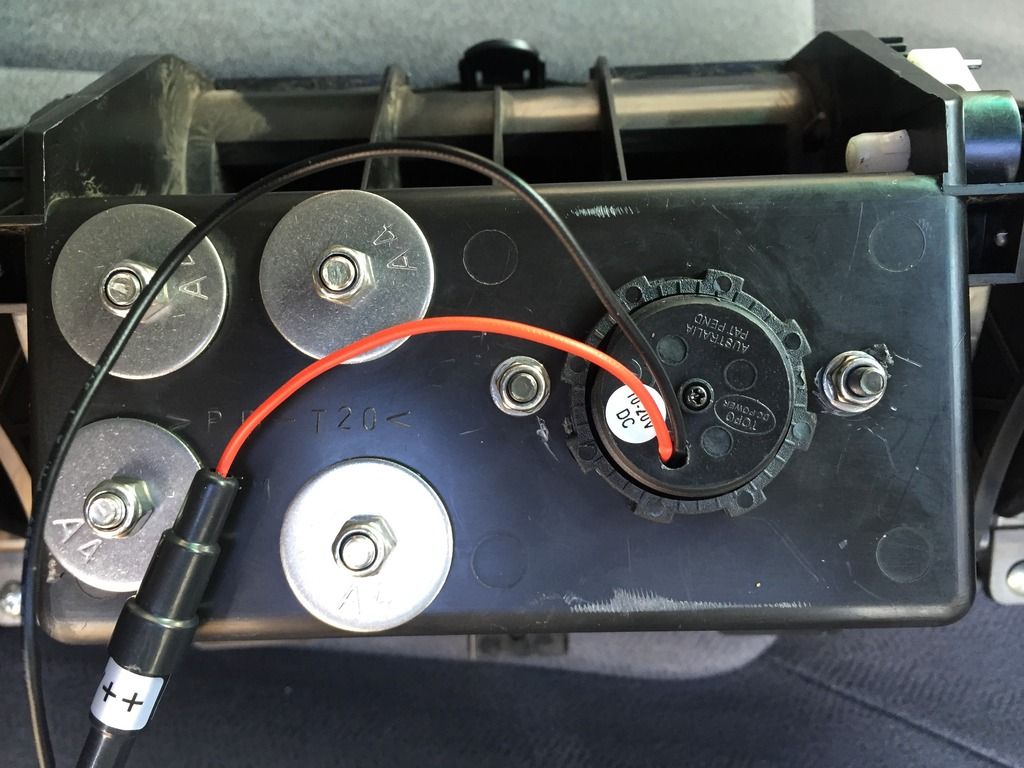
Step 3 - feed your wire through
Next, feed your figure 8 wire from the top of the dash, down the back to where the cig lighter wiring is.
Cut and solder in the new wire.
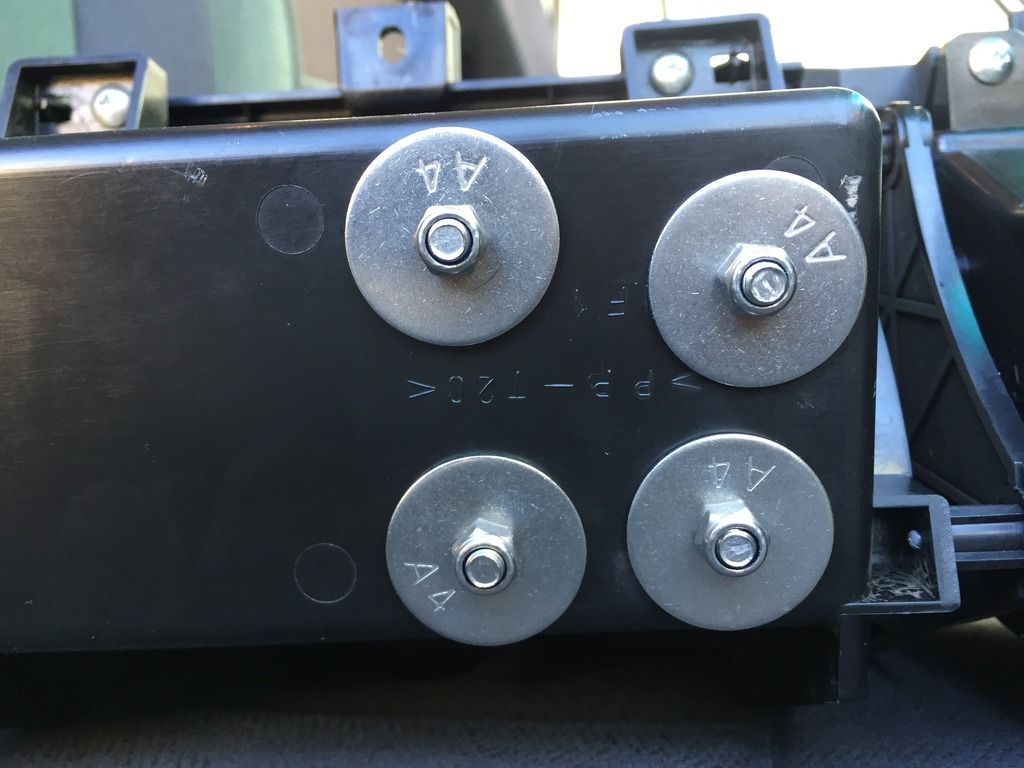
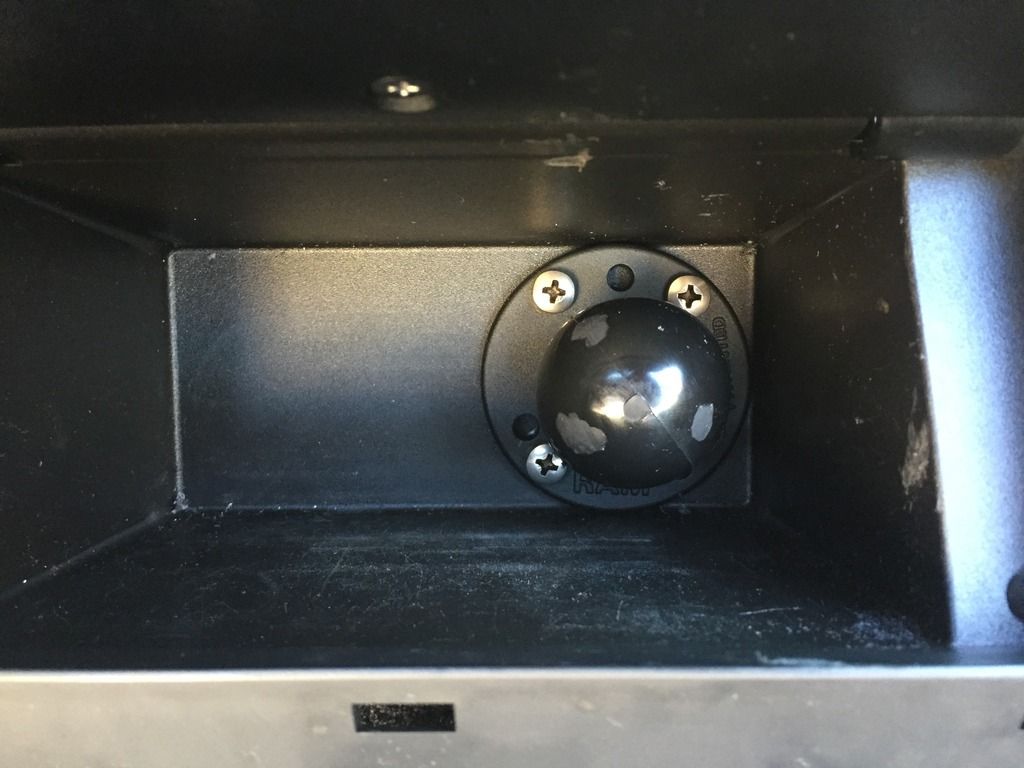
Step 4 - fixing the ball and USB plug
- Next, drill and fix your ball into the cubby hole using the 5mm drill bit.
- Then, do the same for the USB plate
- Using your 25mm bit, drill the centre of the plate to cut a hole through which will go the USB unit. I used the half round file to tidy up the hole and 'nudge' it slightly so the USB unit was centre (hope that makes sense!).
Step 5 - Solder USB Unit
Next, solder your USB unit to your figure 8 wiring.
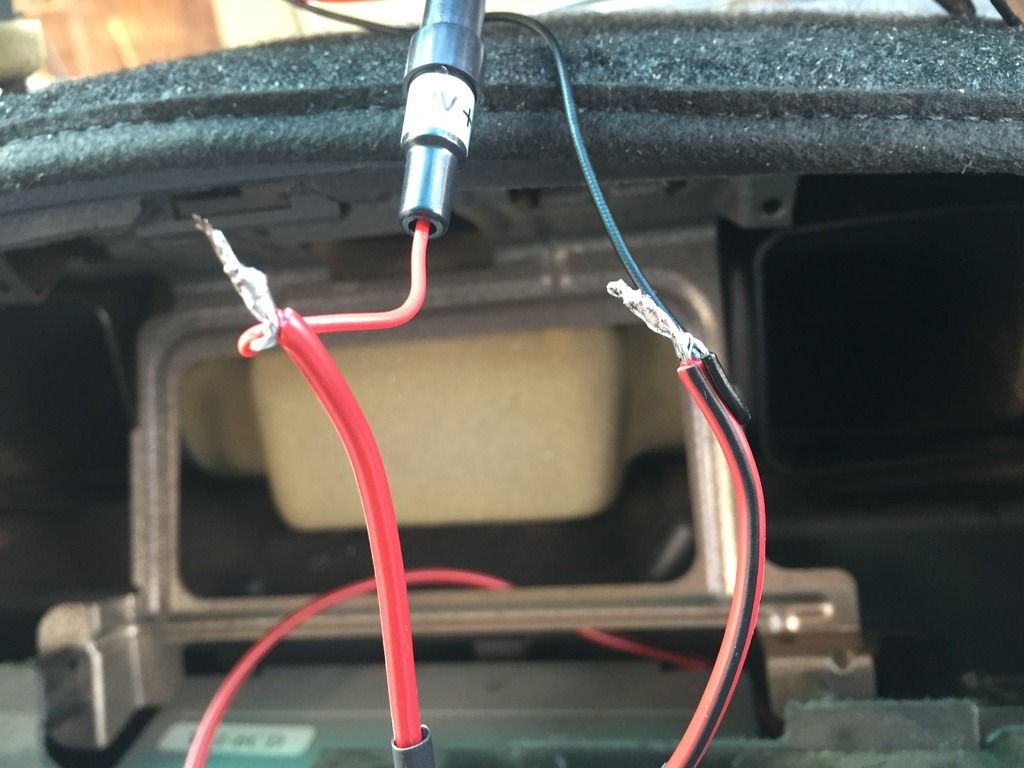
Tape (or make sure you get big enough shrinkwrap, which I wish I did - much neater job!).
Step 6 - Reassemble
- Before reassembling, check to make sure the USB unit works.
- It is as tight as a fishes backside behind the cubby hole, so I tucked the fuse and wiring down behind the little square frame at the rear (see above shot). This ensured enough room.
- To reassemble, just work in reverse...
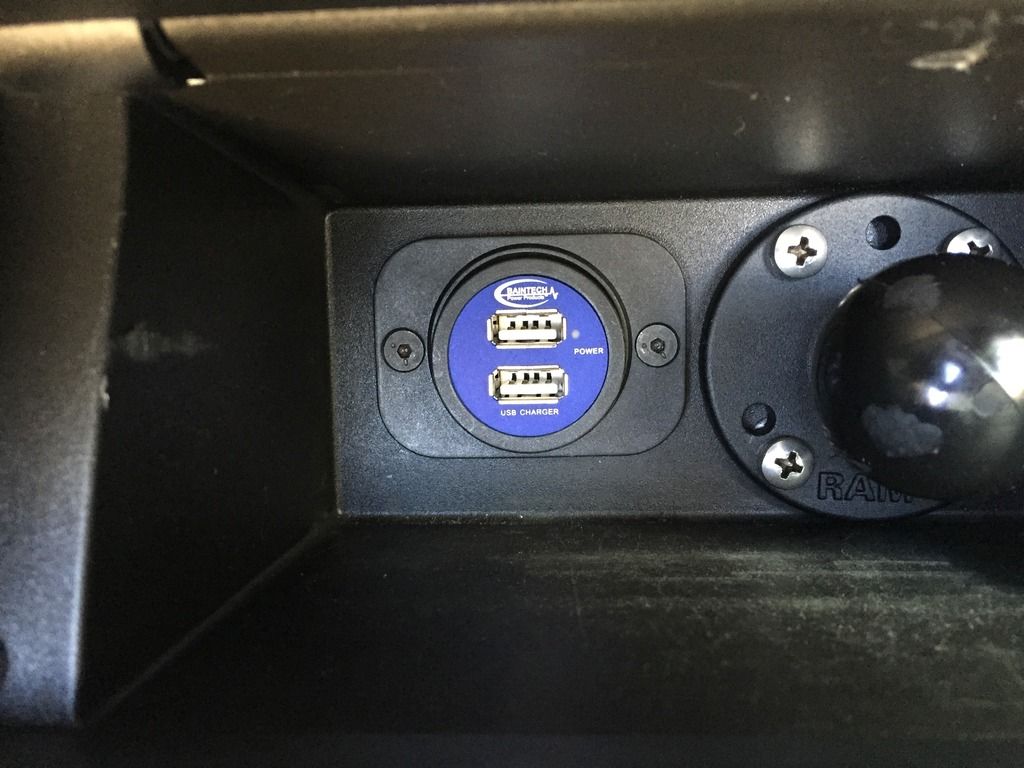
That's it!! Here's the finished product:
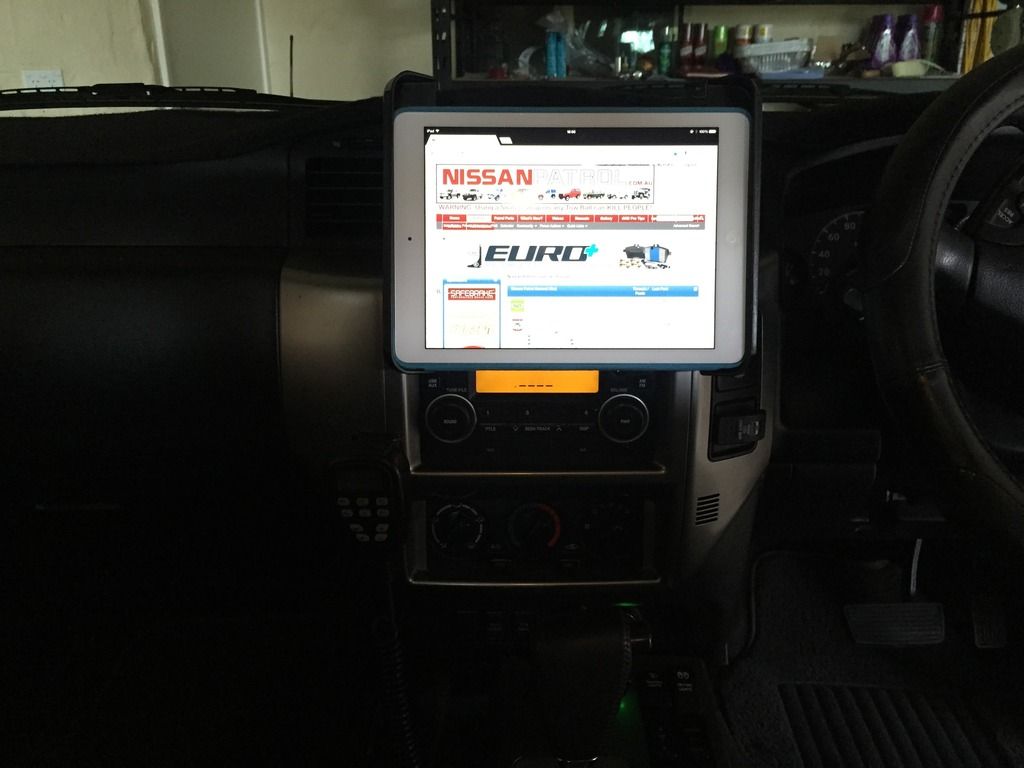
Works like a charm and charges either the iPad alone or two phones. Gotta be happy with that!!
Last edited by LaughingBeagles; 24th May 2015 at 06:55 PM.
Looking for a 4WD Club in WA that caters solely for Patrol, Safari and Maverick owners? Click here to HERE to visit the Western Patrol Club. Click HERE for the Beagle Mobile Mods!
-
The Following 4 Users Say Thank You to LaughingBeagles For This Useful Post:
Bigcol (24th May 2015), Clunk (10th June 2015), MudRunnerTD (22nd July 2015), skiman (24th May 2015)
-
24th May 2015, 01:14 PM
#3
Patrol God


Tell me you removed that blue scotch lok they will fail
and really should be avoided. Other than that looks great
thanks for sharing.
Need to twist your wires in a parallel fashion, it will lay flatter.
Check some U tube
Last edited by threedogs; 24th May 2015 at 01:17 PM.
04 ST 3lt auto, not enough Mods to keep me happy, but getting there
-
The Following User Says Thank You to threedogs For This Useful Post:
LaughingBeagles (24th May 2015)
-
24th May 2015, 01:15 PM
#4
Expert
I did - and agree. I think they're useless. Oh, and it took me a while to work out how to unclip it.... 
Looking for a 4WD Club in WA that caters solely for Patrol, Safari and Maverick owners? Click here to HERE to visit the Western Patrol Club. Click HERE for the Beagle Mobile Mods!
-
-
24th May 2015, 01:20 PM
#5
Patrol God
Great and twist your wire in a parralel manner there are a
few different ways to do it, as other post said U tube may help or Google
04 ST 3lt auto, not enough Mods to keep me happy, but getting there
-
-
24th May 2015, 02:52 PM
#6
-
The Following User Says Thank You to skiman For This Useful Post:
LaughingBeagles (24th May 2015)
-
24th May 2015, 03:35 PM
#7
Expert
Thanks Skiman, apprecite the feedback. To be hones, I really think it's a personal choice as to which one you use. I like the one you posted - what I like about mine is that it fits any tablet (yours looks like it could too).
Looking for a 4WD Club in WA that caters solely for Patrol, Safari and Maverick owners? Click here to HERE to visit the Western Patrol Club. Click HERE for the Beagle Mobile Mods!
-
-
24th May 2015, 03:54 PM
#8
Expert

Am a bit like you mate, office job and not much chance to get my hands dirty :P Am enjoying the challenges the Patrol is throwing at me. I think it's good to know as much as you can about fixing things yourself for those moments when you're out bush and the shit hits the fan!
-
The Following User Says Thank You to skiman For This Useful Post:
LaughingBeagles (24th May 2015)
-
24th May 2015, 04:13 PM
#9
Expert
Absolutely!
Looking for a 4WD Club in WA that caters solely for Patrol, Safari and Maverick owners? Click here to HERE to visit the Western Patrol Club. Click HERE for the Beagle Mobile Mods!
-
-
24th May 2015, 04:13 PM
#10
Patrol Freak

looking good mate,
how did you go with that camera cable? any luck?????
like I said, looks good mate, well done
Tidy Whitey - 99 GU TD42Ti - Diesel Gas, (GUIV Turbo & Intercooler 8Lb boost), 33" Micky T's Baja MTZ's, Dual Batt's, Cargo Barrier, rear draws, HID Super Oscars, winch, Grinch & witch attached and more goodies to come
-
The Following User Says Thank You to Bigcol For This Useful Post:
LaughingBeagles (24th May 2015)


 Reply With Quote