Welcome to the Nissan Patrol forum. To post a question and to see less adds on the forum then you will have to register
first. We are an easy going friendly forum so join in the conversations and feel free to ask any questions.
Become a forum sponsor for only $20 and see no adds with faster page loading times and many extras benefits.
It was pretty sludgy inside, but once cleaned up everything was in good nick.
I wont go into too much detail with the rebuild but found this dudes videos very helpful.
The only main drama I ran into was the brake assembly was seized onto the shaft. It took a lot of soaking with WD40, then I had to clamp the brake assembly in the vice and hit the shaft end, which worked pretty well.
Painted and ready for reassembly with new brake kit and service kit. Even polished the aluminium with the Dremel, which looks the goods.
Re assembly was pretty straight forward apart from getting the inner and outer brake assembly's the wrong way round. After friging round for a bit and chatting to Daz on the phone it suddenly clicked. (The're different!!)
Welded a tag on the drum to make changing rope easy, and also stronger than the old crimp and rivet.
Put it all together with a new 6HP motor and sealed it up with ultra copper. As the motor sits upside down you have to be careful to seal up the drain hole thingy that Warn like to put in.
(Sorry, haven't got any photos of the winch assembled.)
Time for the bar to come off and pull off the TigerZ. I couldn't free spool the Tigerz by hand (always been s#!t even after rebuilding), then the solenoids were just clicking, so had to hit the control box with a hammer to get it going. Good riddance TigerZ!!!!
Then I forgot that I never got round to putting on the new door hinges I bought after the Simpson trip, so while the grill is coming off (new chrome grill to go on) off come the guards.
New hinges and a good chance to give the door jams a good clean. There were also a few bolts broken off for the guards, so a perfect chance to get all these sorted too.
To get away without cutting the grill for the highmount to sit the middle tube of the bar needs to be cut to the level of the front plate. Mounting the winch further back was not an option for me because of the front mount intercooler. (Not enough space)
Someone had previously hacked the bar, so welded in some plate and also put in a couple of corners as the offset fairlead I had didn't cover the top corners.
Its a Nissan! =====> Its a Keeper!! ....... Got a TD42 in it BONUS!! ....... I'm a lucky bugger! I've got 2 of em!
Check out my Toy --> MudRunnerTD's GQ From the Ground Up
Originally Posted by Rogue Dung Beetle
Wish it was Nissan though, Toyotas just can't keep up with the Pootrol pace.
The only good thing about an 80 series is..... the front end?? Wrong!!, the Engine?? Wrong!! the Full Time 4WD system?? Wrong!! Its the NissanPatrol.com.au stubby holder fitted over the transfer lever. WARNING: Towballs used for recoveries can, and do kill people and damage property.
Did a bit more frigging around with it this afternoon and got it sorted pretty well. Initially it was very close to intercooler and pushing on the grill into intercooler. I put a couple of big washers each side on the front mounting plate of the bar (the mounts that locate it vertically) and got it pretty good. It's pretty tight but, there's a few ml between the grill now. I'll get some more photos tomorrow, battery was dying and couldn't use flash.
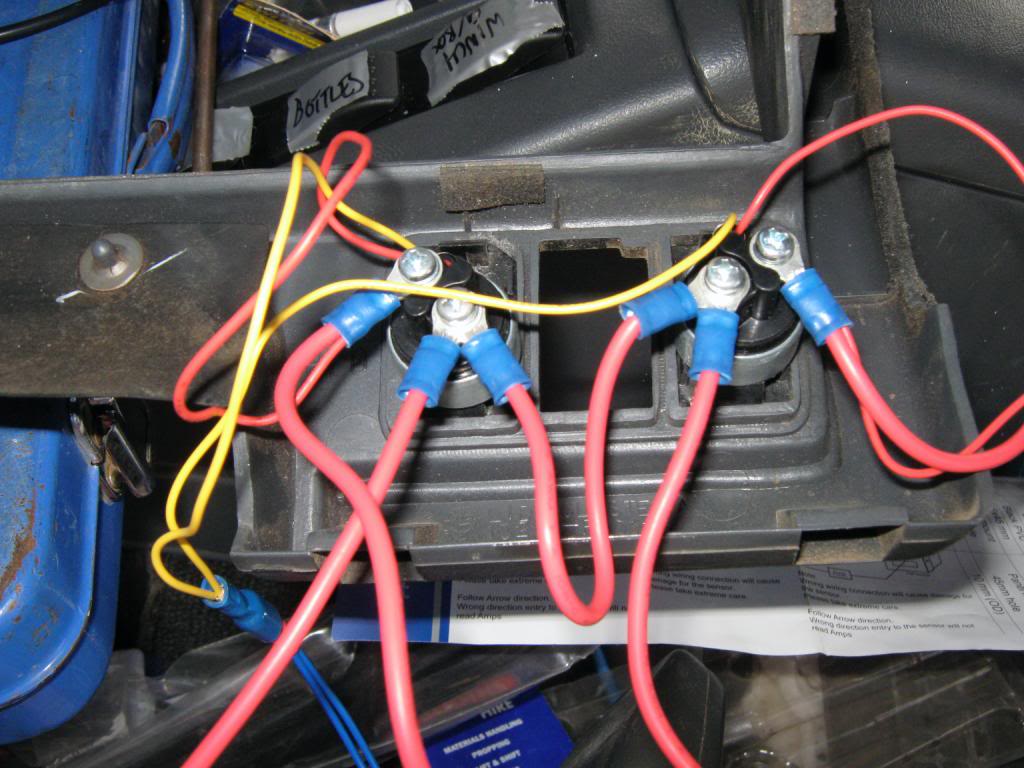
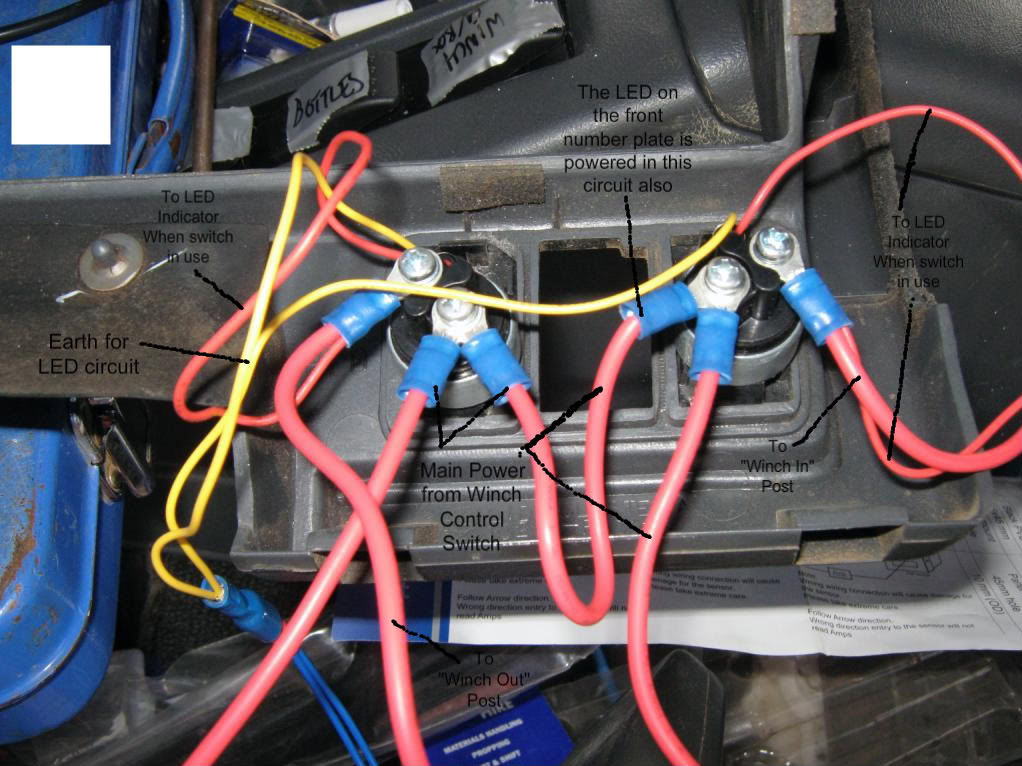
Also the winch is yet to be wired. Planning running an in cab switch and also waterproof switches on the bar with a solid state solenoid under the bonnet. Got a solenoid of Ebay last week but hasn't arrived yet. . . Should be soon hopefully.
Ha ha, you beat me to it!!! Did a bit more frigging around with it this afternoon and got it sorted pretty well. Initially it was very close to intercooler and pushing on the grill into intercooler. I put a couple of big washers each side on the front mounting plate of the bar (the mounts that locate it vertically) and got it pretty good. It's pretty tight but, there's a few ml between the grill now. I'll get some more photos tomorrow, battery was dying and couldn't use flash. Also the winch is yet to be wired. Planning running an in cab switch and also waterproof switches on the bar with a solid state solenoid under the bonnet. Got a solenoid of Ebay last week but hasn't arrived yet. . . Should be soon hopefully.
Haha, sorry mate, I didn't think you were going to do a full write up....lol
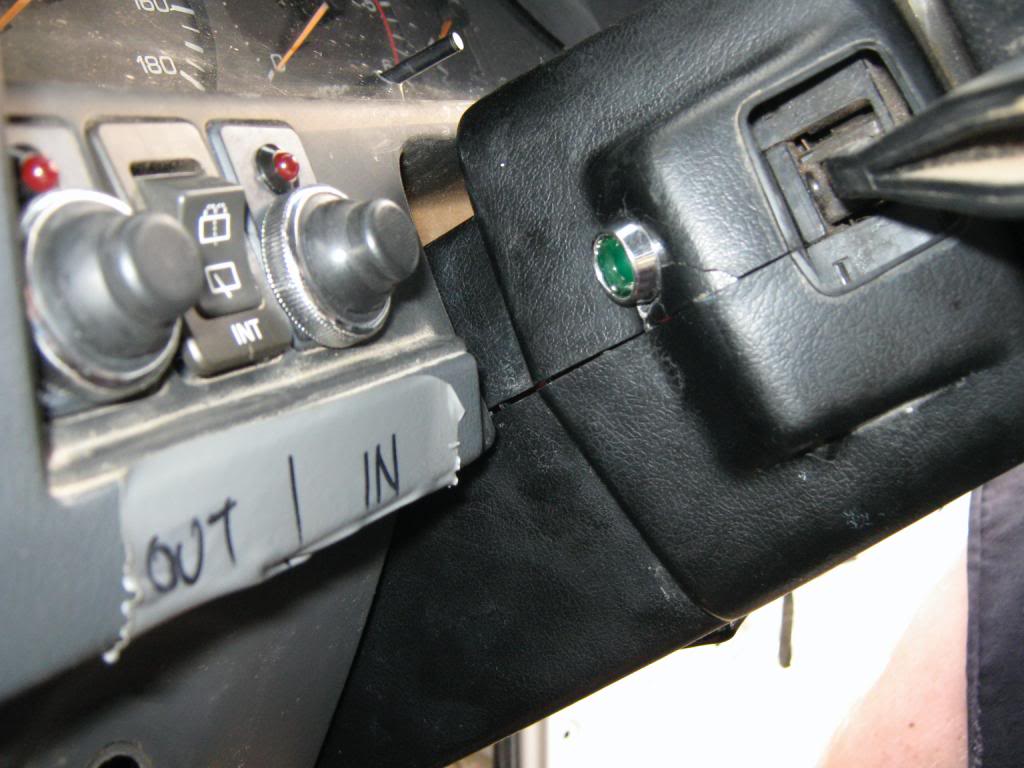
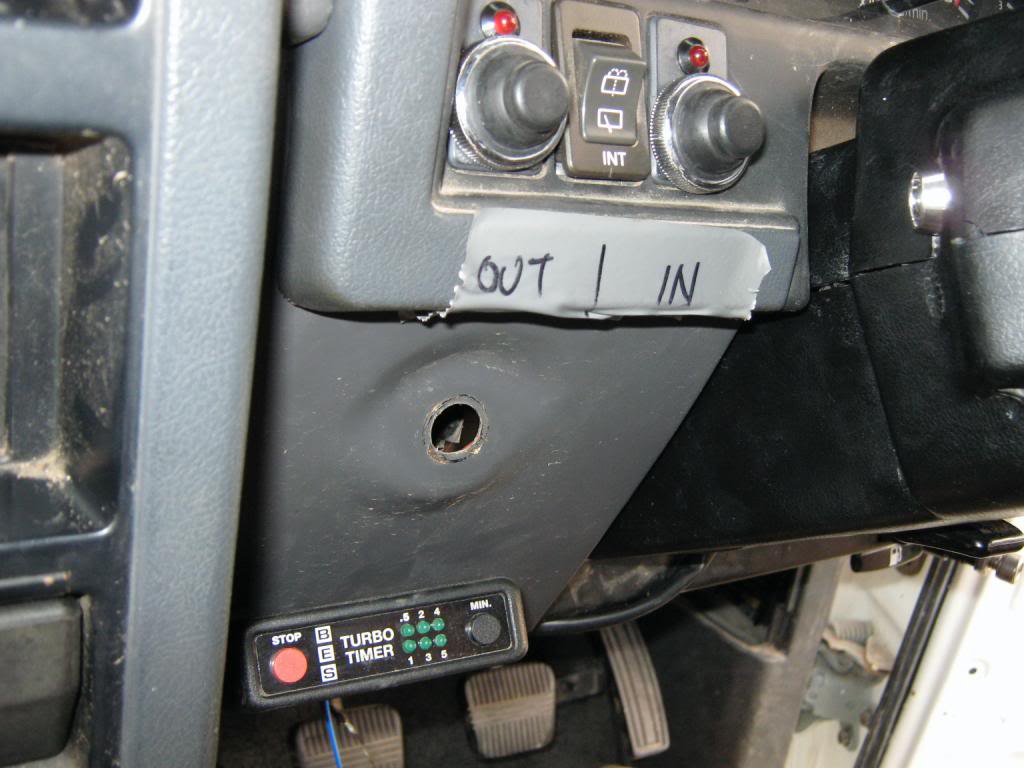
Hey mate a quote from my build re the in cab switches mate. Let me know if you can't read the black writing.
Originally Posted by MudRunnerTD
In this build i also finished the incab winch control switches too.
I had a setup before but used Narva style rocker swtiches and they are not dust proof and used to jamb on. Not good
I replaced them with these and they are dust proof from super cheap.
The LED lights up when the button is pressed to tell me that there is power there.
The silver button on the steering column is actually a green LED that lights up when i switch on the Winch Isolation switch to light up the switches at night. I also have a white LED marker light over the winch drum linked to this switch for night driving. BONUS!!..
Its a Nissan! =====> Its a Keeper!! ....... Got a TD42 in it BONUS!! ....... I'm a lucky bugger! I've got 2 of em!
Check out my Toy --> MudRunnerTD's GQ From the Ground Up
Originally Posted by Rogue Dung Beetle
Wish it was Nissan though, Toyotas just can't keep up with the Pootrol pace.
The only good thing about an 80 series is..... the front end?? Wrong!!, the Engine?? Wrong!! the Full Time 4WD system?? Wrong!! Its the NissanPatrol.com.au stubby holder fitted over the transfer lever. WARNING: Towballs used for recoveries can, and do kill people and damage property.
Cheers Daz, have been using your thread for a bit of inspiration, it's been good. Also found some pics of Gary's set up with his spotties mounted on the bar. Have been thinking about mounting of spotties with a highmount, would rather not put them ontop if I can avoid it (stands out a bit and illegal) Looks as if Garys fit in quite well further forward and apart, I know his is a highmount bar tho. Might have a peek on the weekend for some inspiration. . .
Have you got switches up front on yours? (on bar)
Hopefully get a chance to tinker this week, but looking like it's a bit of a busy one. . .
Cheers mate, no I don't have up front switches ut am going to not all some this time when I rewire for 24v in the coming weeks.
I will install them in the side of the head light surround. They work great there.
Its a Nissan! =====> Its a Keeper!! ....... Got a TD42 in it BONUS!! ....... I'm a lucky bugger! I've got 2 of em!
Check out my Toy --> MudRunnerTD's GQ From the Ground Up
Originally Posted by Rogue Dung Beetle
Wish it was Nissan though, Toyotas just can't keep up with the Pootrol pace.
The only good thing about an 80 series is..... the front end?? Wrong!!, the Engine?? Wrong!! the Full Time 4WD system?? Wrong!! Its the NissanPatrol.com.au stubby holder fitted over the transfer lever. WARNING: Towballs used for recoveries can, and do kill people and damage property.
I used a double throw toggle switch for my in and out which is spring loaded with the middle as off, and a simple single throw for the isolation switch. Up for out and down for in. You can get the little rubber covers that simple screw over them, makes them look neater (imo) and also provides dust resistance etc.


 Reply With Quote


 ....... I'm a lucky bugger! I've got 2 of em!