-
23rd December 2010, 06:57 PM
#1
How do i change a gu cv
Hi guys, new to this forum and 4wding. My cv's are making a clicking sound whilist turning and driving.I assume there stuffed and have already bought new ones to put in. I have limited mechanical knowledge, but am willing to have a go, worse case i stuff it up, ill get a mechanic to fix it. Im after a detailed list of tools and steps on how to replace them, if any one can help that would be great!!! Oh and its on my family wagon, 4.2 diesel, 36 pedes, lockers etc
-
-
23rd December 2010 06:57 PM
# ADS
Circuit advertisement

-
23rd December 2010, 07:11 PM
#2
Welcome to the forum Jams.
Just out of curiosity where abouts are you?
If you can wait a few days I should be able to do a full write up of the job with photos and a full list of tools. If you're planning on doing it sooner than that I'll try doing a write up from memory but there won't be any photos.
Tony
Last edited by YNOT; 23rd December 2010 at 07:26 PM.
-
-
24th December 2010, 06:34 PM
#3
Hey YNOT, that would be orsome if you could a full write up with pics! Im in western suburbs of Vic. I'll keep a keen eye out! Thanks again!!
-
-
27th December 2010, 04:56 PM
#4
Moderator


Hey Jams, did you buy just the CVs or second handies connected to change over axles?
No disrespect intended but changing CVs can get quite involved to be honest and not really where you should "Start" you mechanical education alone in your shed.
Unfortunately, if you do stuff it up you will have a vehicle that is not really drivable and you may need to get a mechanic in, someone like LubeMobile would get you out of trouble if needed though.
Take a look at what Tony puts together for you for sure mate, but be aware this is not a job that should be undertaken lightly.
Good luck.
Its a Nissan! =====> Its a Keeper!! ....... Got a TD42 in it BONUS!!

....... I'm a lucky bugger! I've got 2 of em!
Check out my Toy -->
MudRunnerTD's GQ From the Ground Up

Originally Posted by
Rogue Dung Beetle

Wish it was Nissan though, Toyotas just can't keep up with the Pootrol pace.
The only good thing about an 80 series is..... the front end?? Wrong!!, the Engine?? Wrong!! the Full Time 4WD system?? Wrong!! Its the NissanPatrol.com.au stubby holder fitted over the transfer lever.
 WARNING: Towballs used for recoveries can, and do kill people and damage property.
-
-
27th December 2010, 11:13 PM
#5
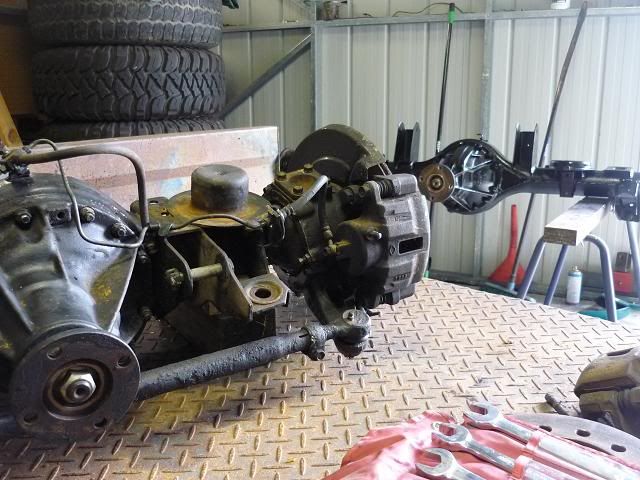
The front diff I was working on for this article was out of a GQ Patrol and was fitted with Nissan manual hubs. The job is the same on GU Patrol with only minor differences in the hub nut area.
Step 1; Jack up front of vehicle and support on jack stands. Remove front wheels.
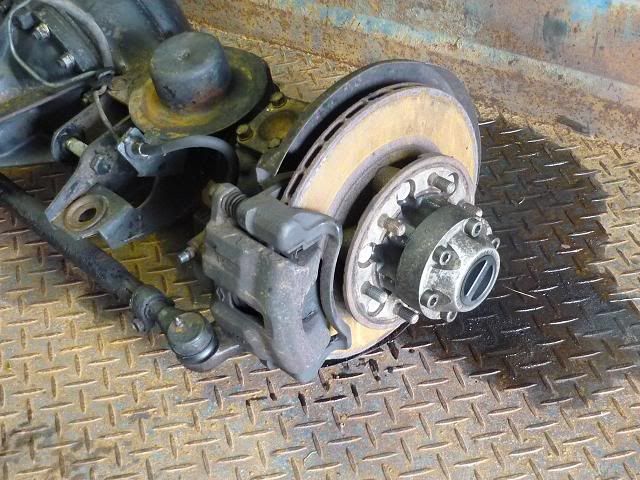
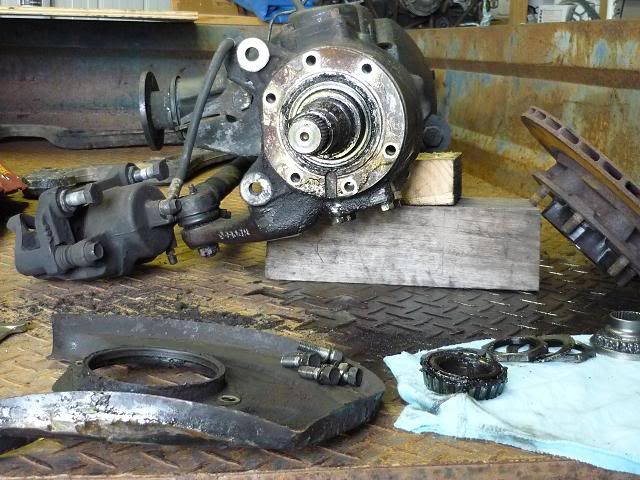
Step 2; Remove front brake calliper and mounting frame. Secure the calliper out of the way, I usually zip tie them loosely to the coil spring. DO NOT allow the calliper to hang down on the brake hose. Tools – 7/8 or 22mm socket and short extension bar.
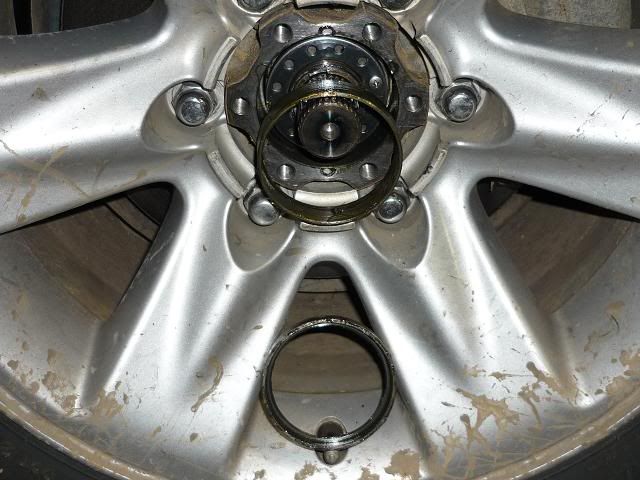
Step 3; Remove free wheeling hub. Tools – 8mm allan key.
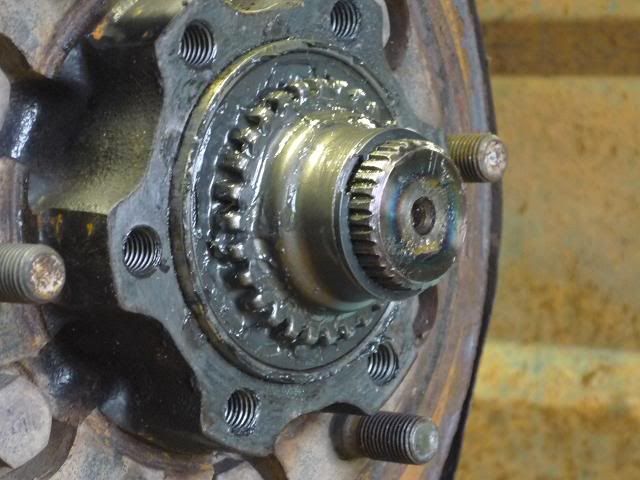
The pic above is what you will see behind a Nissan manual hub, with a circlip on the outside of the hub drive gear. For vehicles with auto hubs you will not have the drive gear and will look more like the pic below, with the circlip further in on the splines. For auto hub vehicles, do not loose the spacer/washer behind the circlip.
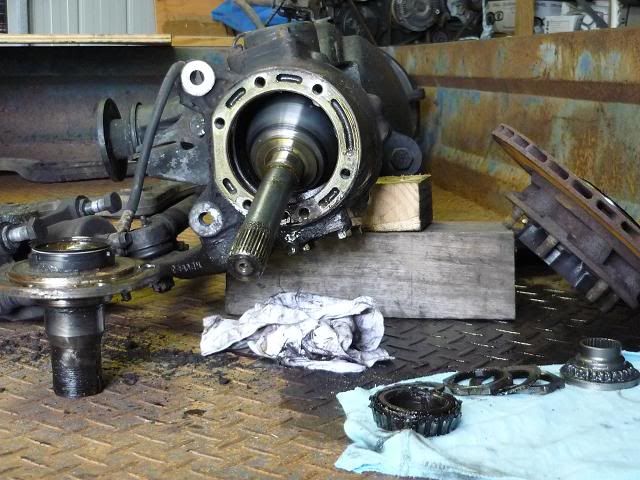
Step 4; Remove the circlip and (for manual hub vehicles) hub drive gear. Tools – circlip pliers.

Step 5; Using a flat blade screw driver prise out the 2 spacers from the hub. The GQ diff I was working on was missing the outside (stepped) spacer, but the inner parallel spacer can just be seen in the pic above. The pic below is a GU front end with both the spacers removed. The (stepped) spacer is sitting on the valve stem. When reassembling, the step on the spacer goes to the inside.
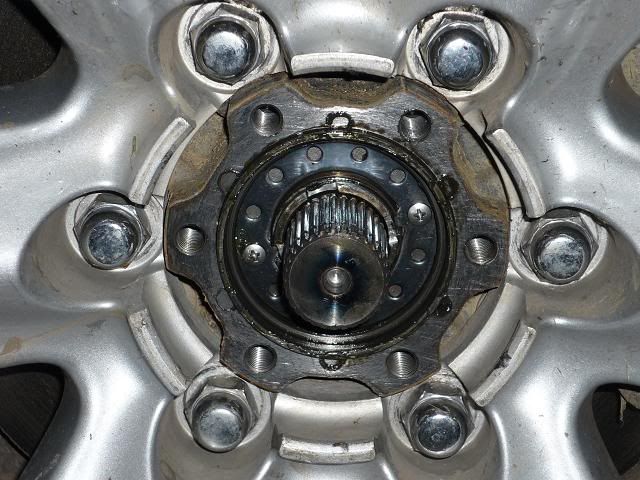
Step 6; Remove the hub nuts. This is where there are minor differences between GQ and GU.
First pic below is GQ. There is a locking tab between the 2 hub nuts, one section of the tab will be folded up against one of the flats on the outer hub nut. Using a hammer and chisel, straighten out the flattened piece of tab and undo the lock nut. The correct tool is a 53mm hub socket (which has a narrower wall than a regular socket), but as not many people have these hub sockets, a hammer and chisel is often used.
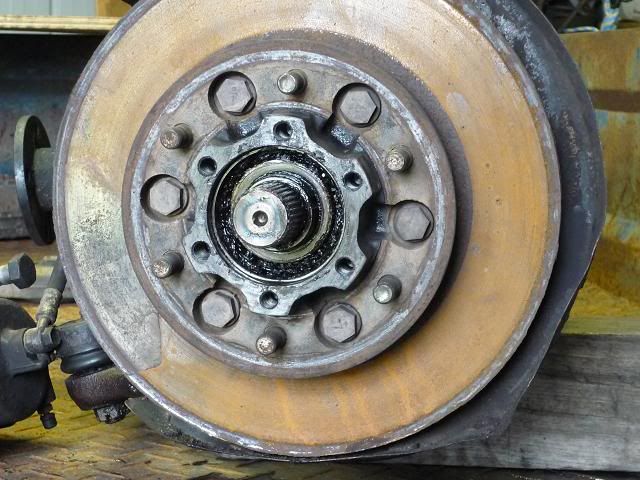
Remove the locking tab and the inner hub nut.
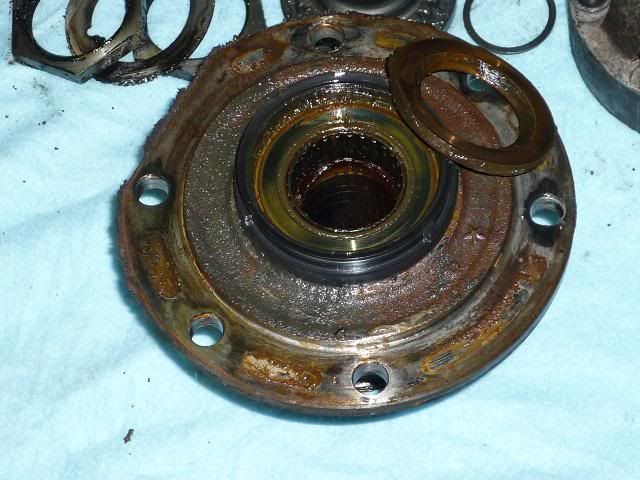
Second pic below is GU (GQ 4.2 EFI is the same). Undo the 2 small Phillips head screws and remove the lock washer. Remove the hub nut.
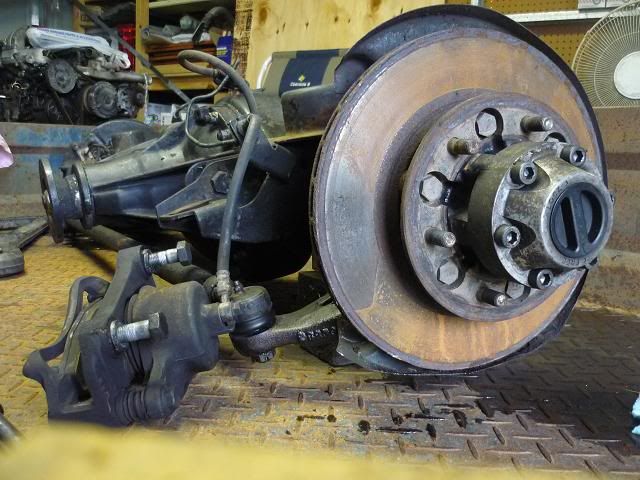
Step 7; Remove the brake hub.
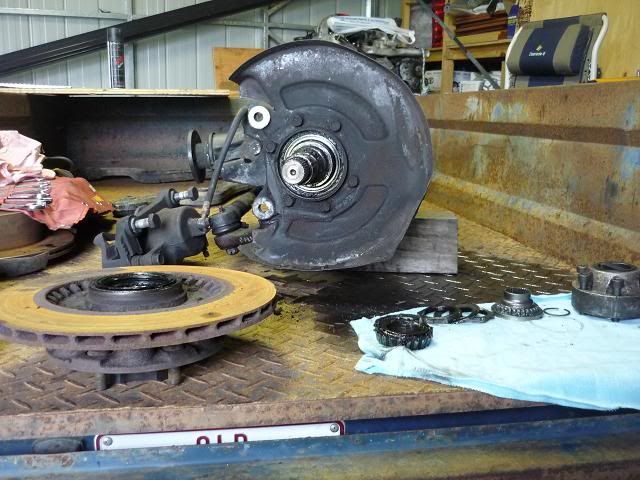
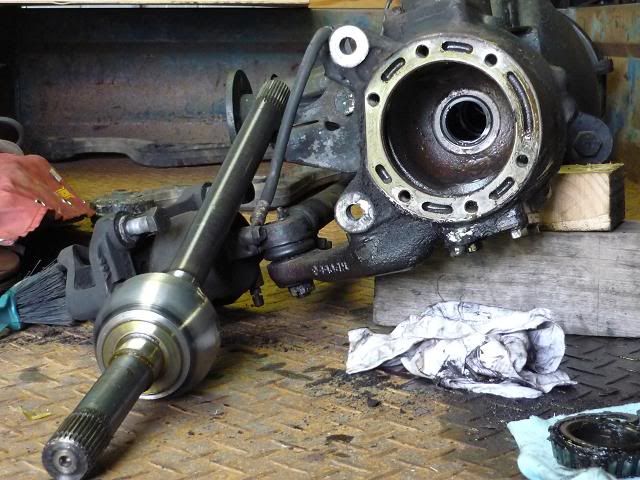
Step 8; Remove the 6 backing plate/ spindle bolts. Remove the backing plate. Tools – 14mm socket or spanner.
Step 9; Remove the spindle.
Be careful when removing the spindle as there is a brass spacer on the inside that is easily lost.
Step 10; CV joint can now be removed.
Assembly is the reverse of above, I will add details for adjusting wheel bearings in a few days.
Tony
Last edited by YNOT; 13th August 2011 at 08:36 PM.
-
The Following 43 Users Say Thank You to YNOT For This Useful Post:
Ade (12th July 2011), Ajwood (28th July 2013), Alben (3rd April 2012), arbee (8th November 2014), Avo (28th July 2013), Ben-e-boy (3rd April 2011), Ben89 (9th October 2012), Bloggsy (3rd April 2011), Bob (8th March 2011), Col.T (28th December 2010), CorbinsGUte (21st May 2014), creadandgread (17th May 2012), Cuppa (8th July 2013), FNQGU (8th March 2014), FrankW (5th October 2012), growler2058 (3rd April 2011), GUtsy ute (19th April 2011), in4m3 (12th June 2017), Irvs (28th April 2013), janderson (7th May 2012), jjjag (25th November 2018), macca (24th September 2012), megatexture (24th September 2012), mudnut (31st October 2012), MudRunnerTD (28th December 2010), nedoleboy (25th February 2011), NewDan (22nd June 2014), NissanGQ4.2 (28th December 2010), nowoolies (3rd April 2011), Parra (27th March 2012), patch697 (27th December 2010), patrol2.8 (6th April 2012), Paul Wiltshire (11th March 2011), rkinsey (31st July 2013), robbo0001 (4th April 2012), Rosscoe (7th April 2011), Ruby (3rd April 2011), schon55 (27th April 2011), Sir Roofy (24th September 2012), the ferret (28th December 2010), twisty (3rd April 2012), Wetty (6th June 2014), Woodsta1704 (28th July 2013)
-
28th December 2010, 11:53 AM
#6
Great walk through, thanks Tony
-
-
28th December 2010, 12:20 PM
#7
Rotaredom

Tony, is the GU pic of an Auto or Manual Hub??? Are the GU hubs the same as GQ Auto hubs?
You said "Second pic below is GU. Undo the 2 small Phillips head screws and remove the lock washer. Remove the hub nut."
Thats how my GQ Auto hubs are
Cheers
Todd
 Time is never wasted when your wasted all the time
WARNING: Towballs used for recoveries can, and do kill people and damage property.
-
-
28th December 2010, 12:31 PM
#8
Thanks Todd.
The GU pic is manual hub with the drive gear removed. I don't know exactly what the difference is between GQ and GU auto hubs (they look the same), but GU auto hubs will not fit a GQ unless you remove the auto locking mechanism.
Thanks for the feedback about your lock washer on your car. It would seem GQ EFI with twin piston front brakes has the same set up as GU.
As I rebuild these front hubs I will post up a few more articles which will partially cross over with this one, to cover replacing/repacking wheel bearings, replacing brakes, replacing axle oil seals. I need to get parts first.
Tony
Last edited by YNOT; 28th December 2010 at 12:37 PM.
-
-
28th December 2010, 12:51 PM
#9
Hardcore

-
-
28th December 2010, 12:57 PM
#10
Tony I seen this last night & droped you a thanks cos you were posting up more to add to it but seen as others have posted so will I.
Bloody TOP JOB mate I take my hat off to ya.
-


 Reply With Quote
